Updated 2014-03-14
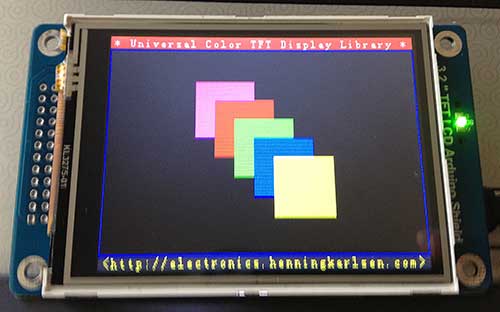
I’ve been looking for a way to add a touchscreen UI to my projects. To this end, I purchased a UCTronics 3.2″ TFT LCD Arduino Shield. Most of the cheap TFT touchscreens that I found need about 38 pins, and therefore, need to interface with an Arduino Mega. What makes this UCTronics shield unique is that it uses an onboard latch to convert the onboard SSD1289 TFT driver data bus from 16-bits to 8-bits. This allows it to connect to an Arduino Duemilanove or UNO. The board I received is a RevB board, and it looks somewhat different from the board pictured in the UCTronics product description. The resistive touch panel on top of the TFT very similar to the touch panel used in the Nintendo DS. Below is the board running UTFT’s demo (UTFT_Demo_320x240):
When I purchased this display, I had to use a specially modified version of UTFT downloaded from UCTronics: 3inch2_RevB.zip. This is because at the time, UTFT only supported the SSD1289 in 16-bit mode. However, as of 2014/14/03, the shield now works with the official UTFT distribution. The key is to supply the correct parameters to the UTFT constructor:
[code lang=”c”]
UTFT myGLCD(SSD1289_8,A1,A2,A0,A3);
[/code]
SSD1289_8 specifies that we’re using an SSD1289 controller in 8-bit mode. The rest of the parameters are the pin assignments.
When compiling for an Arduino Duemilanove or UNO, the IDE will complain that the sketch is too big, unless you comment out all of the #define DISABLE_xxx except for #define DISABLE_SSD1289 in UTFT’s memorysaver.h.
While UCTronics’ version of UTFT comes preconfigured, it is based on an older version of UTFT, which is slower. On my Duemilanove, the UTFT_Demo_320x240 sketch takes 57.7 sec to execute with UCTronics’ UTFT, and 48.6 sec with the official UTFT library. This is mainly because the latest UTFT has a new function called _fast_fill_8(), which speeds up certain fills. However, the sketches built with the newer UTFT library are bigger. With UCTronics’ UTFT, UTFT_Demo_320x240 compiles to 27248 bytes, and 30092 bytes with official UTFT.
Here is a bottom view of the shield:
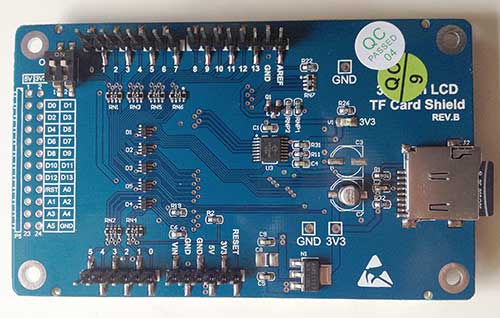
At right is the integrated micro SD card reader, which is handy for storing bitmap data to load into the screen.
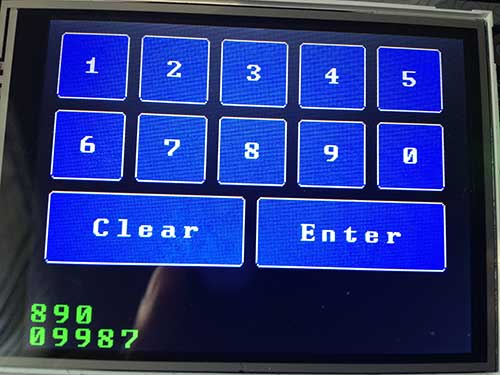
UCTronics supplies ArduCAM_Touch to support the touchscreen. However, I decided to just use UTouch, instead. Below is the UTouch_ButtonTest example sketch:
To use UTouch, you must configure the following lines in the sketch:
[code lang=”c”]
UTFT myGLCD(SSD1289_8,A1,A2,A0,A3);
UTouch myTouch(13,10,11,12,9);
[/code]
I was able to operate the buttons by pressing firmly with my fingers. Note that the touchscreen is resistive, not capacitive, so it works by pressure. A stylus gives you considerably more control. The touchscreen is very similar to the one found in a Nintendo DS.
At first, I was disappointed by the bitmap display. This is the output of the UTFT_Read_BMP demo sketch supplied by UCTronics:
There is severe quantization of the colors. This is the way due to the way that UCTronics implemented the UTFT::dispBitmap() function in their modified UTFT library. I wrote my own function, dispRaw(), to instead display .raw files generated by UTFT’s ImageConverter 565:
[code language=”c”]
// display a raw bitmap that was processed with ImageConverter565
#include <UTFT.h>
#include <SD.h>
#include <Wire.h>
#define SD_CS 8
//UTFT(byte model, int RS, int WR,int CS,int RD)
UTFT myGLCD(SSD1289_8,A1,A2,A0,A3);
void dispRaw(UTFT *utft,File inFile)
{
char VH,VL;
int i,j = 0;
cbi(utft->P_CS, utft->B_CS);
for(i = 0; i < 320; i++)
for(j = 0; j < 240; j++) {
VL = inFile.read();
VH = inFile.read();
utft->LCD_Write_DATA(VL,VH);
}
sbi(utft->P_CS, utft->B_CS);
utft->clrXY();
}
void setup()
{
myGLCD.InitLCD();
if (SD.begin(SD_CS))
{
char VH,VL;
File inFile;
inFile = SD.open("ade.raw",FILE_READ);
if (! inFile)
{
while (1); //if file does not exsit, stop here.
}
dispRaw(&myGLCD,inFile);
inFile.close();
}
}
void loop(){}
[/code]
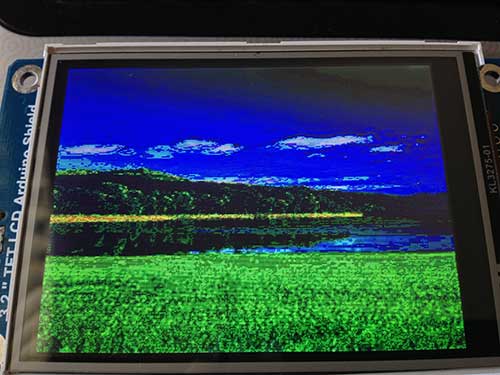
The output looks a lot better:
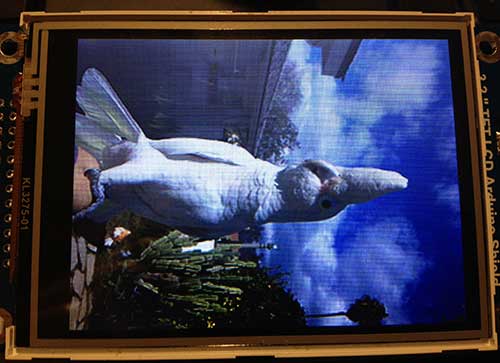
The display is actually much higher quality than the photo above. The photo contains screening and moire patterns that you don’t see with the naked eye. To create a RAW file, first create a 240×320 pixel jpg,png, or GIF file. Run it through either imageconverter565.exe or the online ImageConverter 565 make sure to select Convert to .raw file and Target Platform Arduino (AVR). Copy it to a FAT-formatted uSD card, and insert it into the uSD slot.
It takes about 6 seconds to load a fullscreen RAW file. I’m think the bottleneck is the reading of the data from the SD card. Clearing the screen takes almost 1 second. The speed is acceptable when running UTFT_Demo_240x320. This is board is no speed demon, but the speed seems adequate for implementing a graphic touchscreen control panel. If you need a fast display, look elsewhere.
Resources: