Typically, OpenEVSE firmwares are flashed into the board using a hardware programmer, such as a USBasp. In the past, this was required, because the firmware had grown so large that there was no space left in the ATMega328P‘s flash to fit in a bootloader. However, the latest versions of the AVR tools that come with Arduino have shrunken down the binaries to the point that we now have space for a bootloader. Once the bootloader is installed, OpenEVSE can be programmed in exactly the same fashion as an Arduino Pro Mini, via a USB->TTL UART adapter, such as a FTDI cable, using the stk500 (arduino) protocol.
Before we can program the chip with a bootloader, we need to make a minor hardware mod. After a reset, the bootloader waits to see if a new firmware wants to be flashed before proceeding with booting the installed firmware. It is only during this very small time window that the ATMega328P‘s MCU is ready to accept a firmware. In order to trigger a reset via software, we need to connect the DTR pin of the FTDI cable to the RESET pin of the MCU via a .1uF capacitor.
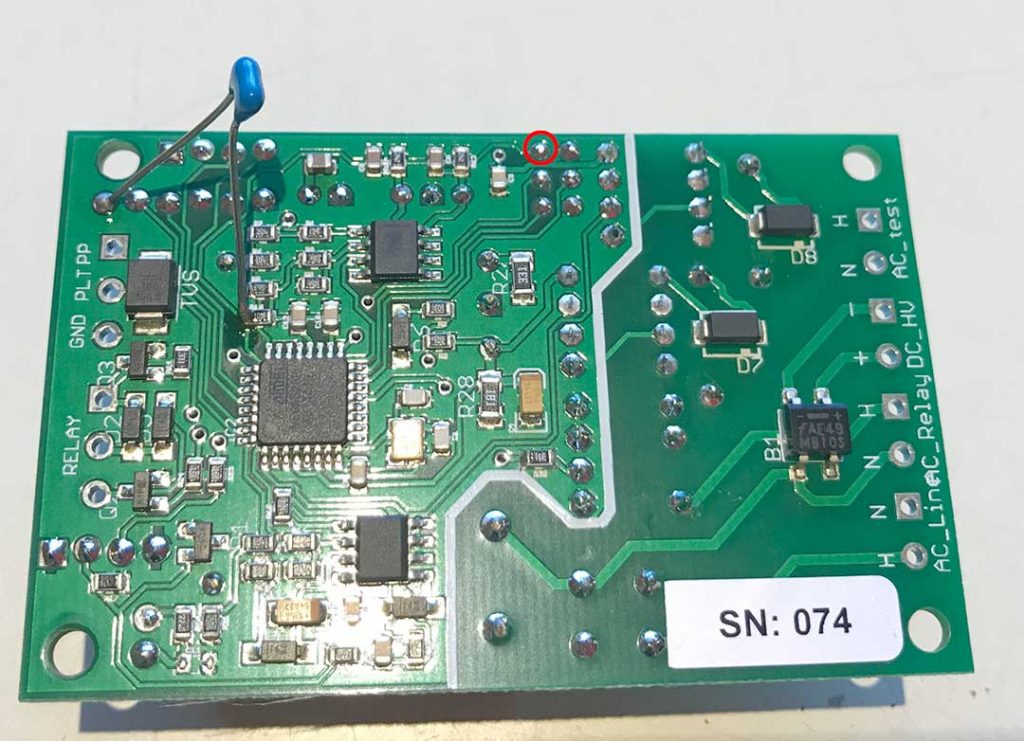
Below is a photo of the mod, done on a Wattzilla C3 board, which is an OpenEVSE variant:
The DTR pin is on the far left of the 6-pin serial connector. The RESET pin can be accessed at either the left side of R10, as pictured above, or at Pin 5 of the ISP connector (red circle).
Once the hardware mod is in place, we must set the fuses to use a bootloader, and flash in the bootloader, using a hardware programmer. In this example, we will use OptiBoot, because it’s smaller and faster (115200 baud) than the standard Arduino bootloader.
avrdude -c USBasp -B0.5 -p m328p -Uflash:w:optiboot_atmega328.hex -Ulfuse:w:0xFF:m -Uhfuse:w:0xDE:m -Uefuse:w:0x05:m -Ulock:w:0x3F:m
After the bootloader is flashed in, we can thereafter flash in firmwares using just the FTDI cable:
avrdude -carduino -PCOM5 -b115200 -p m328p -Uflash:w:open_evse.hex
Substitute your FTDI cable’s virtual serial port for COM5 above.
For those who are not comfortable with command lines, it’s also possible to use the Arduino IDE to burn the bootloader, and flash in firmwares.
- Set your board to Arduino UNO by using the menu to navigate to Tools->Board->Arduino UNO
- Select your hardware programmer via Tools->Programmer
- Install the bootloader via Tools->Burn Bootloader
- Disconnect the hardware programmer, and use Tools->Port to select your FTDI cable’s virtual serial port.
Thereafter, you may flash in your sketches with the upload button. The above procedure will also work with any DIY or other Arduino clone which is not wired for a bootloader. Note that the bootloader takes up 512 bytes, so your maximum sketch size drops from 32768 to 32256 bytes.

Hi
I get this message after seting the fuses:
avrdude: safemode: hfuse changed! Was de, and is now d9
Would you like this fuse to be changed back? [y/n] y
Regards,
Yoav
This is on an ATmega328P? Check your wiring and try another programmer. It works with both my USBasp and my USBtiny.