If you have a hardware AVR programmer, such as the USBtinyISP, you can configure your Arduino IDE to use it for uploading sketches, rather than the standard USB interface. Why would you want to do this?
- it uploads faster
- your project will boot faster
- you can load bigger sketches, because you don’t need the bootloader anymore.
- it’s a lot more convenient when debugging communications between a host computer and the Arduino’s serial port, because you don’t have to share the port with the Arduino IDE and take turns accessing it.
- you want to build a project which uses the Rx/Tx pins on the MCU, which conflicts with programming via serial.
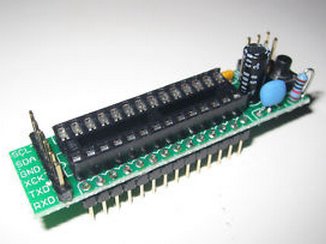
- you can use it to program stripped down AVR boards, such as the $2.99 board pictured below:
Windows users only: First, you must install the device driver. Follow the instructions here: http://www.ladyada.net/make/usbtinyisp/drivers.html
First, open your Arduino/hardware/arduino/boards.txt file in a text editor, and add the following lines:
##############################################################
usbtiny328.name=[usbtinyisp]ATmega328
usbtiny328.upload.using=usbtinyisp
usbtiny328.upload.maximum_size=32768usbtiny328.build.mcu=atmega328p
usbtiny328.build.f_cpu=16000000L
usbtiny328.build.core=arduino
usbtiny328.build.variant=standard
Note: The …variant=standard line is only needed for Arduino 1.0+. Older versions of Arduino will just ignore it.
If you’re using a programmer other than a USBtinyISP, substitute its identifier where I’ve typed usbtinyisp above. You can see the options in your hardware/arduino/programmers.txt file. In arduino-0022, the options are avrisp, avrispmkii, usbtinyisp, and parallel (beware, it’s case sensitive, so for instance, you must type usbtinyisp, not USBtinyISP). To support a different MCU, substitute it in the usbtiny328.build.mcu= line, e.g. atmega168. If you want to support more than one programmer/MCU combination, just add multiple sections with the different configurations to your boards.txt file.
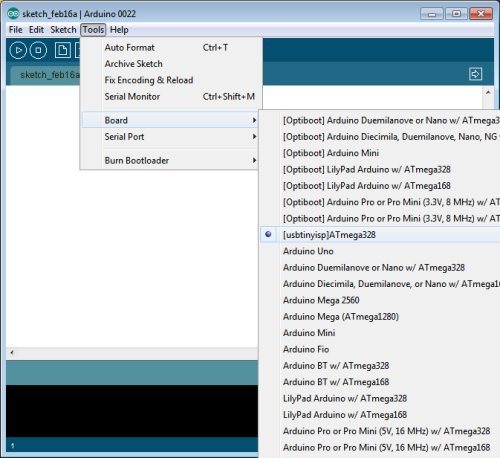
Next, hook up your programmer to the ICSP header on your board, and plug it into your computer. Select your new board configuration from the arduino Tools->Board menu:

Now, you can burn your sketch as usual, via the Upload button. Note that your bootloader will be overwritten, so you won’t be able to burn sketches to the same board without your programmer, unless you follow my instructions for restoring the bootloader below. On the other hand, after configuring your arduino software as described above, you can still burn sketches to arduinos which have the bootloader installed without your programmer. Simply pick the correct board from the Tools->Board menu.
———————————————————
Restoring the Bootloader
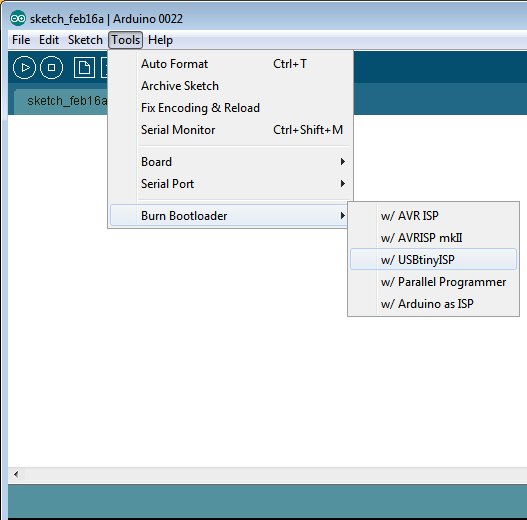
Once you’ve burned a sketch to an arduino via ICSP, the bootloader will be overwritten. If you want to revert to burning your sketch without a programmer, you must first restore the bootloader. With your programmer connected via ICSP, select Tools->Burn Bootloader:

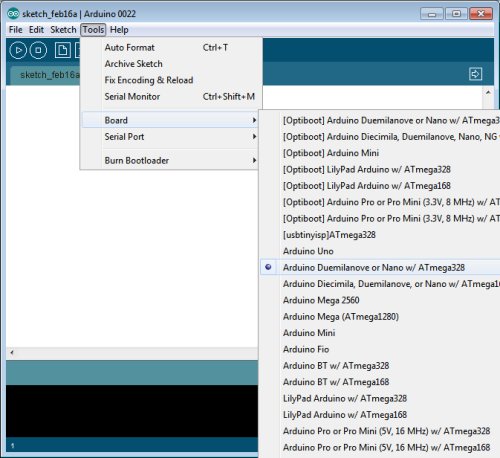
Now, you can disconnect your programmer and hook your arduino directly to the computer via USB. From the Tools->Board menu, select your board:

Now, things are back to normal, and you can burn your sketch via the Upload button.
