Build an Audio Player Based Mind Machine Part 1: Photic Goggles [REPOST FROM GEEKMATICA]

NOTE: This is just a repost of an article that originally appeared in my geekmatica blog back in 2007. I’ve re-posted here, because it’s referred to by my Build Ganzfeld-style Photic Goggles (AVS Lightframes) article.

Commercial mine machines are quite expensive, and often inflexible, containing only a few canned programs. In this series, I will show how to build an infinitely reconfigurable photic-stim mind machine on the cheap. Rather than build an oscillator circuit, we will drive our mind machine with computer-generated waveforms via an audio player. You can use your favorite audio playing program on your computer, or a portable MP3 player.

UNDER CONSTRUCTION: I still have a ways to go w/ filling in details, but I thought I would at least throw up the article first, since it might take me forever. Please pardon the omissions.

Keywords: DIY, build, mind machine, brain, AVS, photic goggles, audio visual stimulation, lightframesPart 1A: Photic-stim Goggles (aka Lightframes)

Photic-stim goggles cost typically more than $50, but they’re typically built with only <$1 worth of LED’s, and some cheapo ski-type sunglasses.

Below are the lightframes which came with my Sirius AVS machine, which I purchased from MindModulations.com.
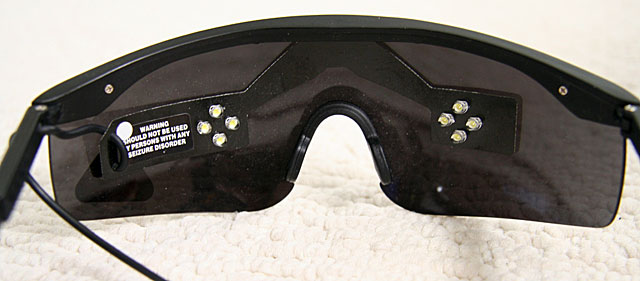
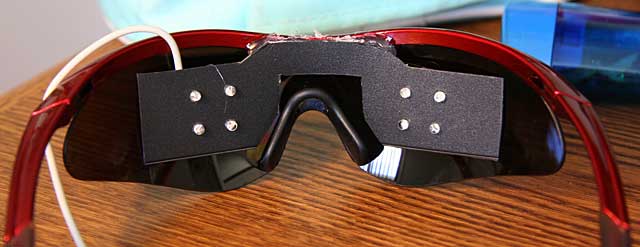
Note how they are just as I described above, a cheap pair of ski-type sunglasses, with 8 LED’s wired into a sheet of black plastic. The plastic is attached to the sunglasses with double stick foam tape.

Below are the materials we need for our project:

Bill of Materials (BOM)

  1. Ski goggle style sunglasses. I purchased this pair for under $10
  2. Stereo wiring with 1/8 in phone plug. A cheap pair of earbuds from a local 99 Cents Only Store is perfect for cannibalizing.
  3. Thin, flexible black plastic sheeting. A spare DVD case courtesy of junk mail from AOL will do fine.
  4. LED’s. The type and number of LED’s is up to your own taste. Since my design uses the black plastic sheet insert, I picked 3mm LED’s… they need to be small enough that they won’t bump into your eyes when you’re wearing the goggles. If you want to drill directly into the goggle lenses and eschew the plastic sheet, you can use bigger LED’s. I bought my LED’s from UniqueLEDS.com. They have an extensive selection, and list detailed specs for the LED’s, including brightness. SUPERBRIGHT
  5. Not pictured is a few inches worth of hookup wire. I had some kynar-insulated 40AWG wire wrap wire laying around, which was perfect, due to its extremly thin diameter.

How many LED’s you use is up to you, but the minimum is two, one for each eye. I decided to use 8 … 4 for each eye. Also, I used two different colors, green and blue, on alternating diagonals. Note that my LED’s have 3 leads instead of the usual two. This is because I had a wild idea of using bicolor LED’s so that I could get different color combinations, but I’m not very sensitive to the colors, so I decided to hook them up like one-color LED’s. There are various recommendations on the web for color selection. Personally, I like the bright white LED’s that my Sirius frames used, but I decided to experiment with colors on this set.

First, cut the black plastic which will support your LED’s. Ask I said above, you can skip this step, and drill directly into the lenses, but it will look a lot uglier, since the wiring will be exposed in the front. Also, the drilling method doesn’t let you easily reconfigure the frames if you change your mind about the layout. I used graph paper to make a paper template for my LED layout:
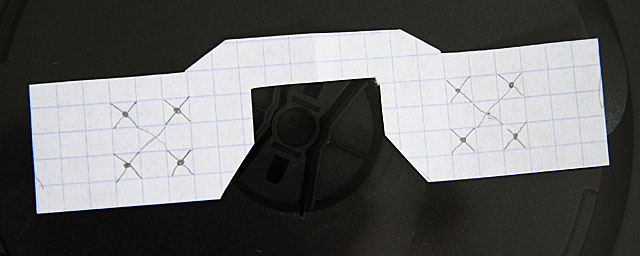
You should lay out the LED’s so that they’re fairly well-centered over your eyes. If you space them out a bit, it will allow for inaccuracy, and eye movement. Note that my layout is rotated 45 degrees with respect to the layout used by the Sirius. My DVD case was soft enough that I could just use scissors to cut out the template, but you may need to use an X-acto knife.You can use a drill for the holes, but I spun an X-acto knife around, instead, and slowly increased the size of the holes until I had a tight fit. (BTW, for the curious, those are not my hands in the photo).

I misaligned one of the holes a bit, as will be apparent in later photos, but it works fine, even though it’s a bit ugly.

Since we want to keep the LED’s far enough away that they don’t hit your eyes, we need to bend the leads as tightly as possible. I used a pair of needle-nosed pliers, but if you’re careful, you can just use your fingers on the edge of your desk:
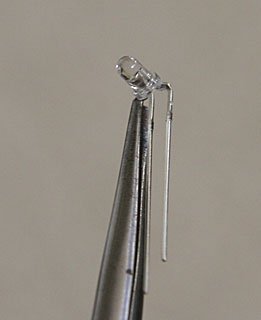
Here’s what they look like when they’re done. Since my layout uses alternating colors on the diagonals, I first bent two of the green LED’s. Then, I bent another pair of green LED’s in the opposite direction. The opposite polarity of the bending is important, because the LED’s are hooked up in parallel. Here’s what they look like before I cut the leads:

Now, the wiring and layout of the leads will vary considerably, depending on how you want your LED’s to behave. The lightframes I built behave very differently from the Sirius lightframes, which utilize the industry standard wiring. In the Sirius setup, all 4 LED’s on a particular side light up synchronously. The left side responds to the left channel, and the right side responds to the right channel, so the two sides can be controlled independently. This is an example of how they can blink:

My design mimics the IC/D setting of TC-Softworks lightframes, hooks up each pair of diagonals together. The greens respond to the right channel, and the blues respond to the left channel. Therefore, both eyes are always lit, but the intensity and color can vary.

You can use your imagination to come up with your own unique design.

If you are building your goggles to work with a particular mind machine, be aware that there is another variation in the wiring, which affects the compatibility. All of the schematics I have shown up to now have used Common Ground (CG) wiring, where the cathodes (grounds) are all tied together. Some machines, such as my Sirius, use Common Power (CP) wiring, where the anodes (power) are tied together. Before wiring up your goggles, make sure you know if you need CG or CP wiring. As it stands, the goggles I built are incompatible w/ my Sirius.

You must also be aware that which polarity you choose will affect the polarity of the signals that you use to light up your goggles. CG goggles light up when the signal is positive, and CP goggles light up when the signal is negative. Thus, if we use the following signal, CG goggles would light up in the first half of the cycle, and turn off in the second half, where the signal goes negative.

On the other hand, CP goggles will do the opposite, and be dark in the 1st half cycle, then light up in the 2nd half cycle.

Next, I fit them into the plastic, and soldered the wires:
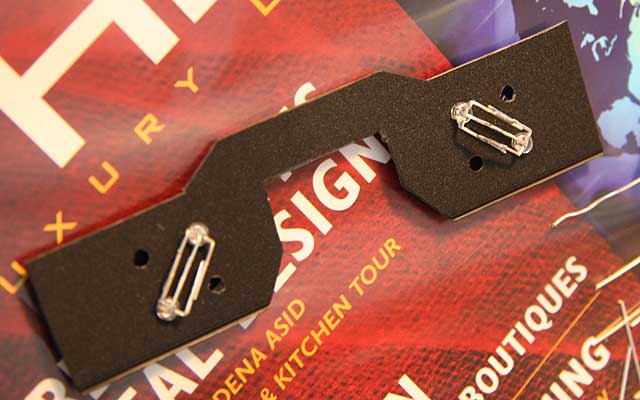
Be careful to solder as quickly as possible, and not to use a high-wattage iron, because LED’s are semiconductors, and can easily be destroyed by overheating.

The inner pairs of LED’s have to be bent a bit differently, so that the leads don’t touch and short out w/ the outer pair of LED’s.
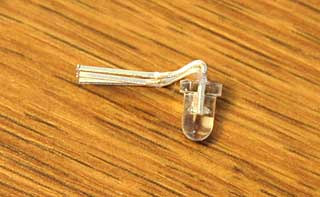
In my case, they were the blue LED’s. Note that the LED’s w/ the extra bend actually go on the inside, so I had to take the first pairs out first. Here’s what they look like up close. Although the inner and outer wires look like they’re touching, there’s a tiny clearance. Here’s what it looks from the other side:
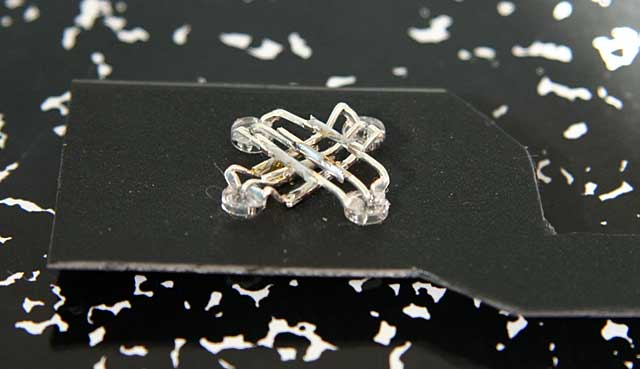
I know, I know, the holes are a bit off, but it’s accurate enough.

Next, I connected up the wiring. Since my goggles are wired up for CG, the center leads (the cathodes) of all of the LED’s are wired together. The anodes of each color are all wired together. NEEDS PIC OF TRS WIRING HERE

Testing …
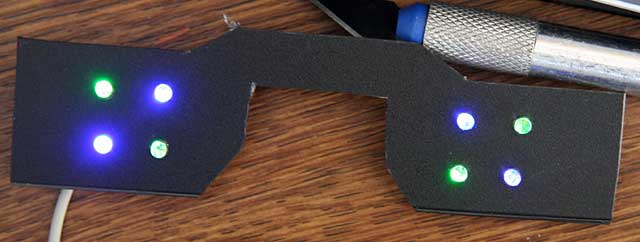
Left channel only
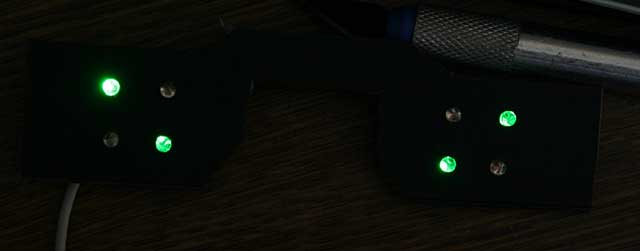
Build Ganzfeld-style Photic Goggles (AVS Lightframes)

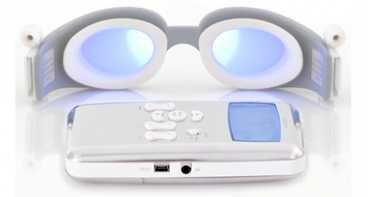
Building upon my passive Ganzfeld goggles, I decided to build a set of Ganzfeld-style lightframes for photic brain stimulation.  I was inspired by the goggles which come with the very expensive Laxman mind machine:

laxman

Typical lightframes which come with audio-visual stimulation (AVS) mind machines use point source LEDs, such as this pair which came with my MindPlace Sirius mind machine:

siriusgoggles

I covered the basics of how to construct such goggles in a previous article: Build an Audio Player Based Mind Machine Part 1: Photic Goggles

Even the RGB “ganzframes” which come with the MindPlace Procyon mind machine are rather feeble, consisting of point source SMT LEDs, covered by a simple roughened square of translucent plastic… the effect is only mildly diffuse, and still looks like a cluster of point sources.  Inspired by Michael Rule’s hallucinogenic goggles project, I modified his goggles design to my tastes, and built a monochrome replacement for my Sirius lightframes.

Parts for this project:

parts

BOM

  • wiring harness from cheap headphones (a pair of earbuds from your local 99 cent store are a good donor)
  • 2 LEDs – I chose white LEDs
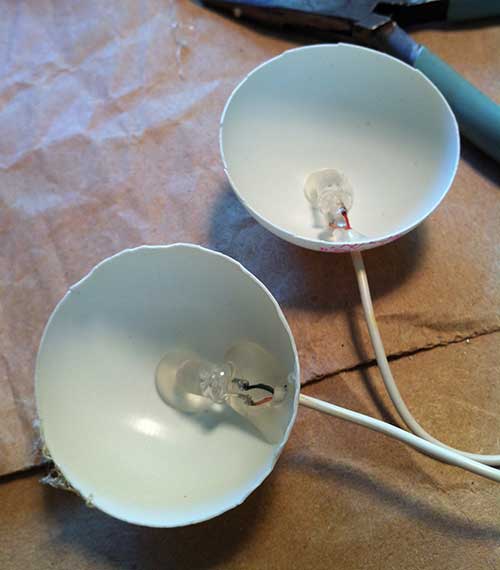
  • a ping-pong ball – I already sliced it in half in the photo.  Using the seam as a guide, cut it in half with a very sharp x-acto knife
  • passive ganzfeld goggles prepared as described in my previous article:  Relax Your Mind: Build Your Own Ganzfeld Goggles

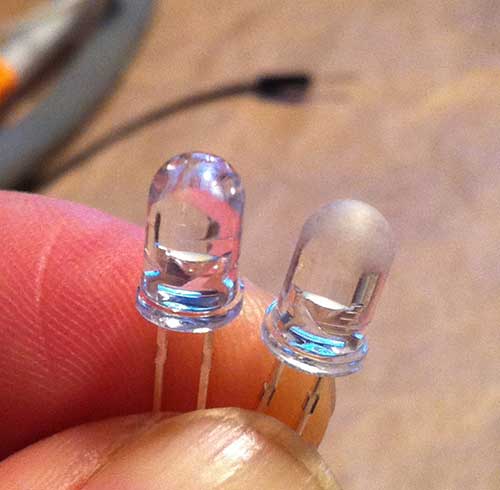
If you your LEDs are of the clear point-source variety, it’s a good idea to scuff them up a bit with to make them more diffuse. You don’t have to do the whole LED.  Rubbing the tip with sandpaper will suffice:

ledscuff

Trim the LED leads, and solder them to the headphone wires:

soldering

The polarity of the wiring depends on the requirements of your particular mind machine.  My Sirius mind machine uses common-anode wiring (also known as CP or common-power), so the anodes connect to ground, and the cathodes go to the right and left channel signal leads.  If your mind machine requires common-cathode wiring (aka CG/common-ground), then you should connect the cathodes to ground, and the anodes to the left and right signals.

After soldering the LEDs, drill a small hole in the side of each ping-pong ball half (I actually just twirled the tip of my x-acto knife, rather than using a drill bit), and then tack them to the balls with hot melt glue.  The blob of glue that holds the tip of the LED to the ball actually helps to diffuse the light a bit more.  Notice that the LED’s are pointed toward the ball instead of away from it, so that you instead of shining the LED beam into your eyes, it bounces off the ball.

ledplacement

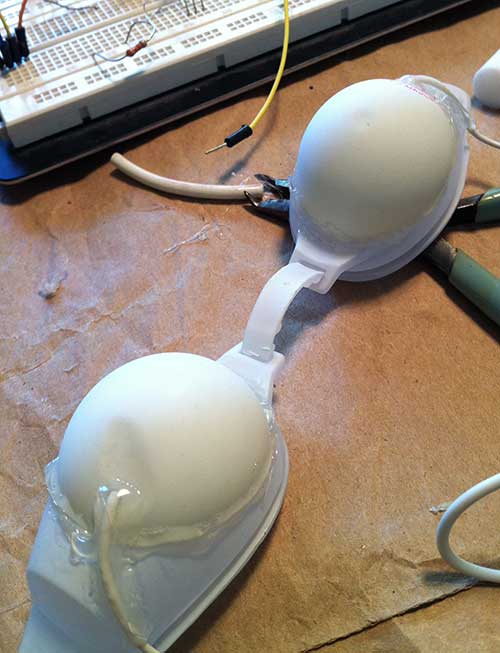
Next, carefully glue the ping-pong ball halves to the front of the goggles.  Tack one side of the ball, wait for it to harden, and work your way around it a section at a time, while bending it to conform to the shape of the goggles.  Be careful of overheating when applying hot glue to the ping-pong balls.  My glue gun was a bit hot, and the heat warped them a bit. Notice the flattened parts of the balls below:

melted

Here are the completed goggles:

completed

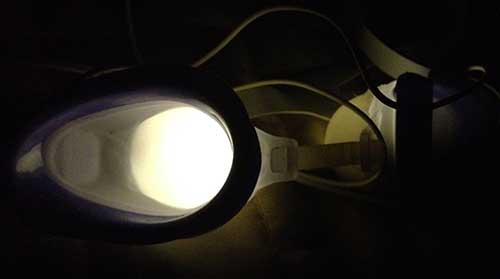
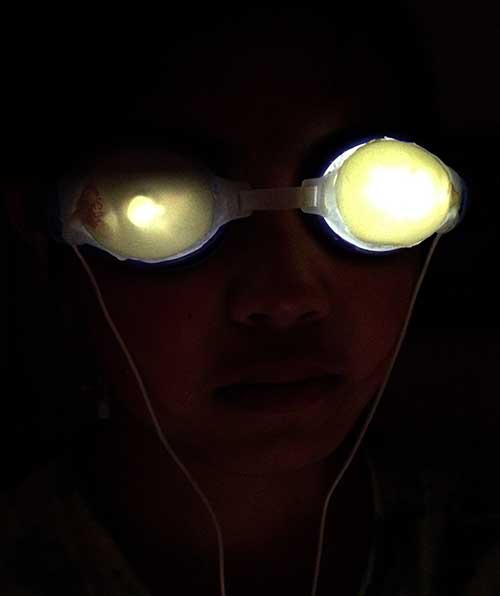
They work fabulously … much better than conventional point-source lightframes, and an added bonus is that they can be used with eyes open.

monogoggles

Plus, they look really cool & trippy: goggleshead

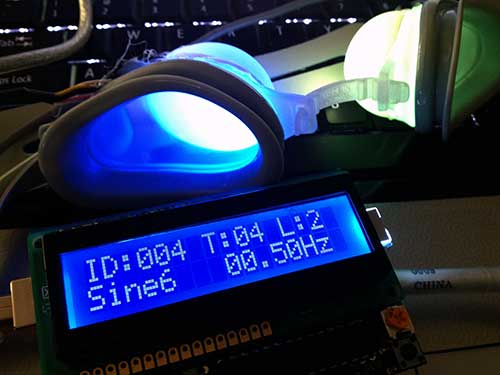
Here is a preview of my hallucination machine. It’s a standalone Arduino-based mind machine, which is my remix Michael Rule’s Hallucinogenic goggles.  The goggles are of identical design, but use RGB LEDs rather than a single color.  I will document the build in a future article.

hallucinationmachine

Related Post: Relax Your Mind: Build Your Own Ganzfeld Goggles

Relax Your Mind: Make Your Own Ganzfeld Goggles

The Ganzfeld effect is a form of visual sensory deprivation.  The idea is to give the open eyes a blank visual field of uniform color.  Since there is nothing for the eyes to see, the brain cuts off the unchanging input, and often manufactures its own images – these may be thought of as mild hallucinations.  Personally, I haven’t experienced any vivid hallucinations via a Ganzfield, but I find the effect to be rather relaxing.  I’ve found that a Ganzfeld is very good for helping to eliminate excess chatter in the mind, especially when practicing meditation.

One common meditation technique involves cracking the eyes just barely open, so that even though your eyes are open, you can’t really see anything.  There are two purposes for this technique: 1) it’s easier to stay awake with the eyes open and 2) when the eyes are closed, the brain goes into the idling alpha wave rhythm. When you meditate, one aim is to generate alpha with the eyes open; this isn’t easy, because in typical settings, there are too many distracting things for your eyes to see.  I find it easier to stay awake when I use Ganzfeld goggles than when I meditate with my eyes barely cracked open.

A common technique for creating a “Ganzfeld goggles” is to cut a ping pong ball in half, and then place one half over each eye. While this technique is cheap, and relatively easy, it’s not particular comfortable, as the edges of the cut halves tend to be sharp.  Also, they’re easily damaged.  I’ve devised alternate cheap and easy method of building Ganzfeld goggles, which is more comfortable and durable, and better than an expensive commercial alternative.

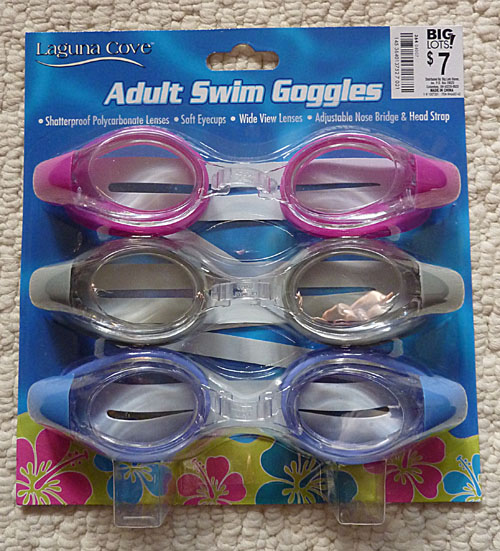
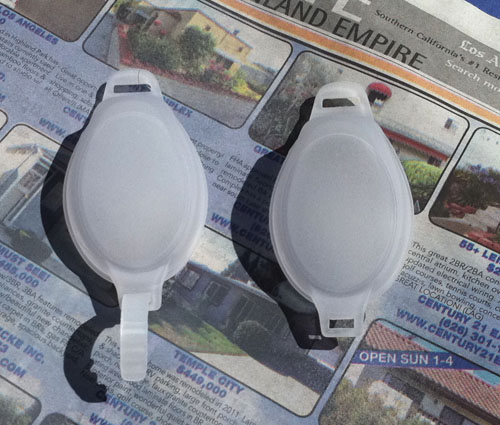
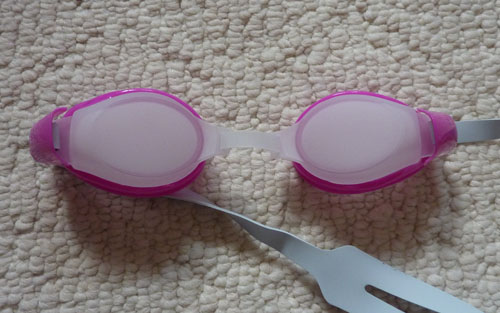
My take on Ganzfeld goggles starts with a pair of cheap swimming goggles.  I bought a pack of 3 at Big Lots for $7.

It’s important to use large goggles with a bubble lens as above.  What we are looking for is to have a big enough lens that when we’re wearing them, the edges are basically outside of the visual field.  Next, we need a can of frosting spray:

You can find glass frosting spray in the spray paint section of most hardware stores.  I also tried white paint, but frosting spray is better, because it lets more light through, and filters the light more evenly.  Remove the seals and straps from your goggles, and spray on the frosting

Be sure to spray both the outside and inside of the goggles.  2-3 coats are needed to achieve a sufficient frostiness.  Wait about 10 min between coats.  Once they’re dry, reassemble your goggles.

Your Ganzfeld goggles are now ready to use.


I won’t go into detail here on how to use Ganzfeld goggles, because you can find plenty of articles via Google.  However here are some basics:

Find a quiet room, and lay down in a recliner or on a bed.  Keep your eyes open, and relax.  You may want to try auditory sensory deprivation, as well.  Since it’s hard to find a completely quiet place, another way of decreasing auditory distractions is to listen to white, pink, or brown noise through sound-isolation headphones.  You can make noise files easily using Audacity, a free audio editor. Here is a tutorial on YouTube for how to generate white/pink/brown noise.  Although the video says you can use any version of Audacity, only Audacity 1.3+ can generate pink and brown noise.  Audacity 1.2.x can only generate white noise.

You can also try audio brainwave entrainment, using binaural beats.  Some people like alpha wave entrainment; personally, I find 7 Hz theta wave entrainment to work best.  There SBaGen and BWGen are two free programs for generating binaural beats.  An excellent commercial software, which is a lot more flexible, and can generate other waveforms, such as isochronic beats, is Neuroprogrammer.   STAY AWAY FROM I-DOSER. The author makes ridiculous, fraudulent claims, and the program is just a rip-off of Jim Peter’s GPL’ed SBaGen code.

If you want to use the goggles to enhance your meditation, simply wear them while practicing your normal meditation techniques.  Instead of keeping your eyes barely cracked open, you can keep them fully open, half open, or whatever way feels most comfortable.   Again, I won’t go into detail about meditation techniques, but a good method for beginners is Counting Meditation.  Sit with your spine straight and tailbone slightly elevated by a pillow. Inhale and exhale deeply and slowly through your diaphragm (you expand your belly, rather than your chest during breathing) while  counting your breaths.  As you relax, your breath will naturally slow down.  If you lose count due to being distracted, simply start over.  Eventually, you will be able to get the count higher and higher before you lose your concentration.

Another experiment you can try is to play with colored light sources.  For instance, you can sit in a room which is lit by a red lightbulb.  I’ve found that even sitting in the dark with some colored LED’s works.  If you want to attach the LED’s directly to your goggles, you can diffuse them with ping-pong balls.  Just cut a ping-pong ball in half.   Hot glue an LED into each one, pointing away from the opening.  Then hot glue the ping pong ball halves onto your goggles.

While I don’t experience hallucinations when using the goggles, they are quite relaxing, and really do enhance my meditation practice.  With the vision blocked, your brain shifts its attention more to your other senses.  If I use them without listening to my entrainment tracks, I become much more aware of the ringing in my ears that my brain normally filters out.

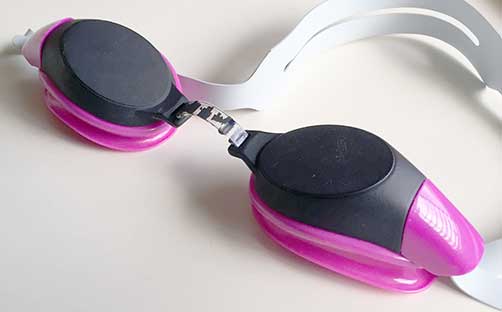
I’ve also played with an alternate pair, which I painted with several coats of black paint. The idea is to completely block out the light, so it’s like you’re sitting in a pitch black room of absolute darkness.

blkgoggles

I actually prefer this black pair when meditating. Your brain naturally produces occipital alpha waves when you close your eyes.  The idea of meditating with eyes open is that it forces you to produce the alpha waves by meditation only.  However, meditating with eyes open is visually distracting.  Wearing the black glasses allows you to eliminate visual distractions while meditating with eyes open.


Update 2014-12-18:

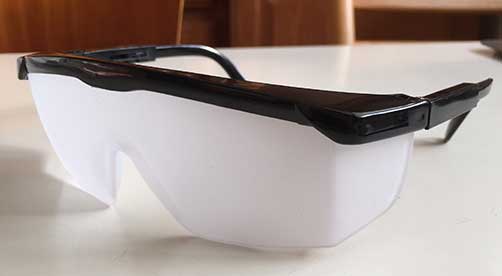
If you find swimming goggles to be uncomfortable, you can try using safety glasses. I bought a pair at my local 99 cent store. You can also find them cheaply at HarborFreight. Simply pop out the clear lens, spray with frosting spray, and then reassemble.

ganzglasses

I find the safety glasses to be a bit more comfortable for long sessions. The downside is that in order to avoid peripheral vision from ruining the ganzfeld, you have to wear them fairly close to your eyes, and avoid rolling your eyes up or down.

Mindmodifications.com has an interesting article about the Ganzfeld effect: MULTIMODAL GANZFELD GIVES MILD HALLUCINATIONS
They also have detailed instructions on how to build the goggles out of ping-pong balls, should you want to try that version, as well.

Enjoy your Ganzfeld goggles, and feel free to leave feedback about your experiences below, or to tell of any enhancements you devise.

Related Post: Build Ganzfeld-style Photic Goggles (AVS Lightframes)