On the surface, the Ember Mug sounds like a completely idiotic product. I mean, who needs a %#$ bluetooth mug? However, I like to drink coffee and tea, and it has been a constant irritant over the years that my coffee or tea are always either too hot or too cold. Especially tea. I tend to sip it over a long period, and it’s always either burning hot or too cold.
One day, my wife got an Ember Mug 2 as a gift. Actually, it turns out to be pretty useful. It keeps your drink at whatever temperature you like. I decided to get myself used Ember Mug 2. I paid $58, which is still way too much, but it’s a lot cheaper than the $150 a new one cost at the time.
The bluetooth is still idiotic. I would much prefer a mug w/ manual temperature control and buttons on the side. The app just complicates things. Furthermore, the firmware is absolute garbage. Since there’s no switch to turn it on or off. It tries to figure out if there’s liquid inside by sensing how fast the temperature changes when the heater is on. Unfortunately, the idiotic firmware also assumes that the mug is empty when you put in a drink that’s too cold. It refuses to heat up, even if you try to override via the app.
One day, I had some cold coffee that had been sitting out too long. I put it in the Ember Mug to warm it up. It refused to heat up my drink, since it was too cold. Being half asleep, I put it in the microwave oven to warm up the drink to a temp where the Ember Mug would recognize that it wasn’t empty. HORROR OF HORRORS! After about 30s, I realized that I had put my non-microwaveable Ember Mug into the oven!!! I turned off the oven, but alas, it was too late. The mug continued to talk to the app for a few minutes, but refused to heat. A few minutes, it completely died, never to wake up again. I’m lucky that I didn’t microwave it long enough to cause the lithium ion battery to catch on fire, and destroy my oven!!!
I scoured the Internet, looking for information on how to take it apart. I was hoping that maybe I got lucky, and only the battery got damaged… all I had to do was figure out how to replace it. Unfortunately, I couldn’t find anybody who’d actually taken apart an Ember Mug 2. There is lots of info on taking apart the Ember Travel Mug. However, that one’s bottom is held on with just screws. Not the Mug 2. I took off the rubber gasket on the bottom, and this is what I found:
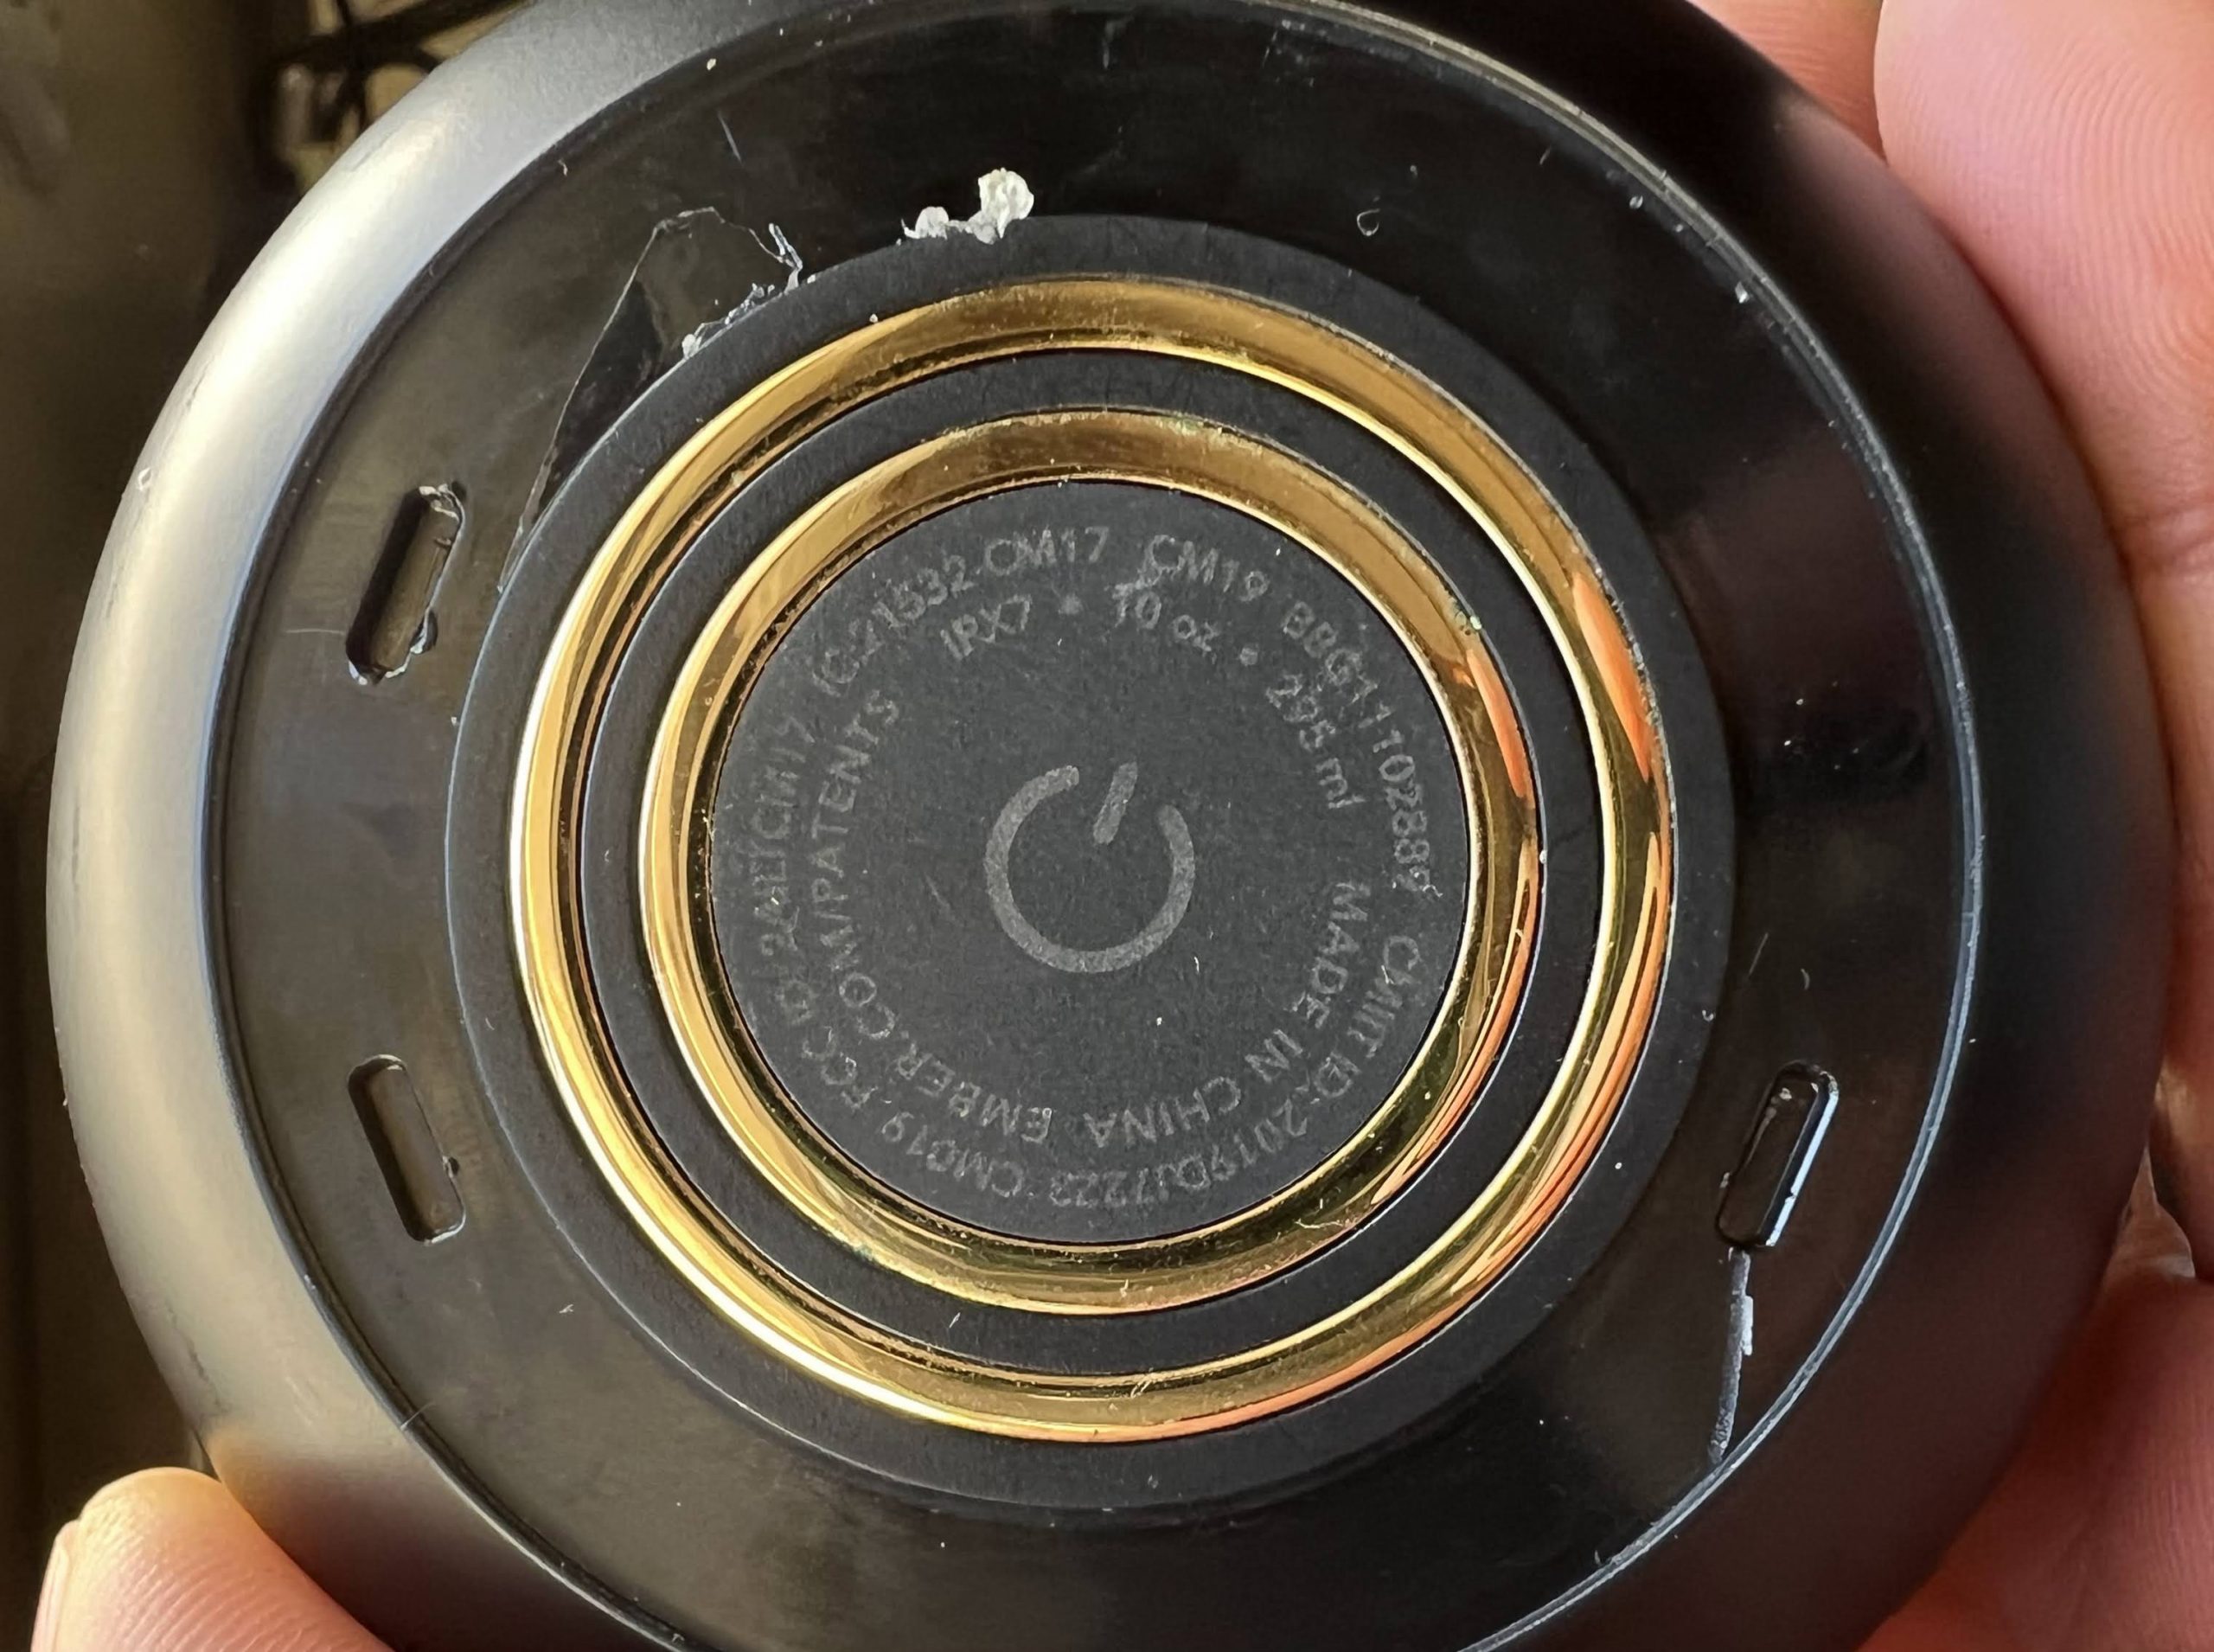
Unlike the Travel Mug, there are no screws under the gasket. I tried rotating the bottom using the slots, but was not successful.
At this point, I decided to contact Ember tech support, because I heard that they offer cheap replacements to idiots who damage their mugs in the microwave. I emailed Ember tech support, and got this response:
| Thank you for reaching out to Ember support! Your request has been received. We are currently experiencing longer reply times, but our team is working diligently to get back to you! |
Yeah, right. It’s been 3 weeks, and they still haven’t gotten back to me! <rant> Ember is a shitty company! They sell such a ridiculously expensive disposable, unrepairable product, and have non-existent tech support.</rant> (Update 20240112: Ember actually did try to get back to me 2 days after I opened my support ticket w/ an offer to sell me a new mug at reduced cost, but somehow, the message never got to me. A few hours after I posted this article, I received a message from them saying the ticket would be closed soon due to inactivity.)
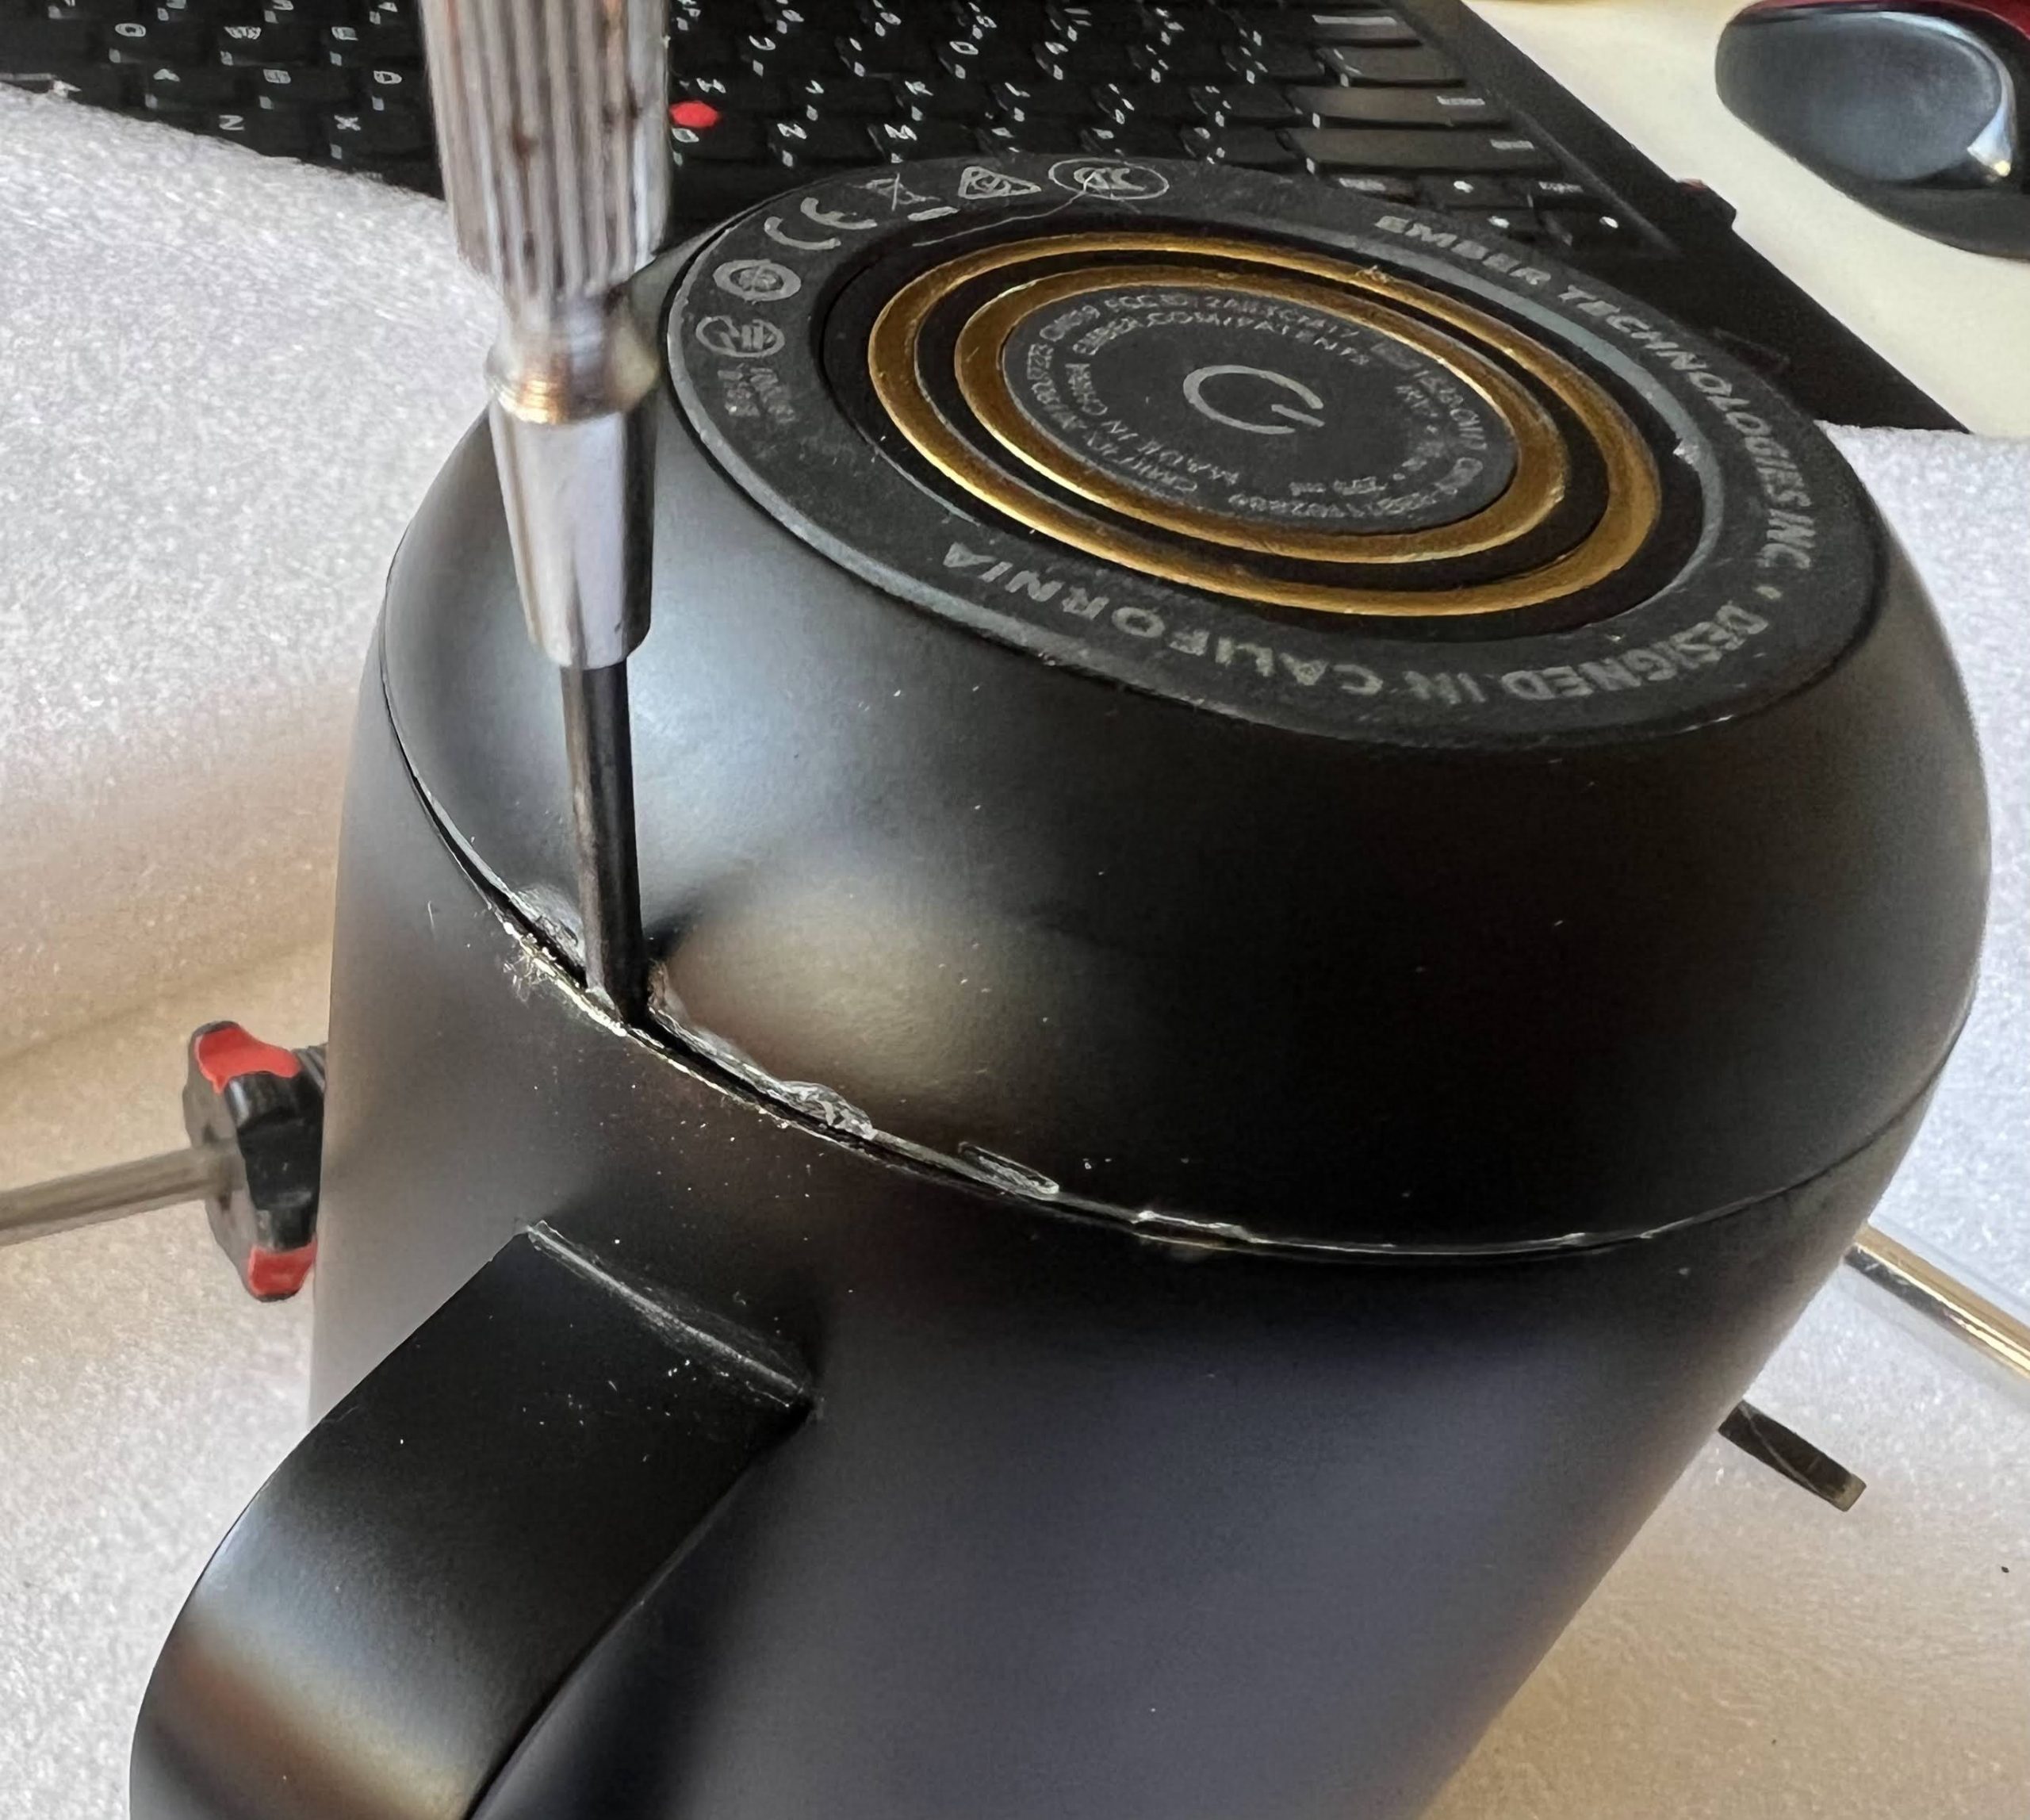
OK, so I decided to disassemble my mug this morning. First, I went around the seam at the bottom with an x-acto knife. It didn’t come loose. Next, I drove a screwdriver into the seam and tried to pry. I chose a spot under the handle, so that the damage wouldn’t be as visible. Finally, I drove my screwdriver between the metal casing and the plastic bottom:
Finally, some movement.
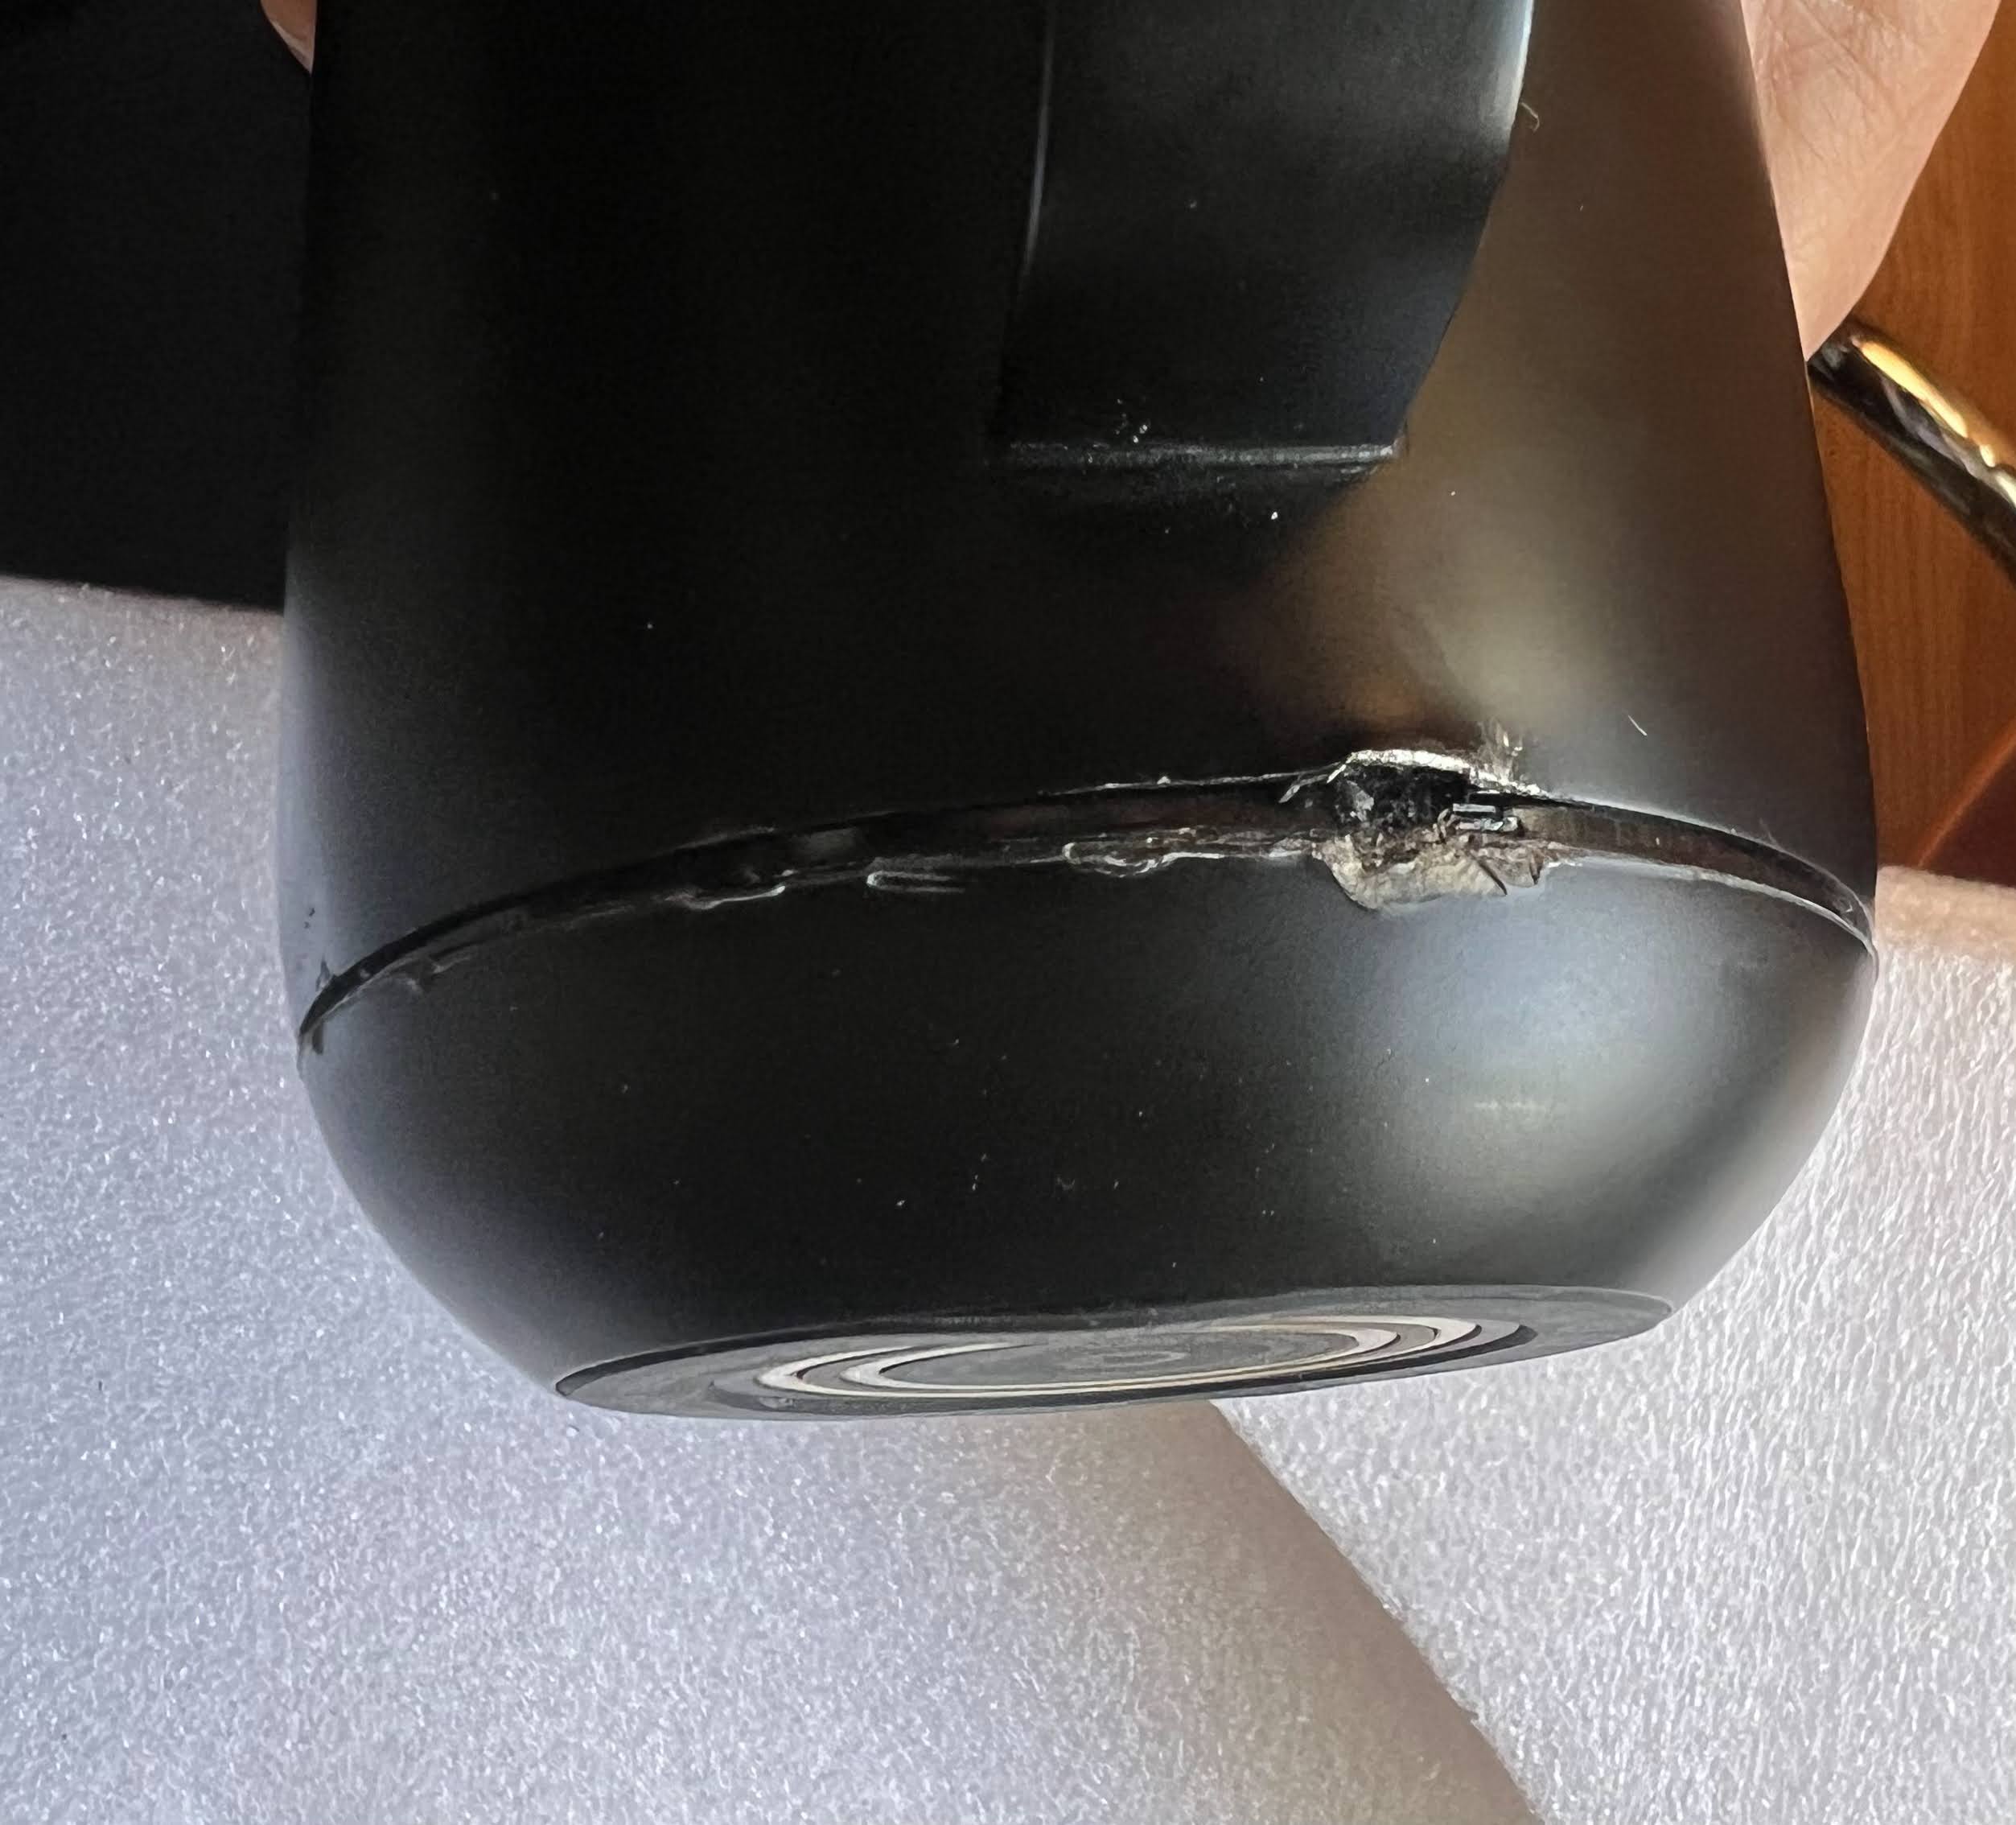
I wedged a bigger screwdriver in, and pried harder. The bottom finally came off:
Well lookie there! It’s a twist off bottom after all! It’s too late for me, but I think one could easily drive 3 brads into a piece of wood, lining up w/ the slots I revealed in my first photo … rotate clockwise, and twist off the bottom w/o damaging anything! (UPDATE: The guy who wrote the iFixIt article linked at the bottom claims that the vertical aluminum strip at 10 o’clock prevents the bottom from being twisted off. If that’s the case, it’s a bit of assholery by Ember to keep the mugs from being serviced. Sheesh, it’s bad enough they didn’t just screw the bottom on like w/ the Travel Mug).
The second I had the case cracked open, the smell of burnt electronics emanated. I instantly knew that I would be dealing w/ more than a damaged battery. The battery is covered by an aluminum plate, which is held on by 4 torx screws:
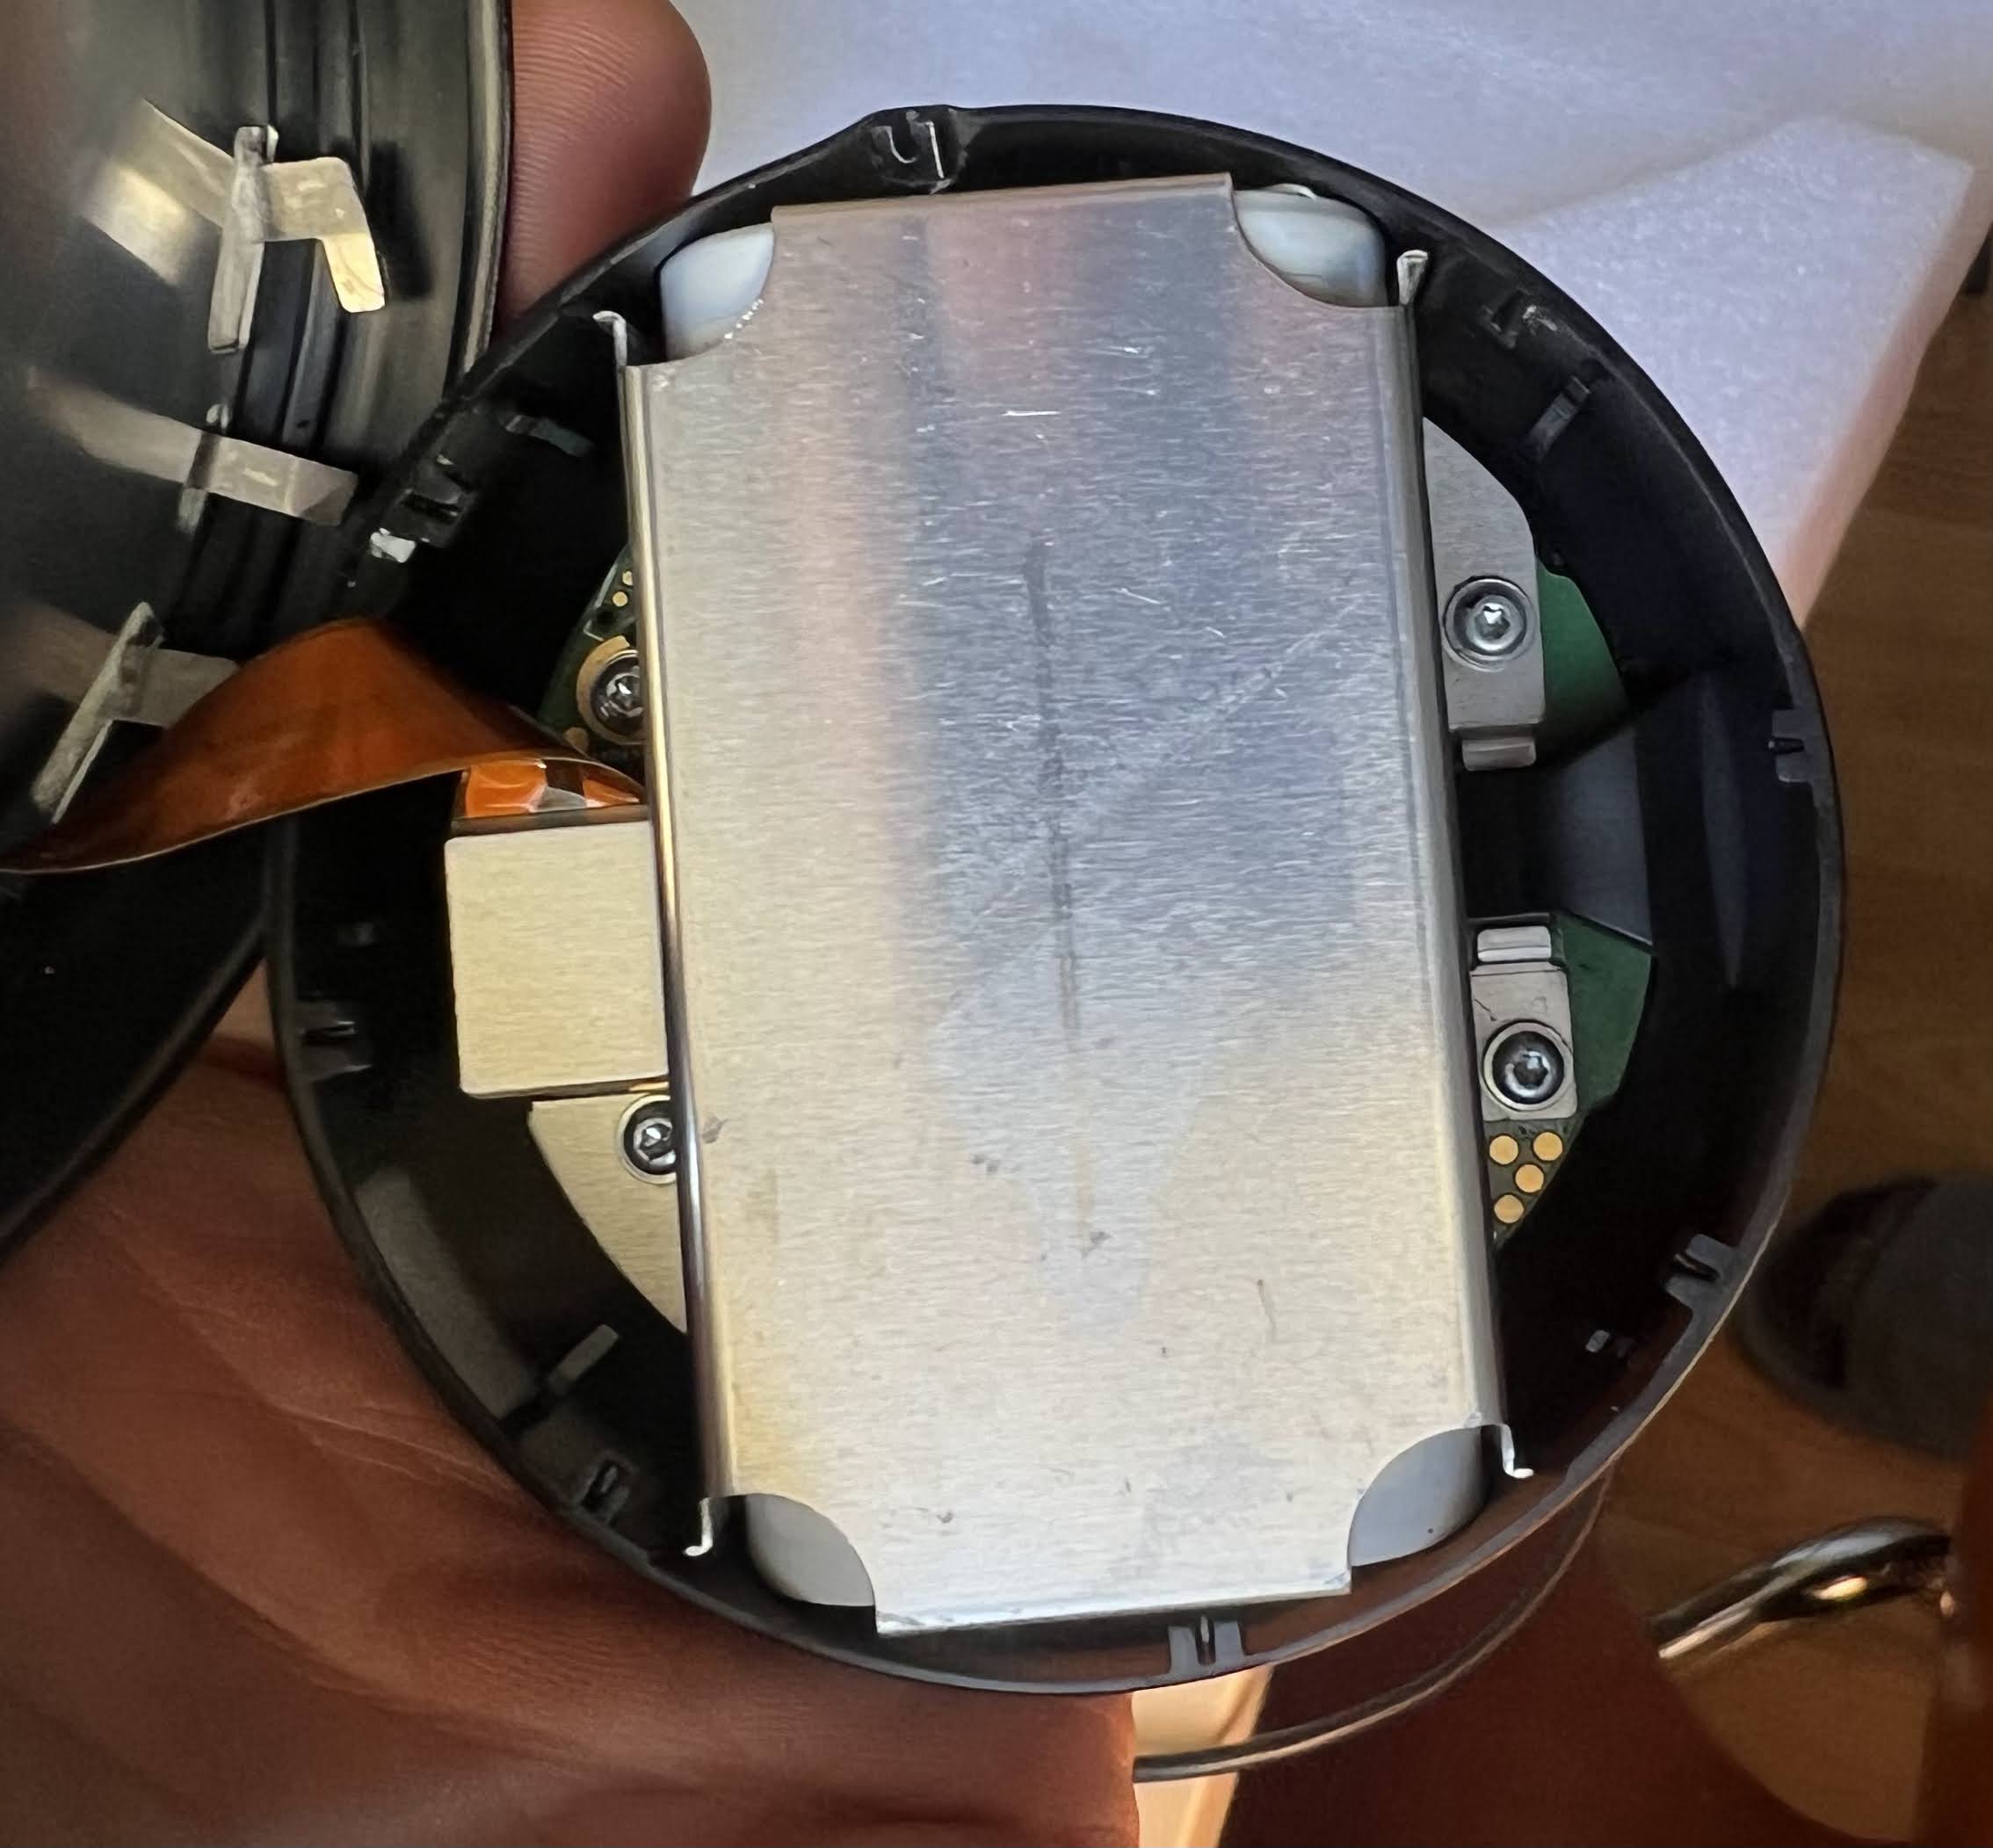
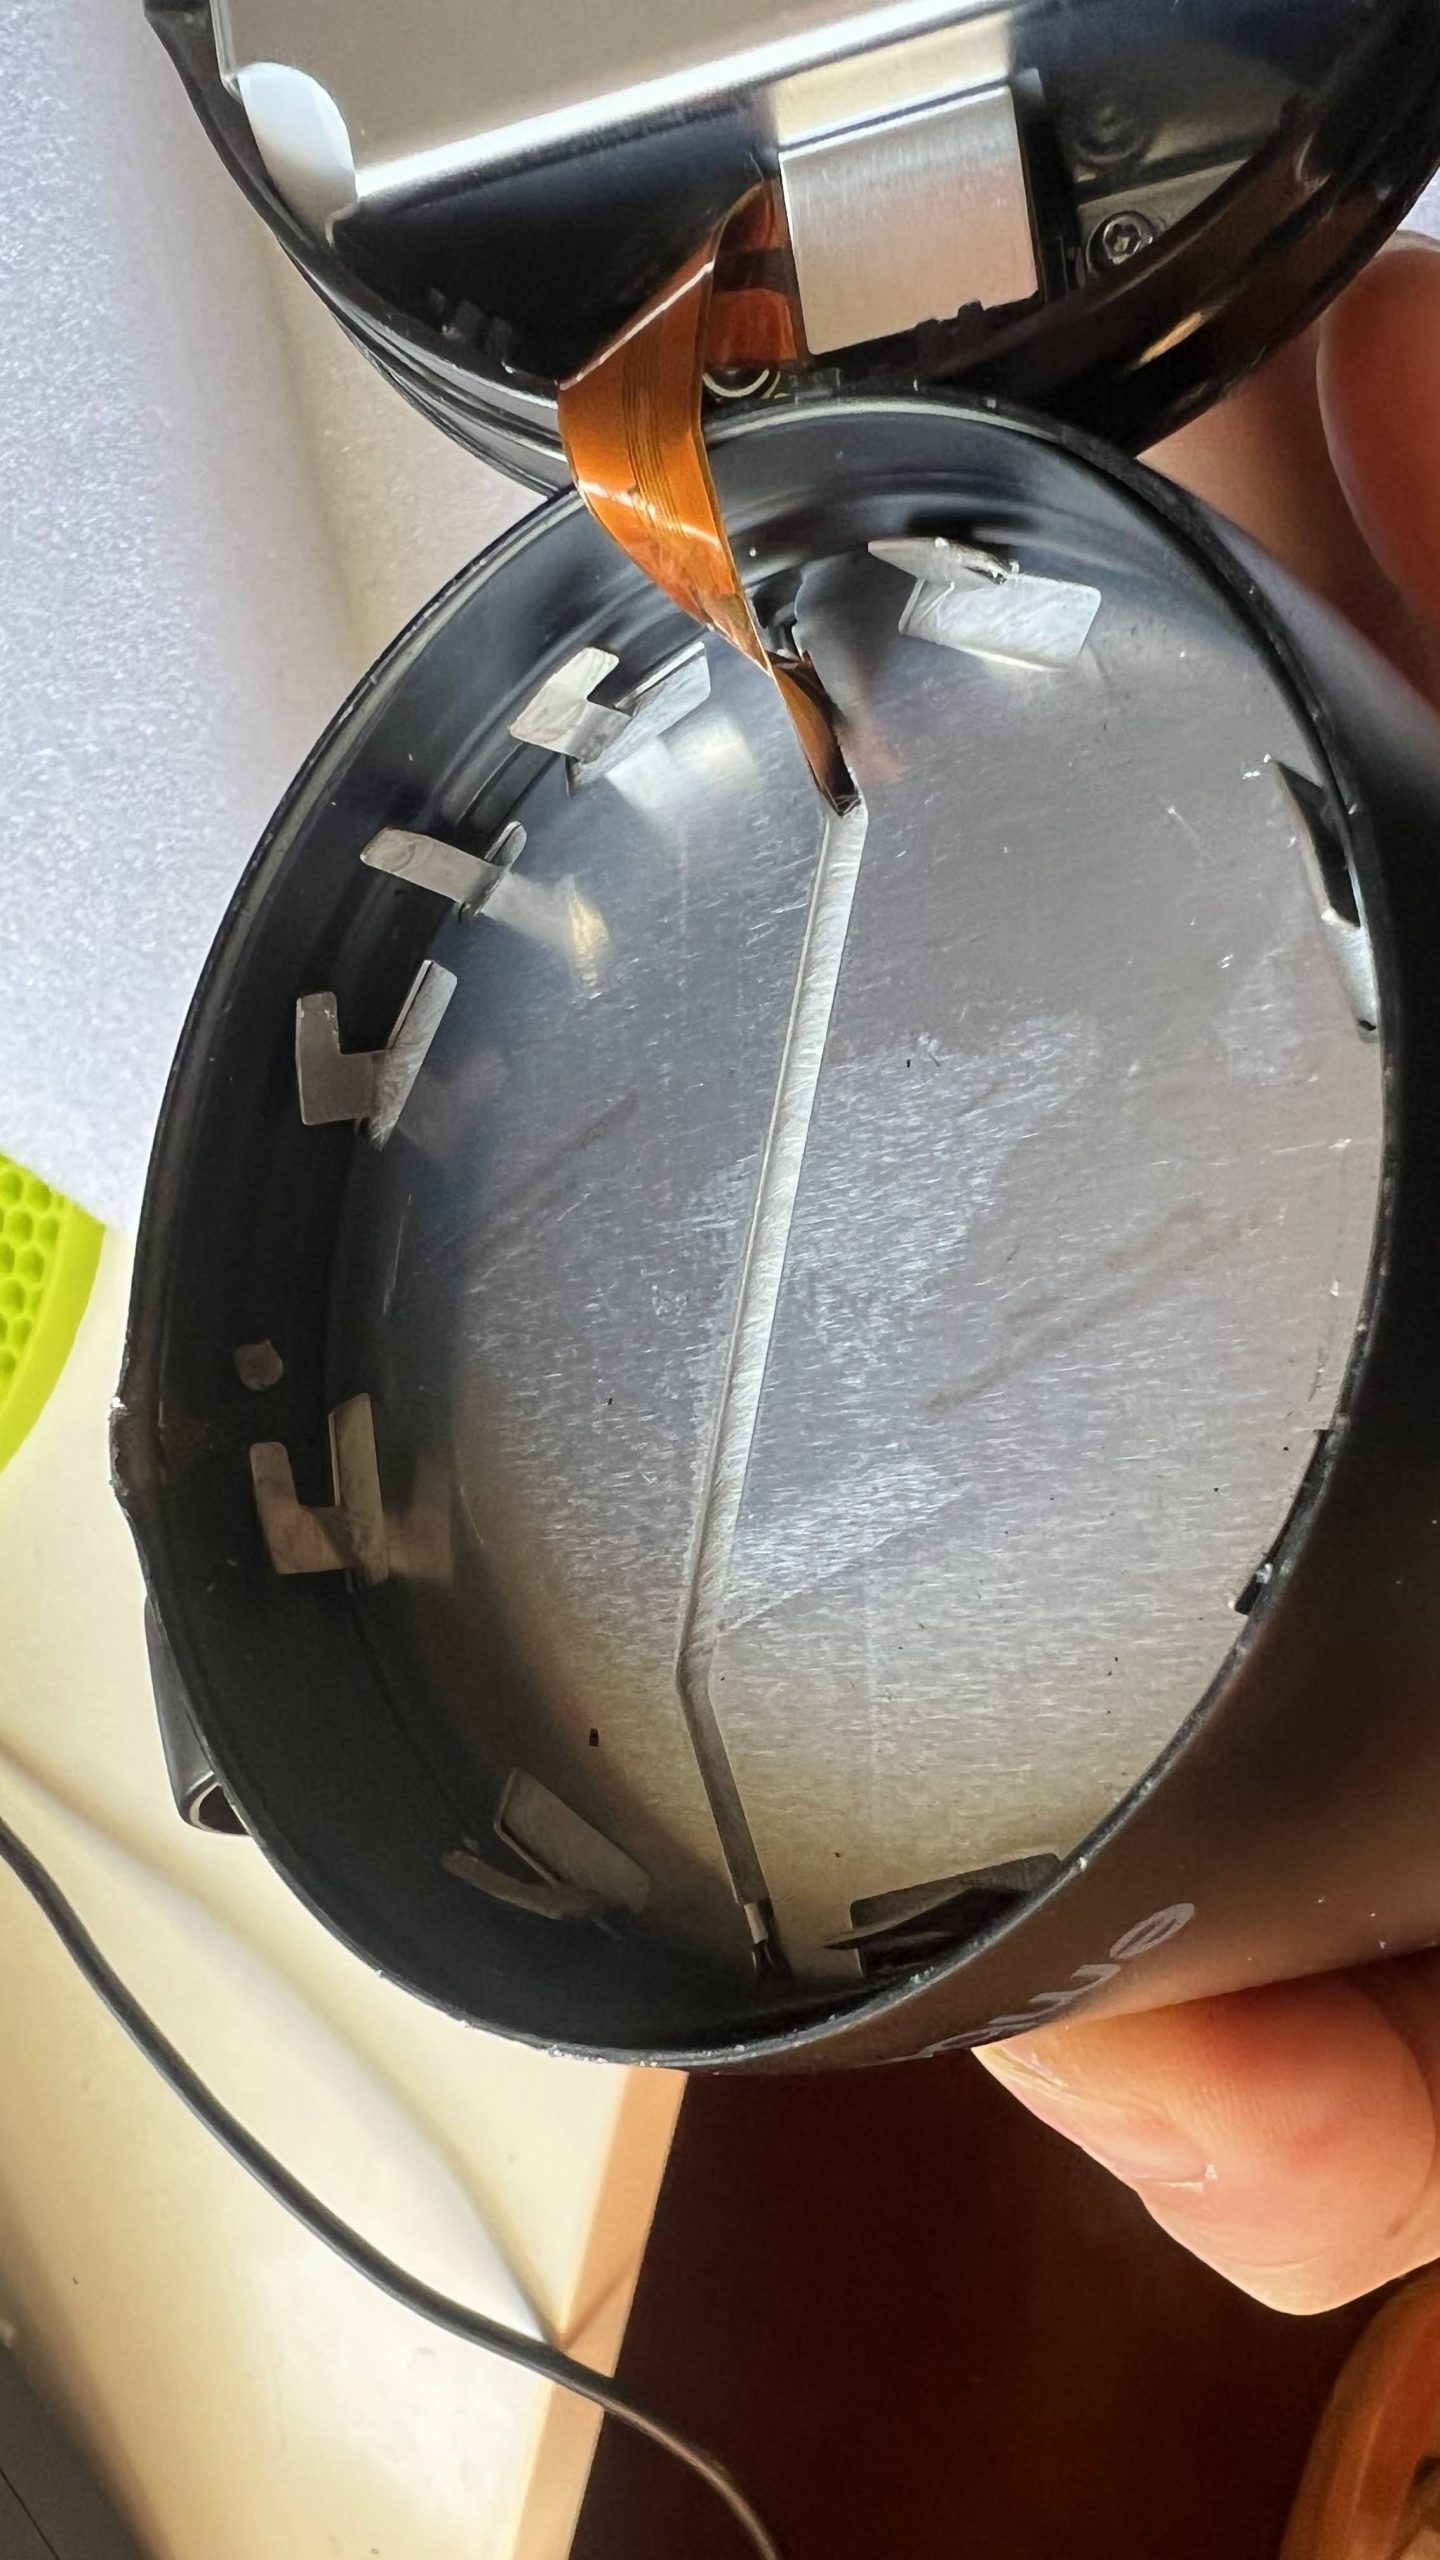
The 4 torx screws also secure the PCB to the bottom of the case. However, I still couldn’t get the PCB out after taking out the screws. There was a piece of plastic holding down the PCB. You can see it on the right side in the photo below:
I rotated the plastic part out of its retaining slot. Bad idea. It turns out that it’s a light pipe for the RGB LED. Rotating it broke the LED from the PCB:
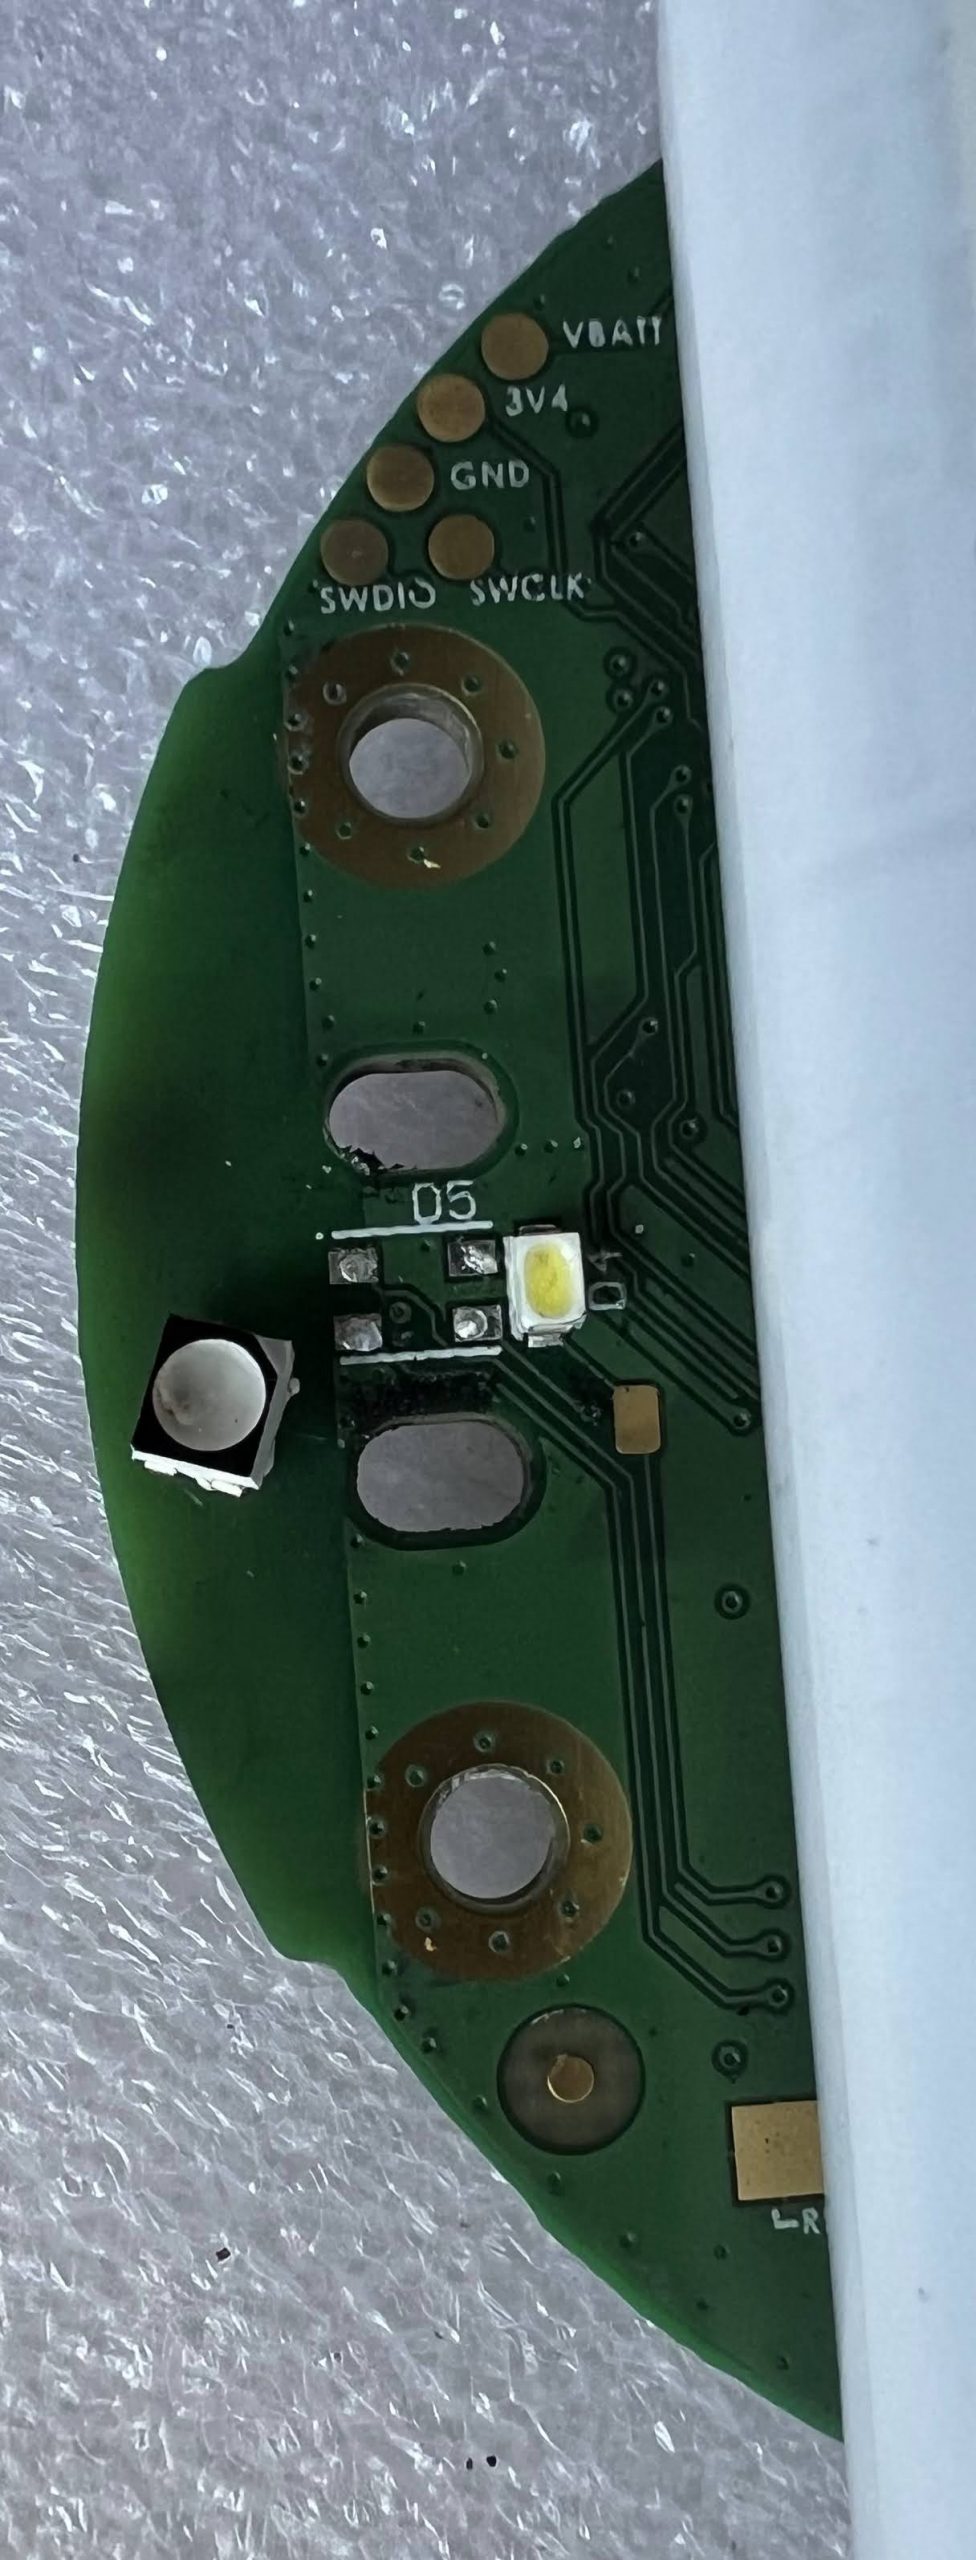
Note that there’s also a monochrome COB LED behind it. I wonder why they need 2 separate LEDs. Here’s what my burnt out plastic bottom looks like inside:
The 2 gold pins in the top center are contacts from the charging ring on the other side. The small circular pin dead center is the pushbutton on the bottom of the mug, which actuates a small SPST switch on the bottom of the PCB
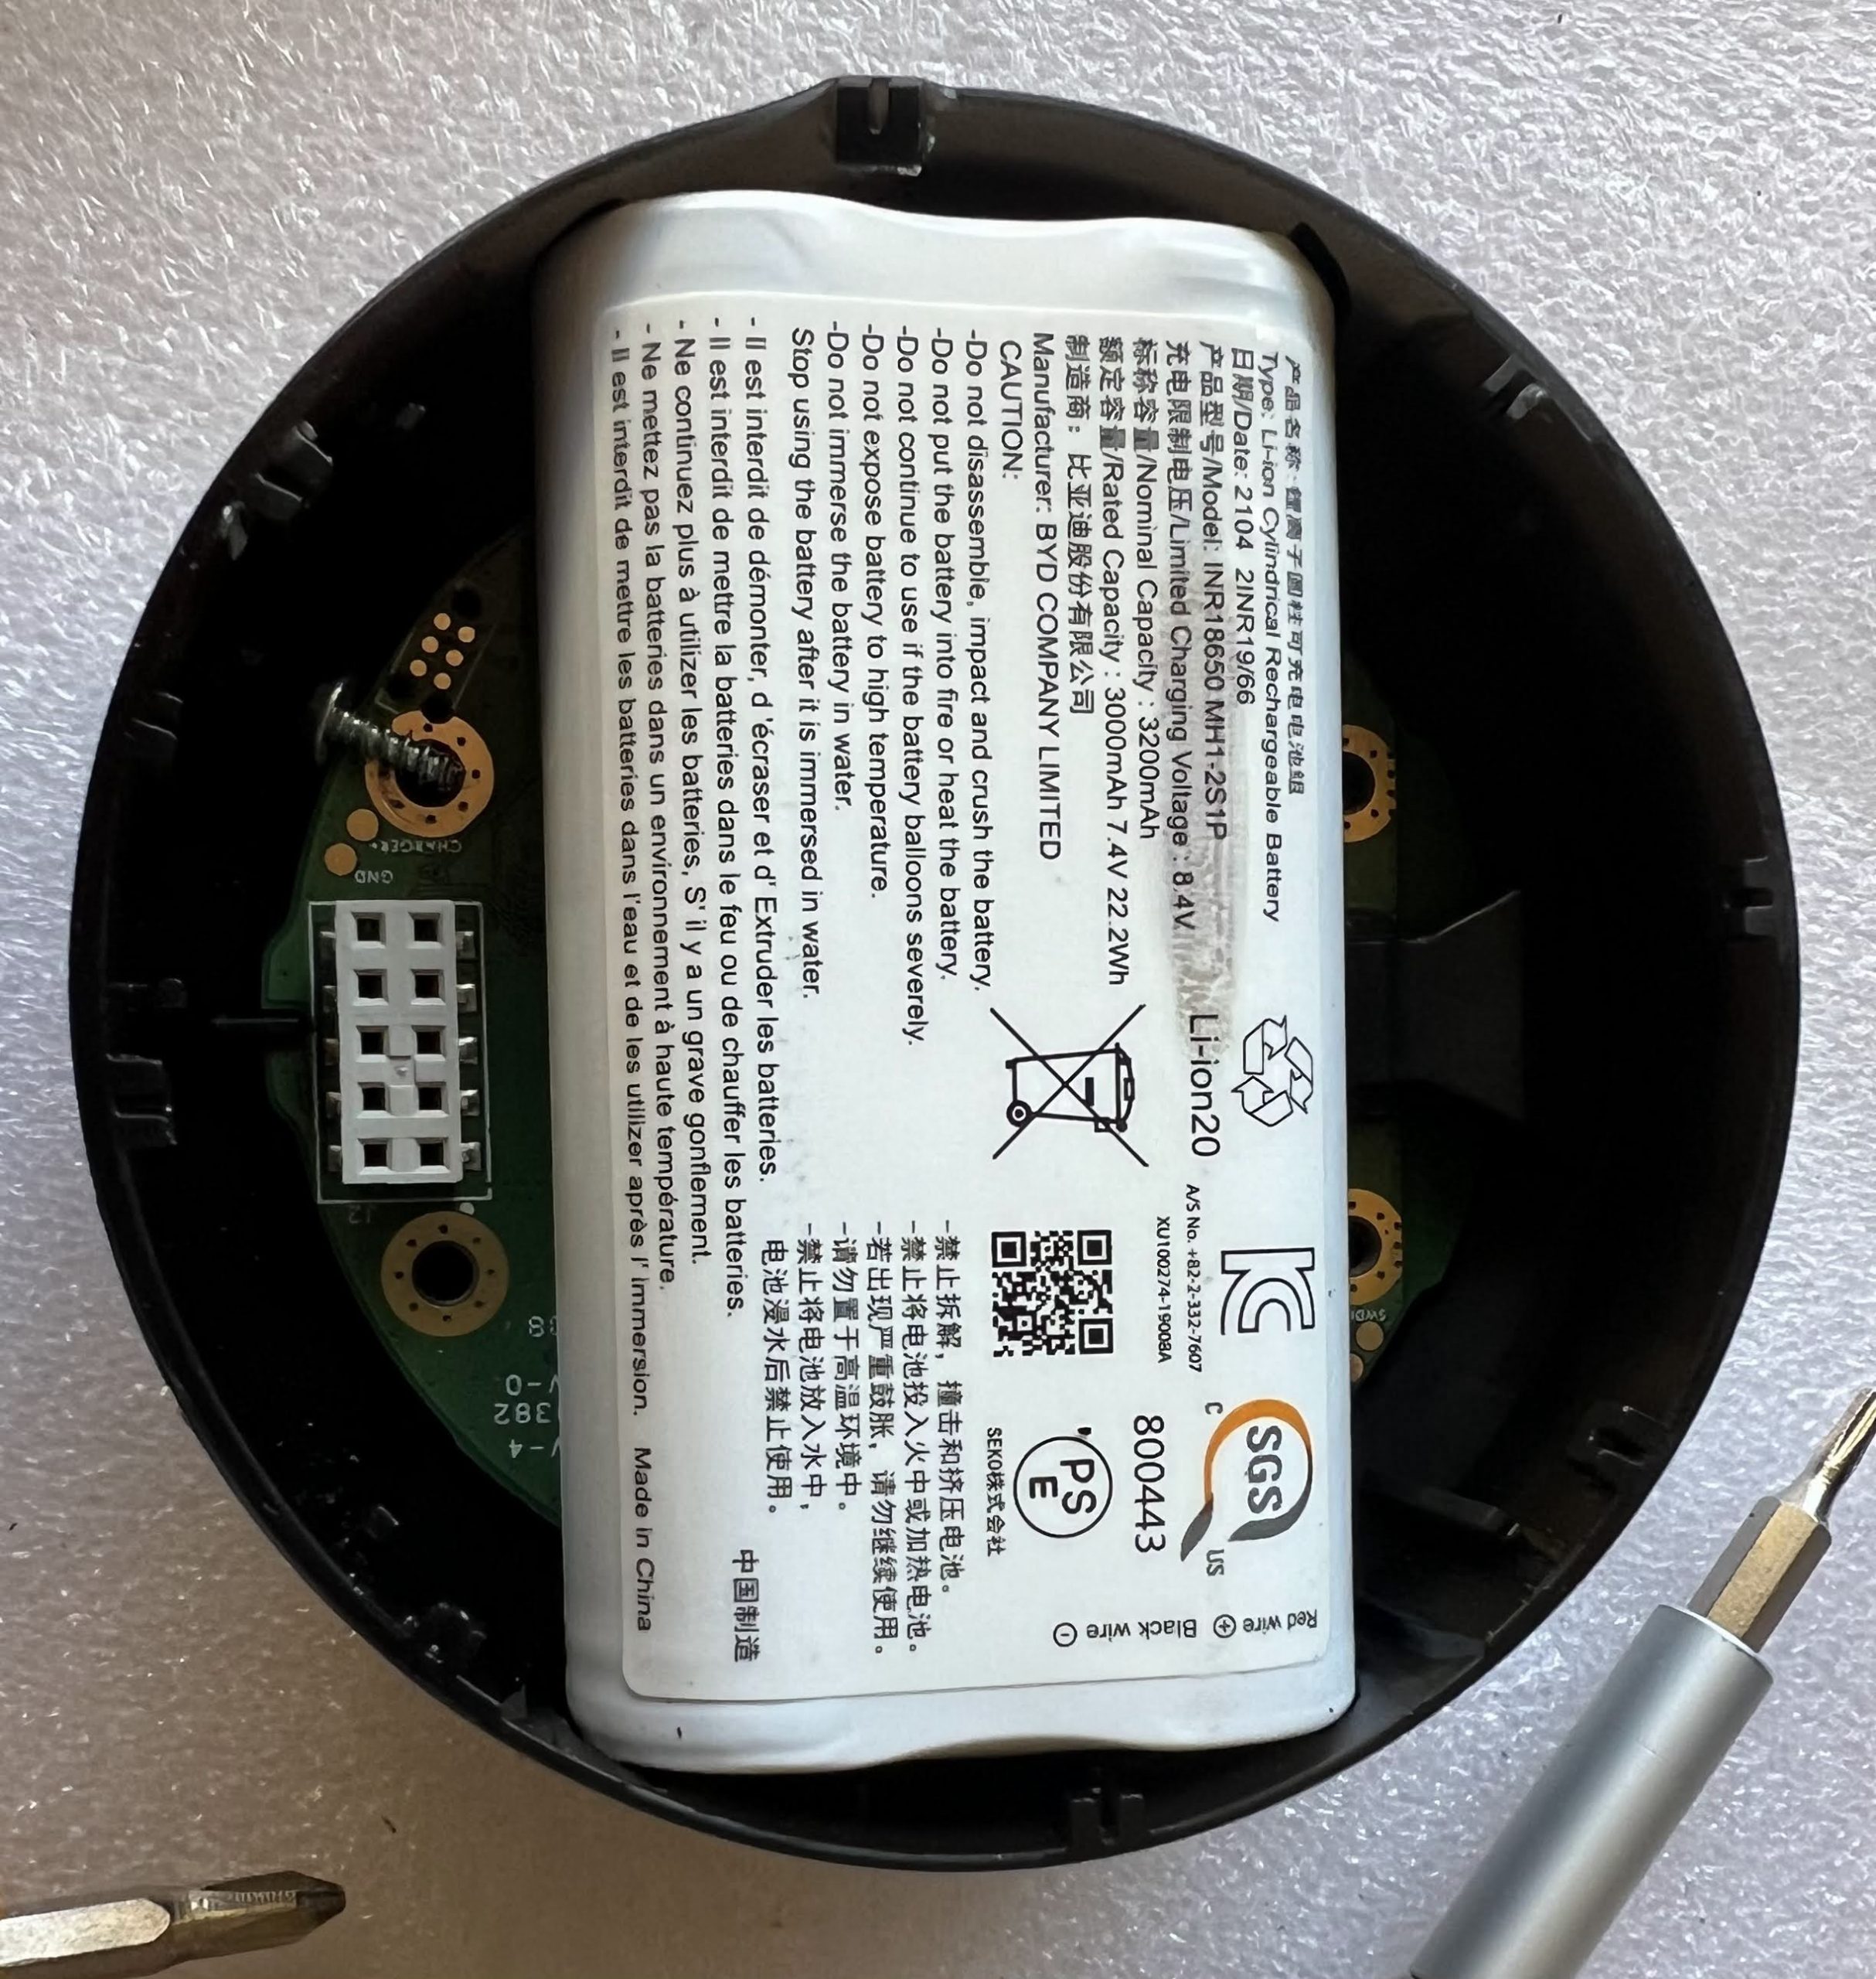
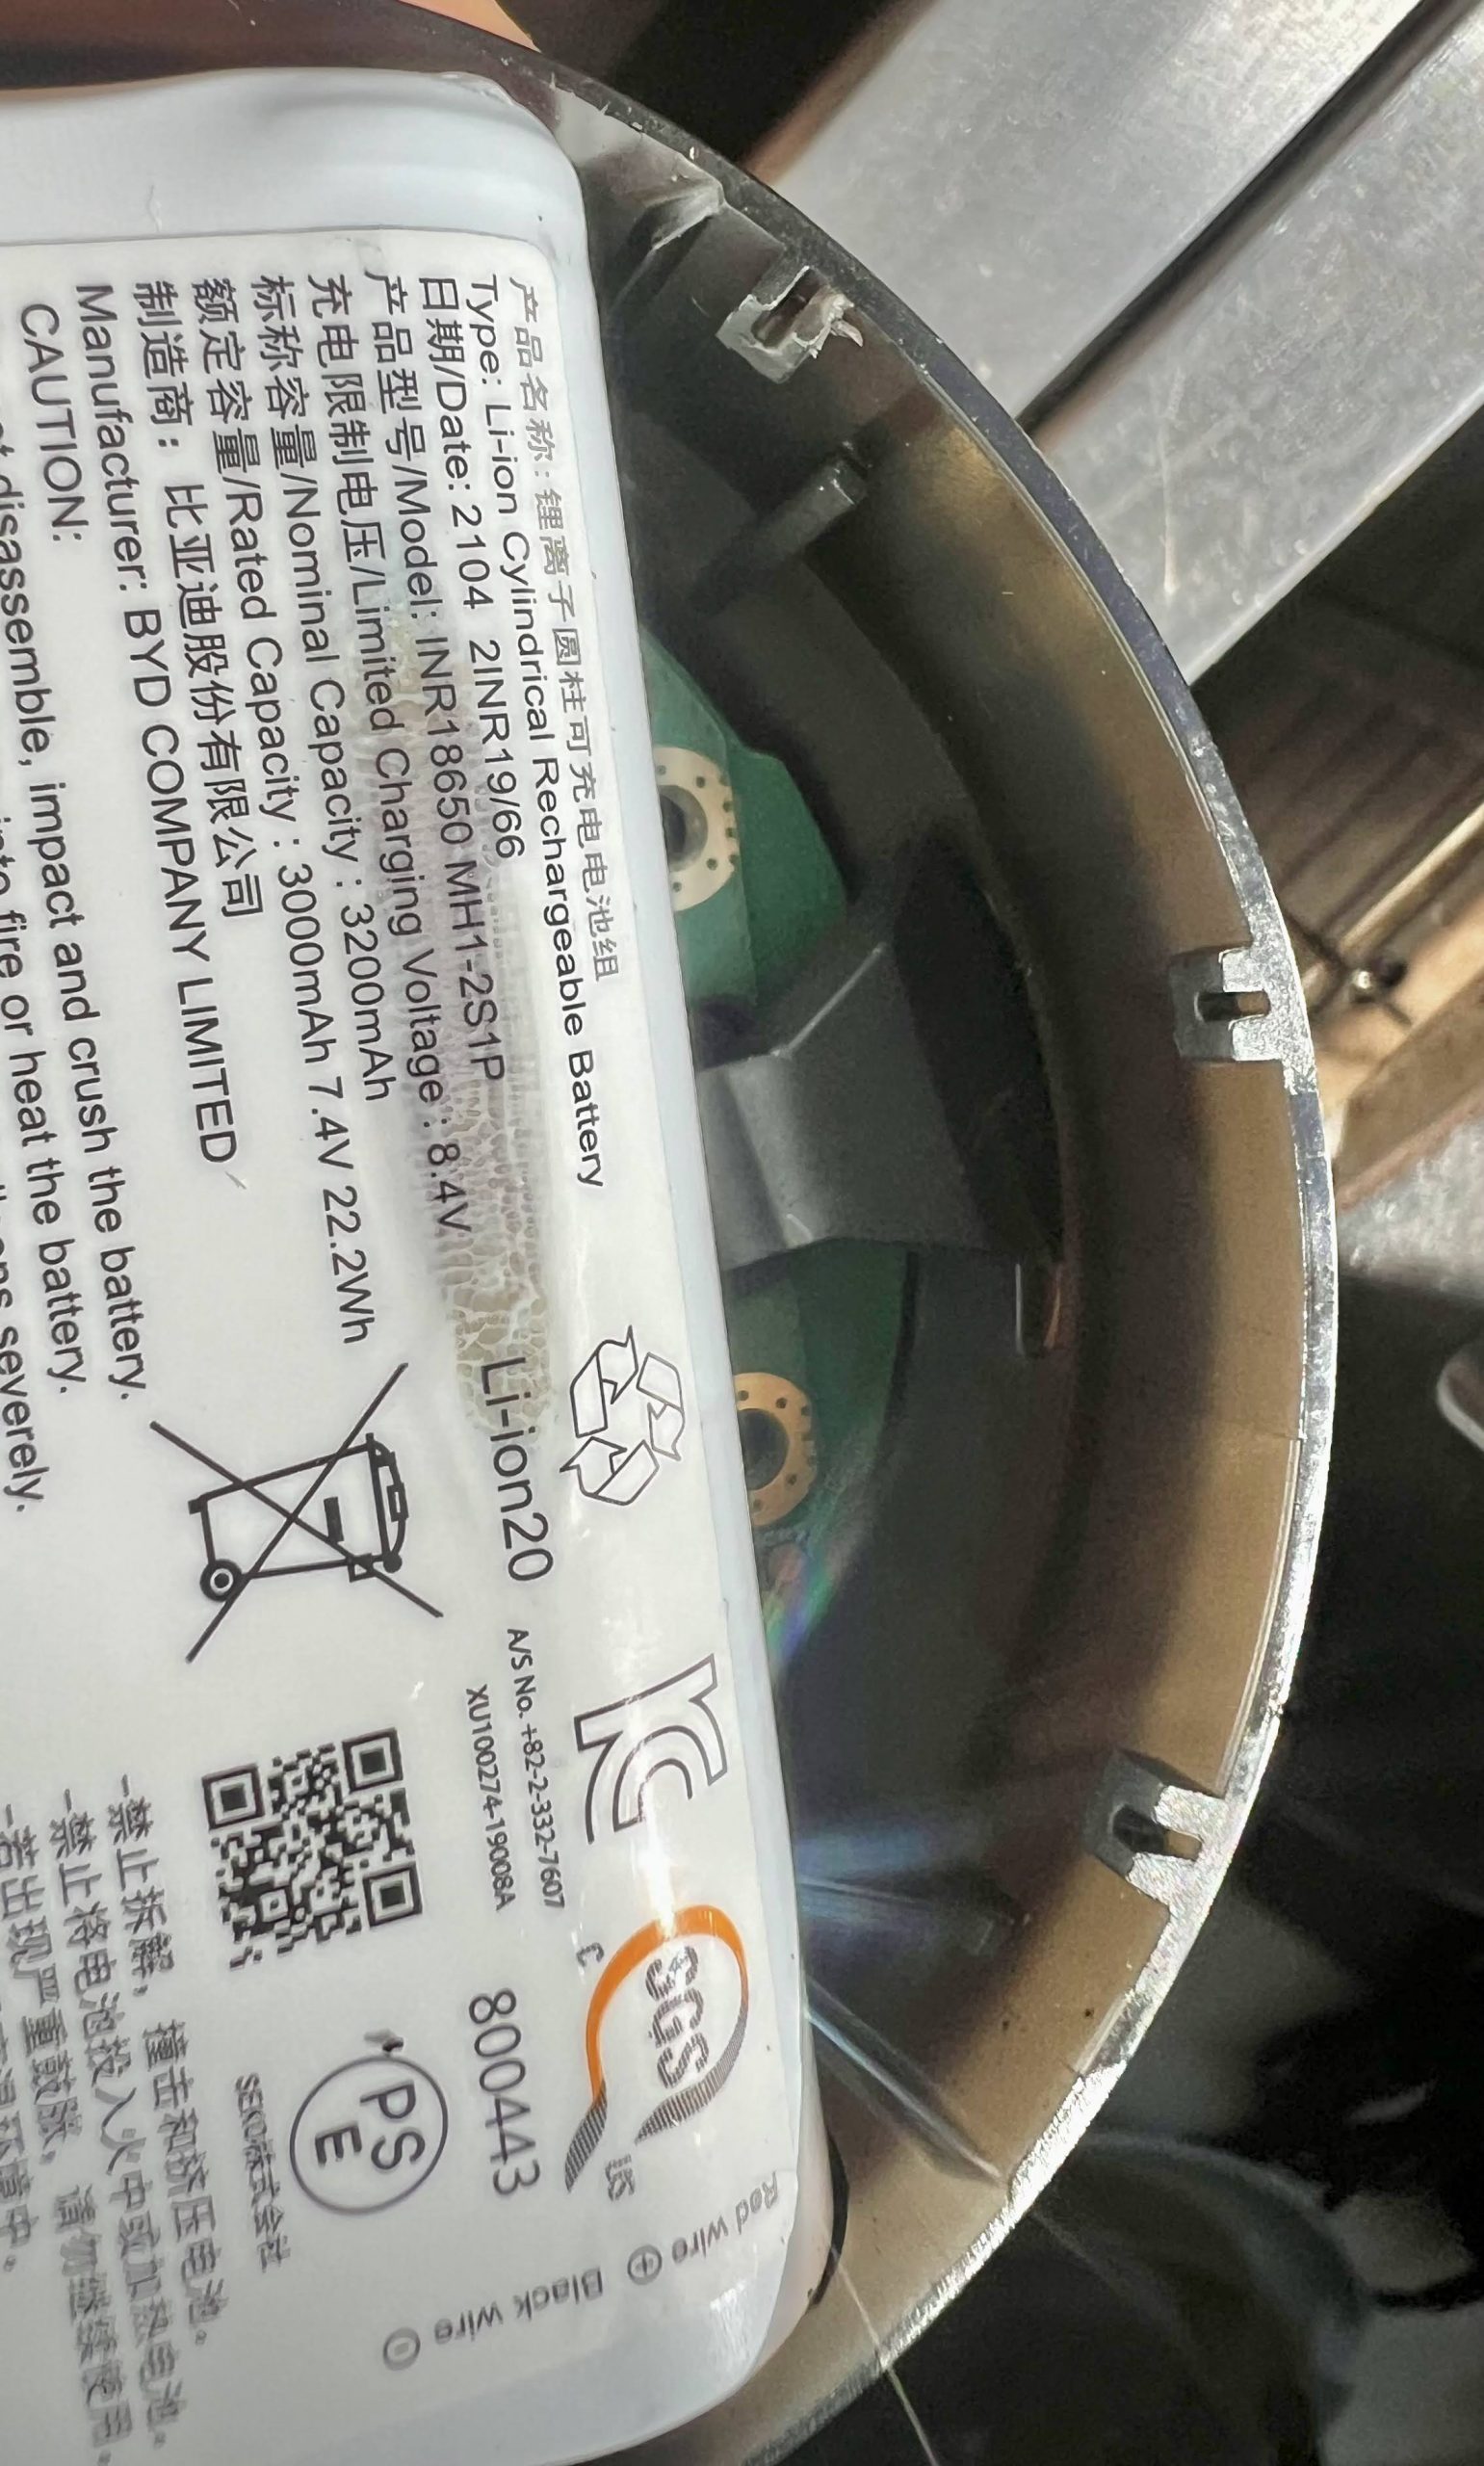
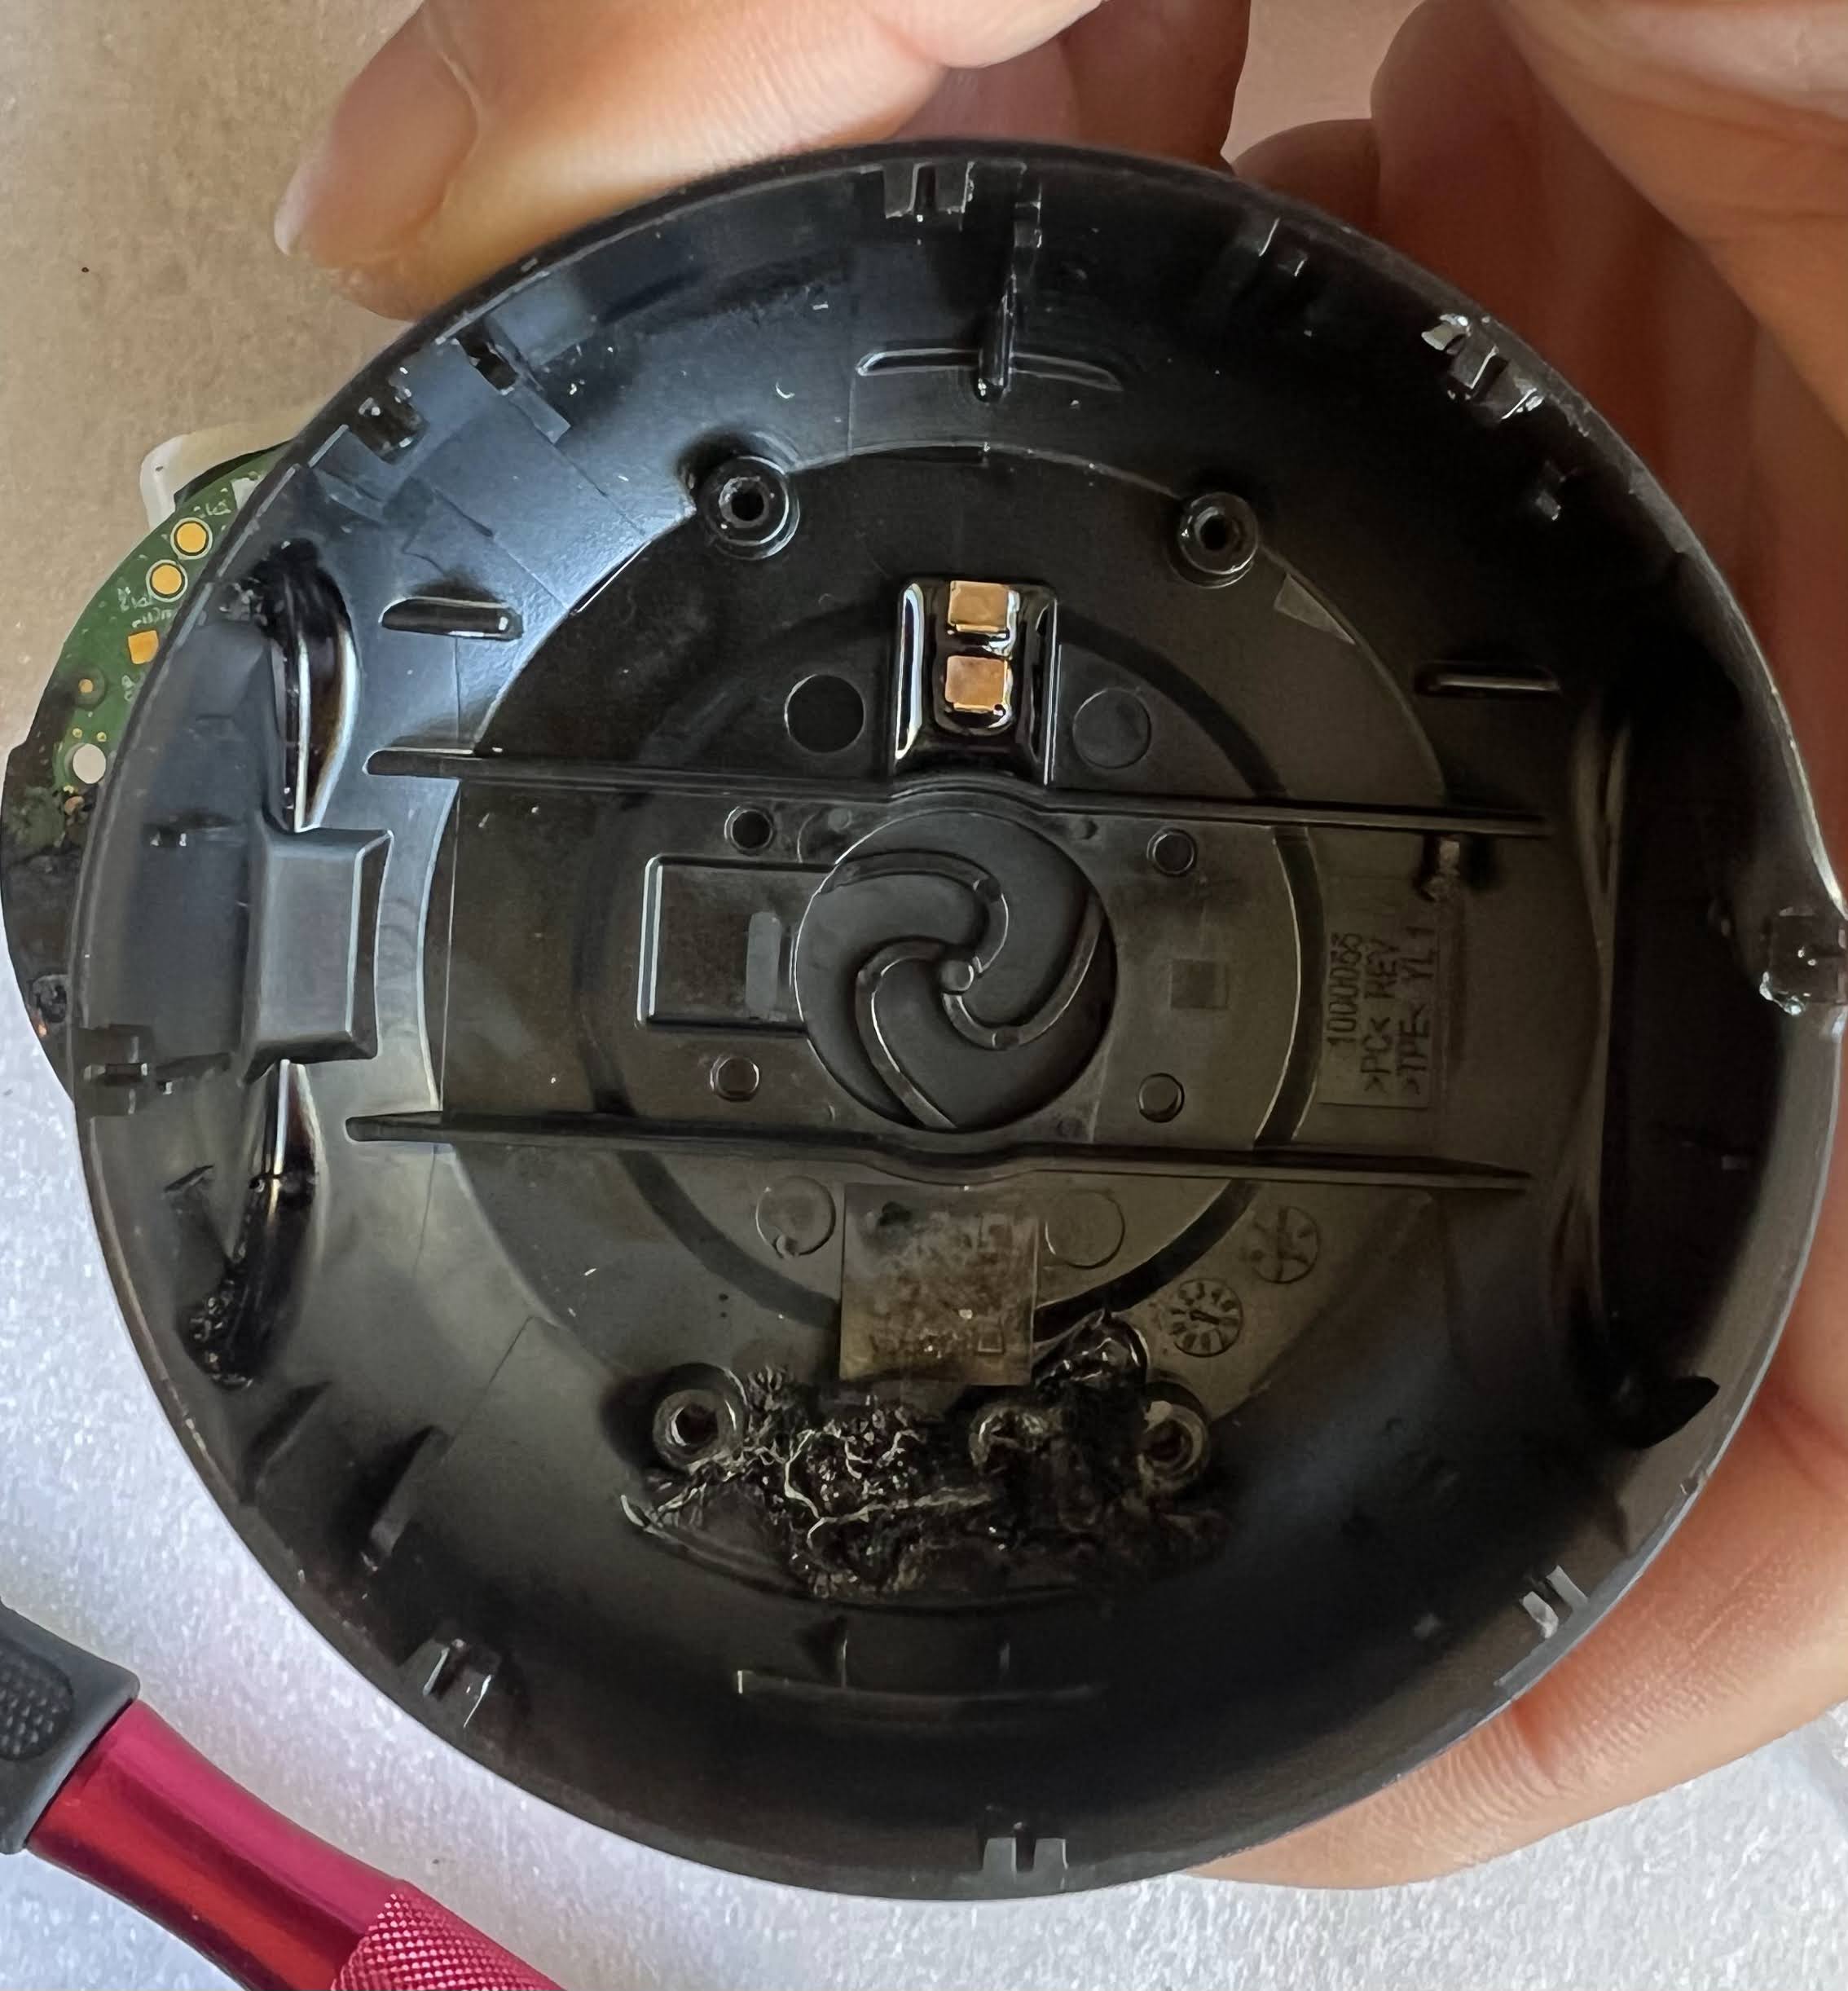
The battery is just a couple standard 18650 cells welded together in a plastic casing, along with the protective circuitry. If you have a Mug 2 with a worn out battery, Ember won’t sell you a replacement. It’s not to hard to just rebuild the pack w/ two new 18650 cells. Here’s my scorched PCB:
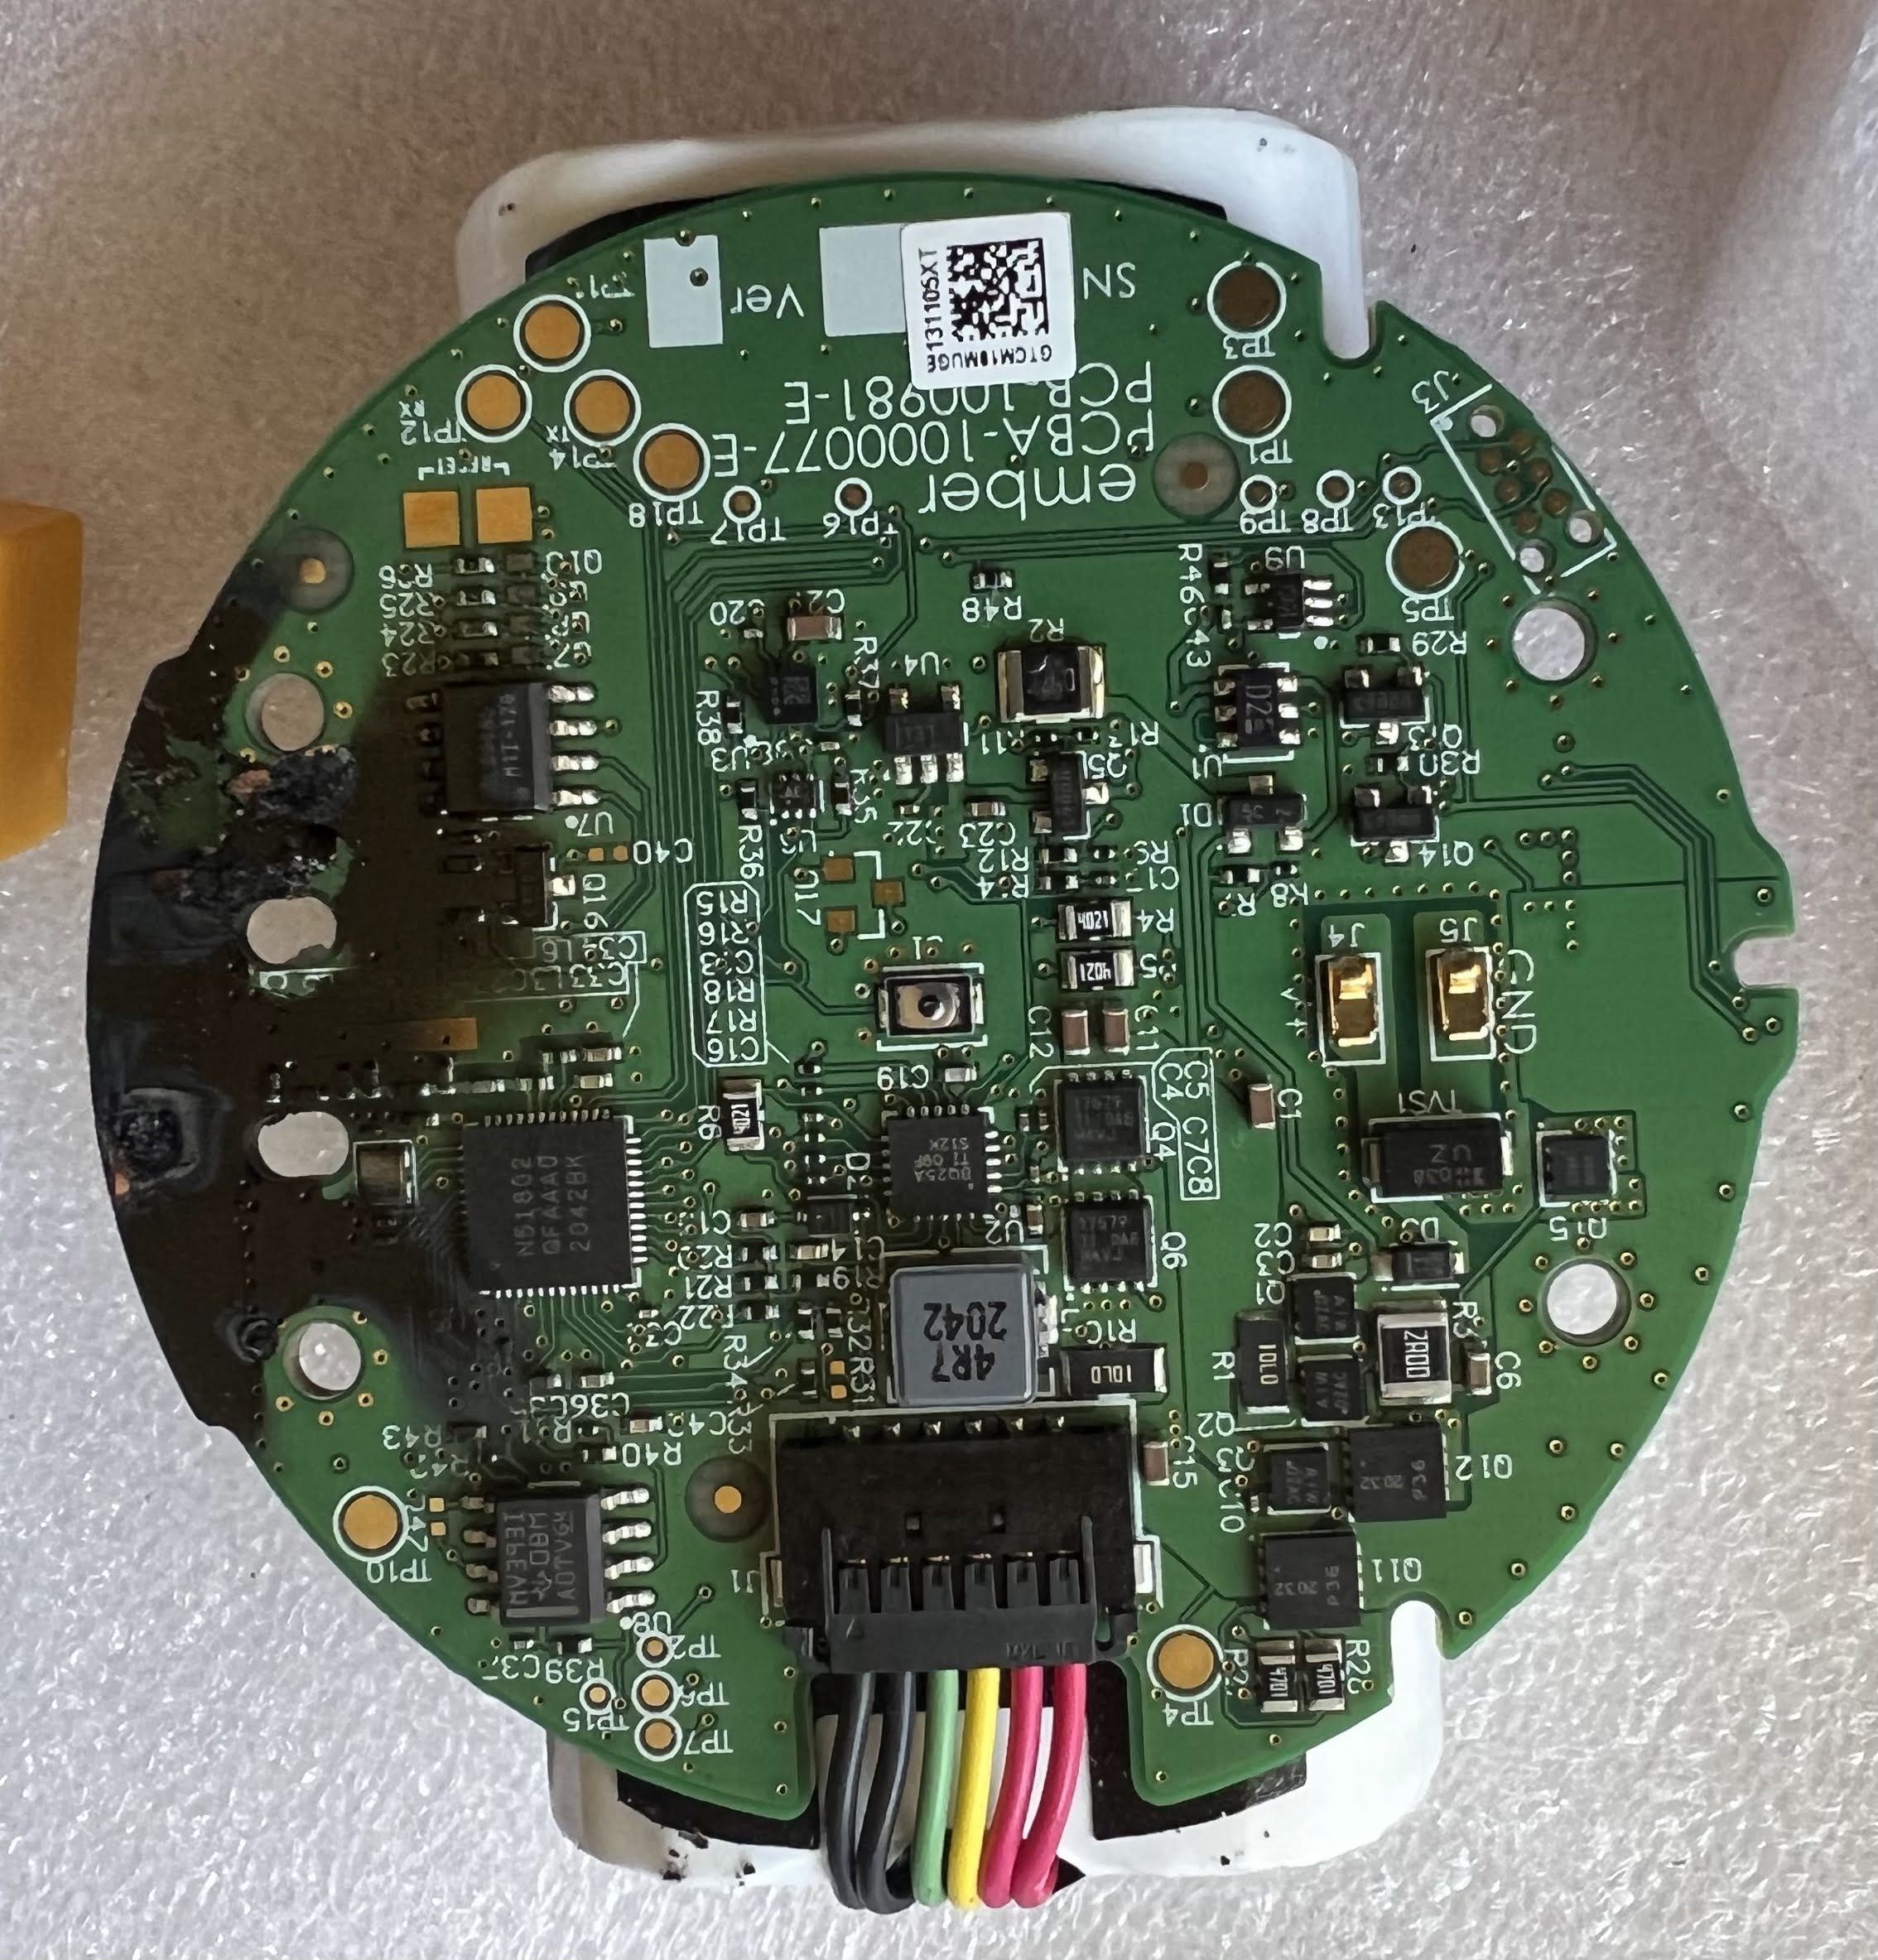
The battery connector is on the bottom of the photo above. I measured the voltage between the red and black wires, and it was zero. The yellow and green are sense wires. I am not going to even try to apply 7.4V to the burnt PCB to see if it still works. Here are closeups of the connector that goes into the top of the mug:
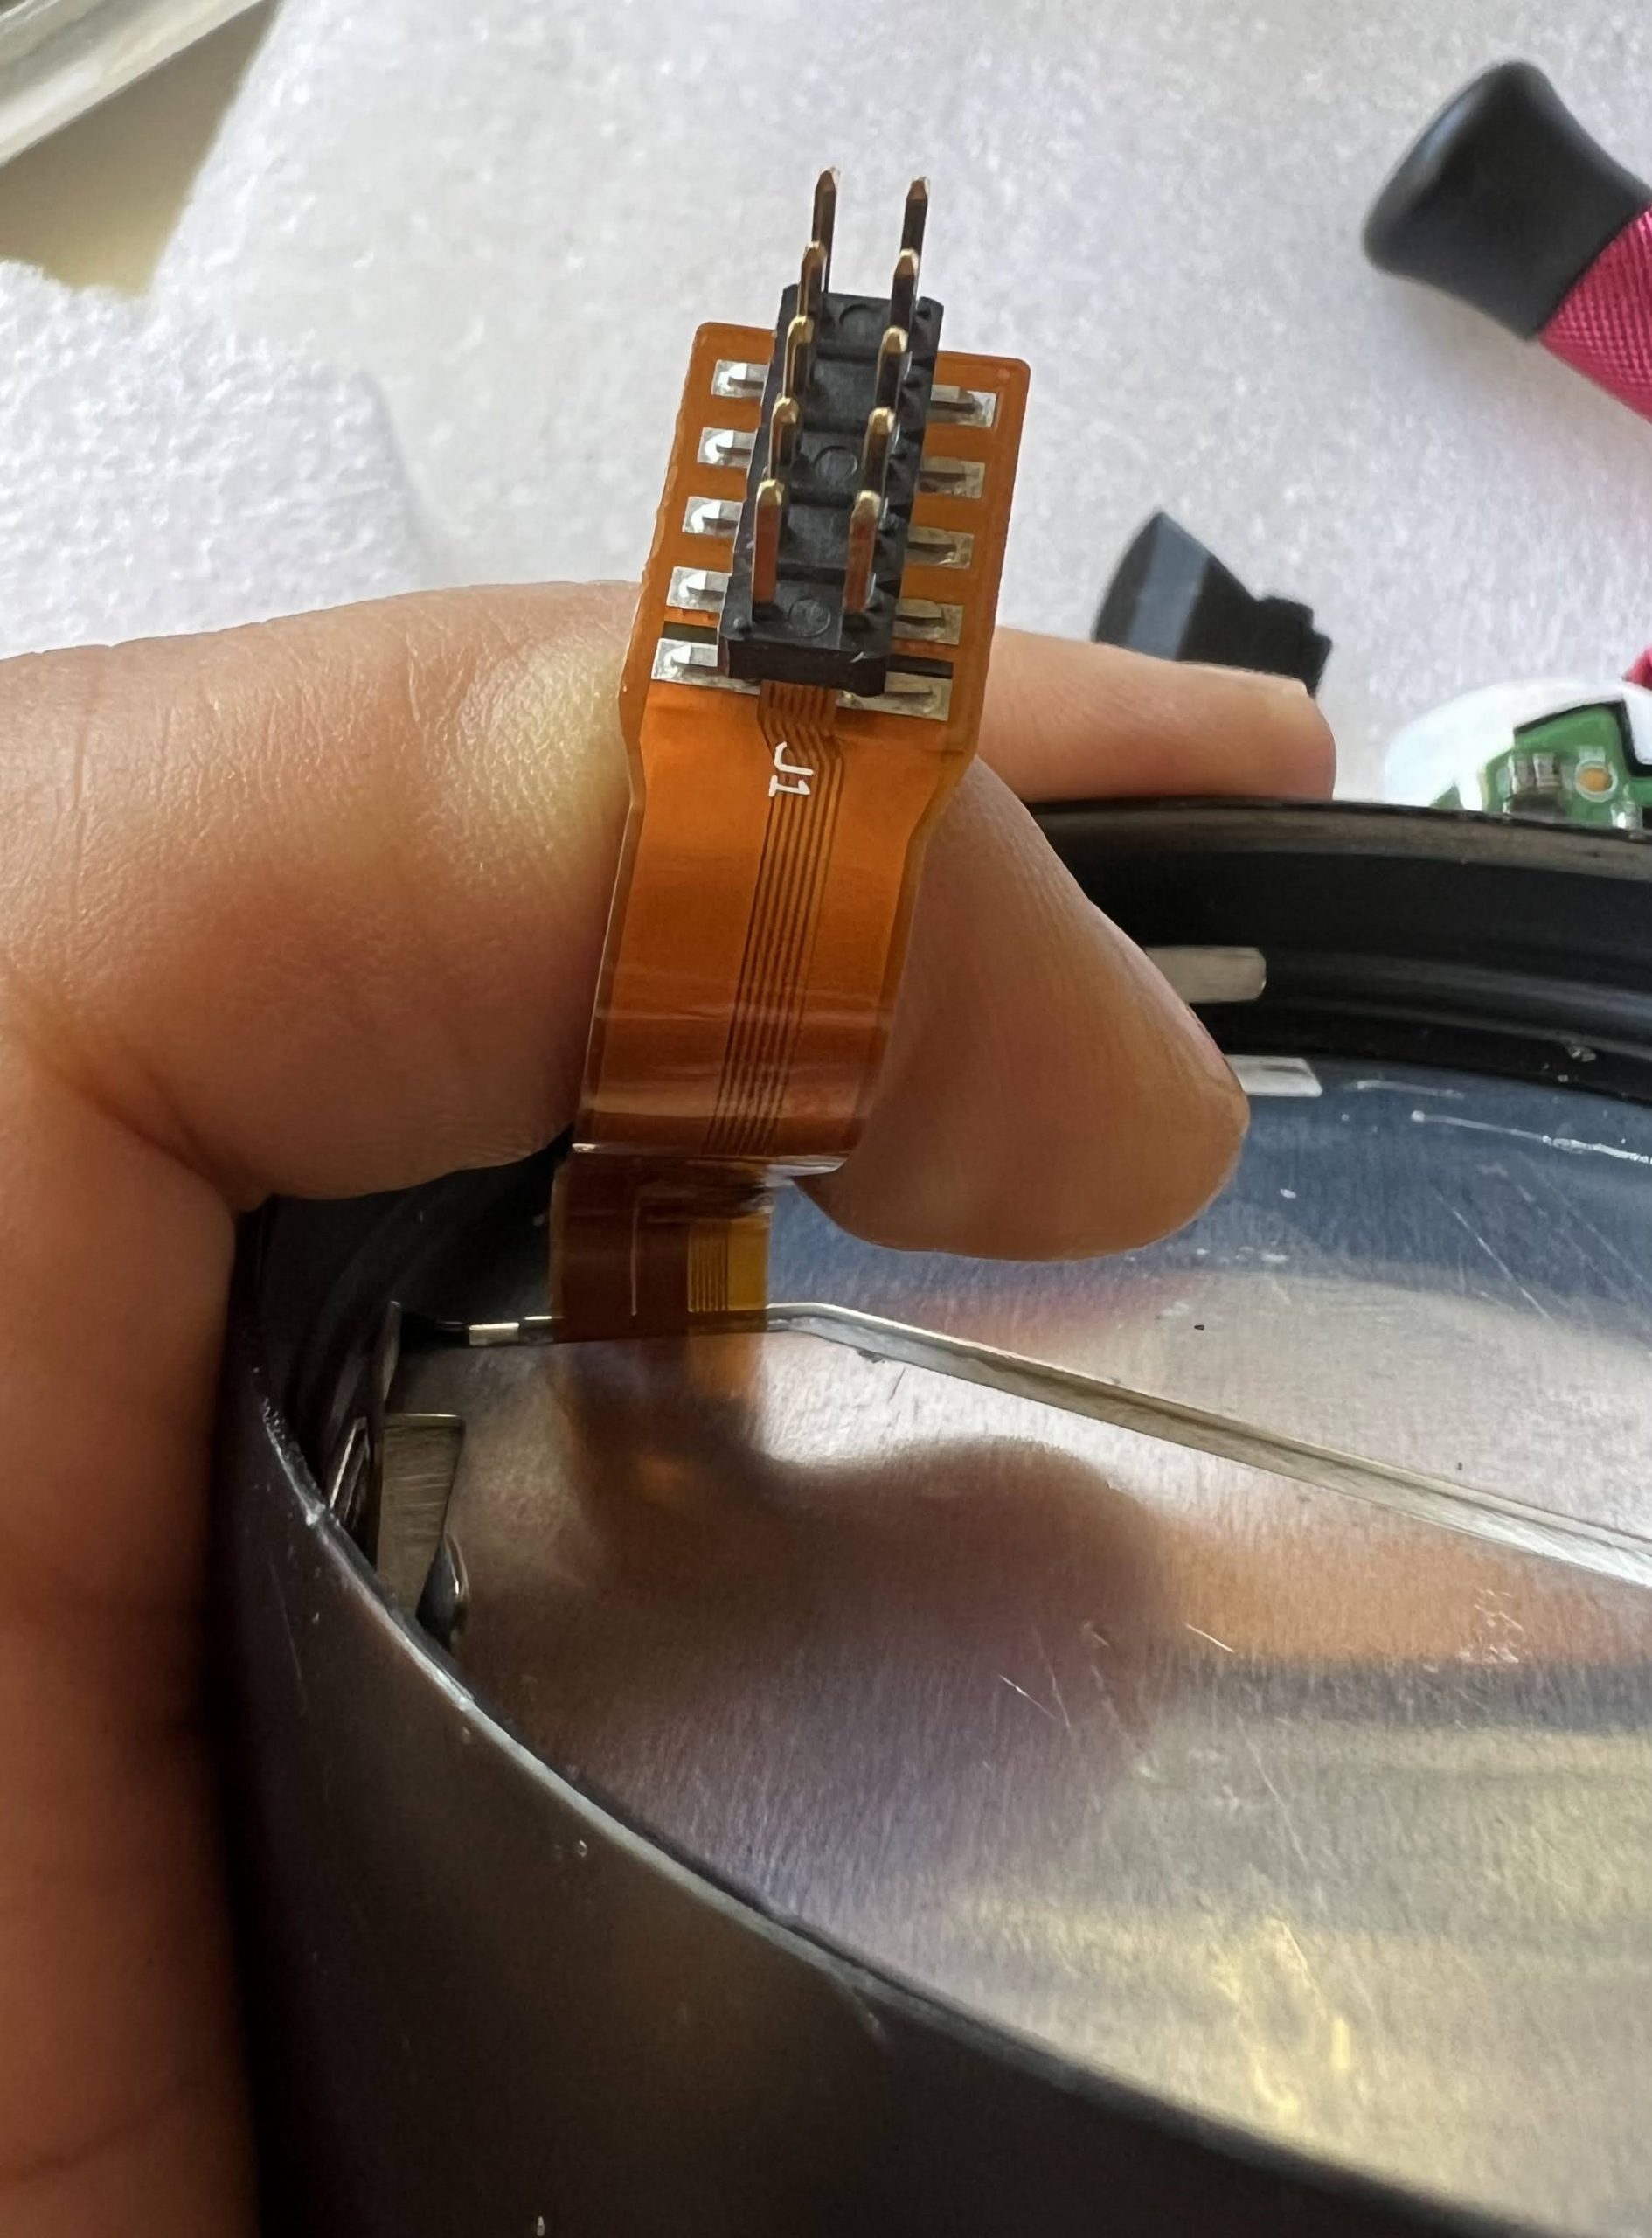
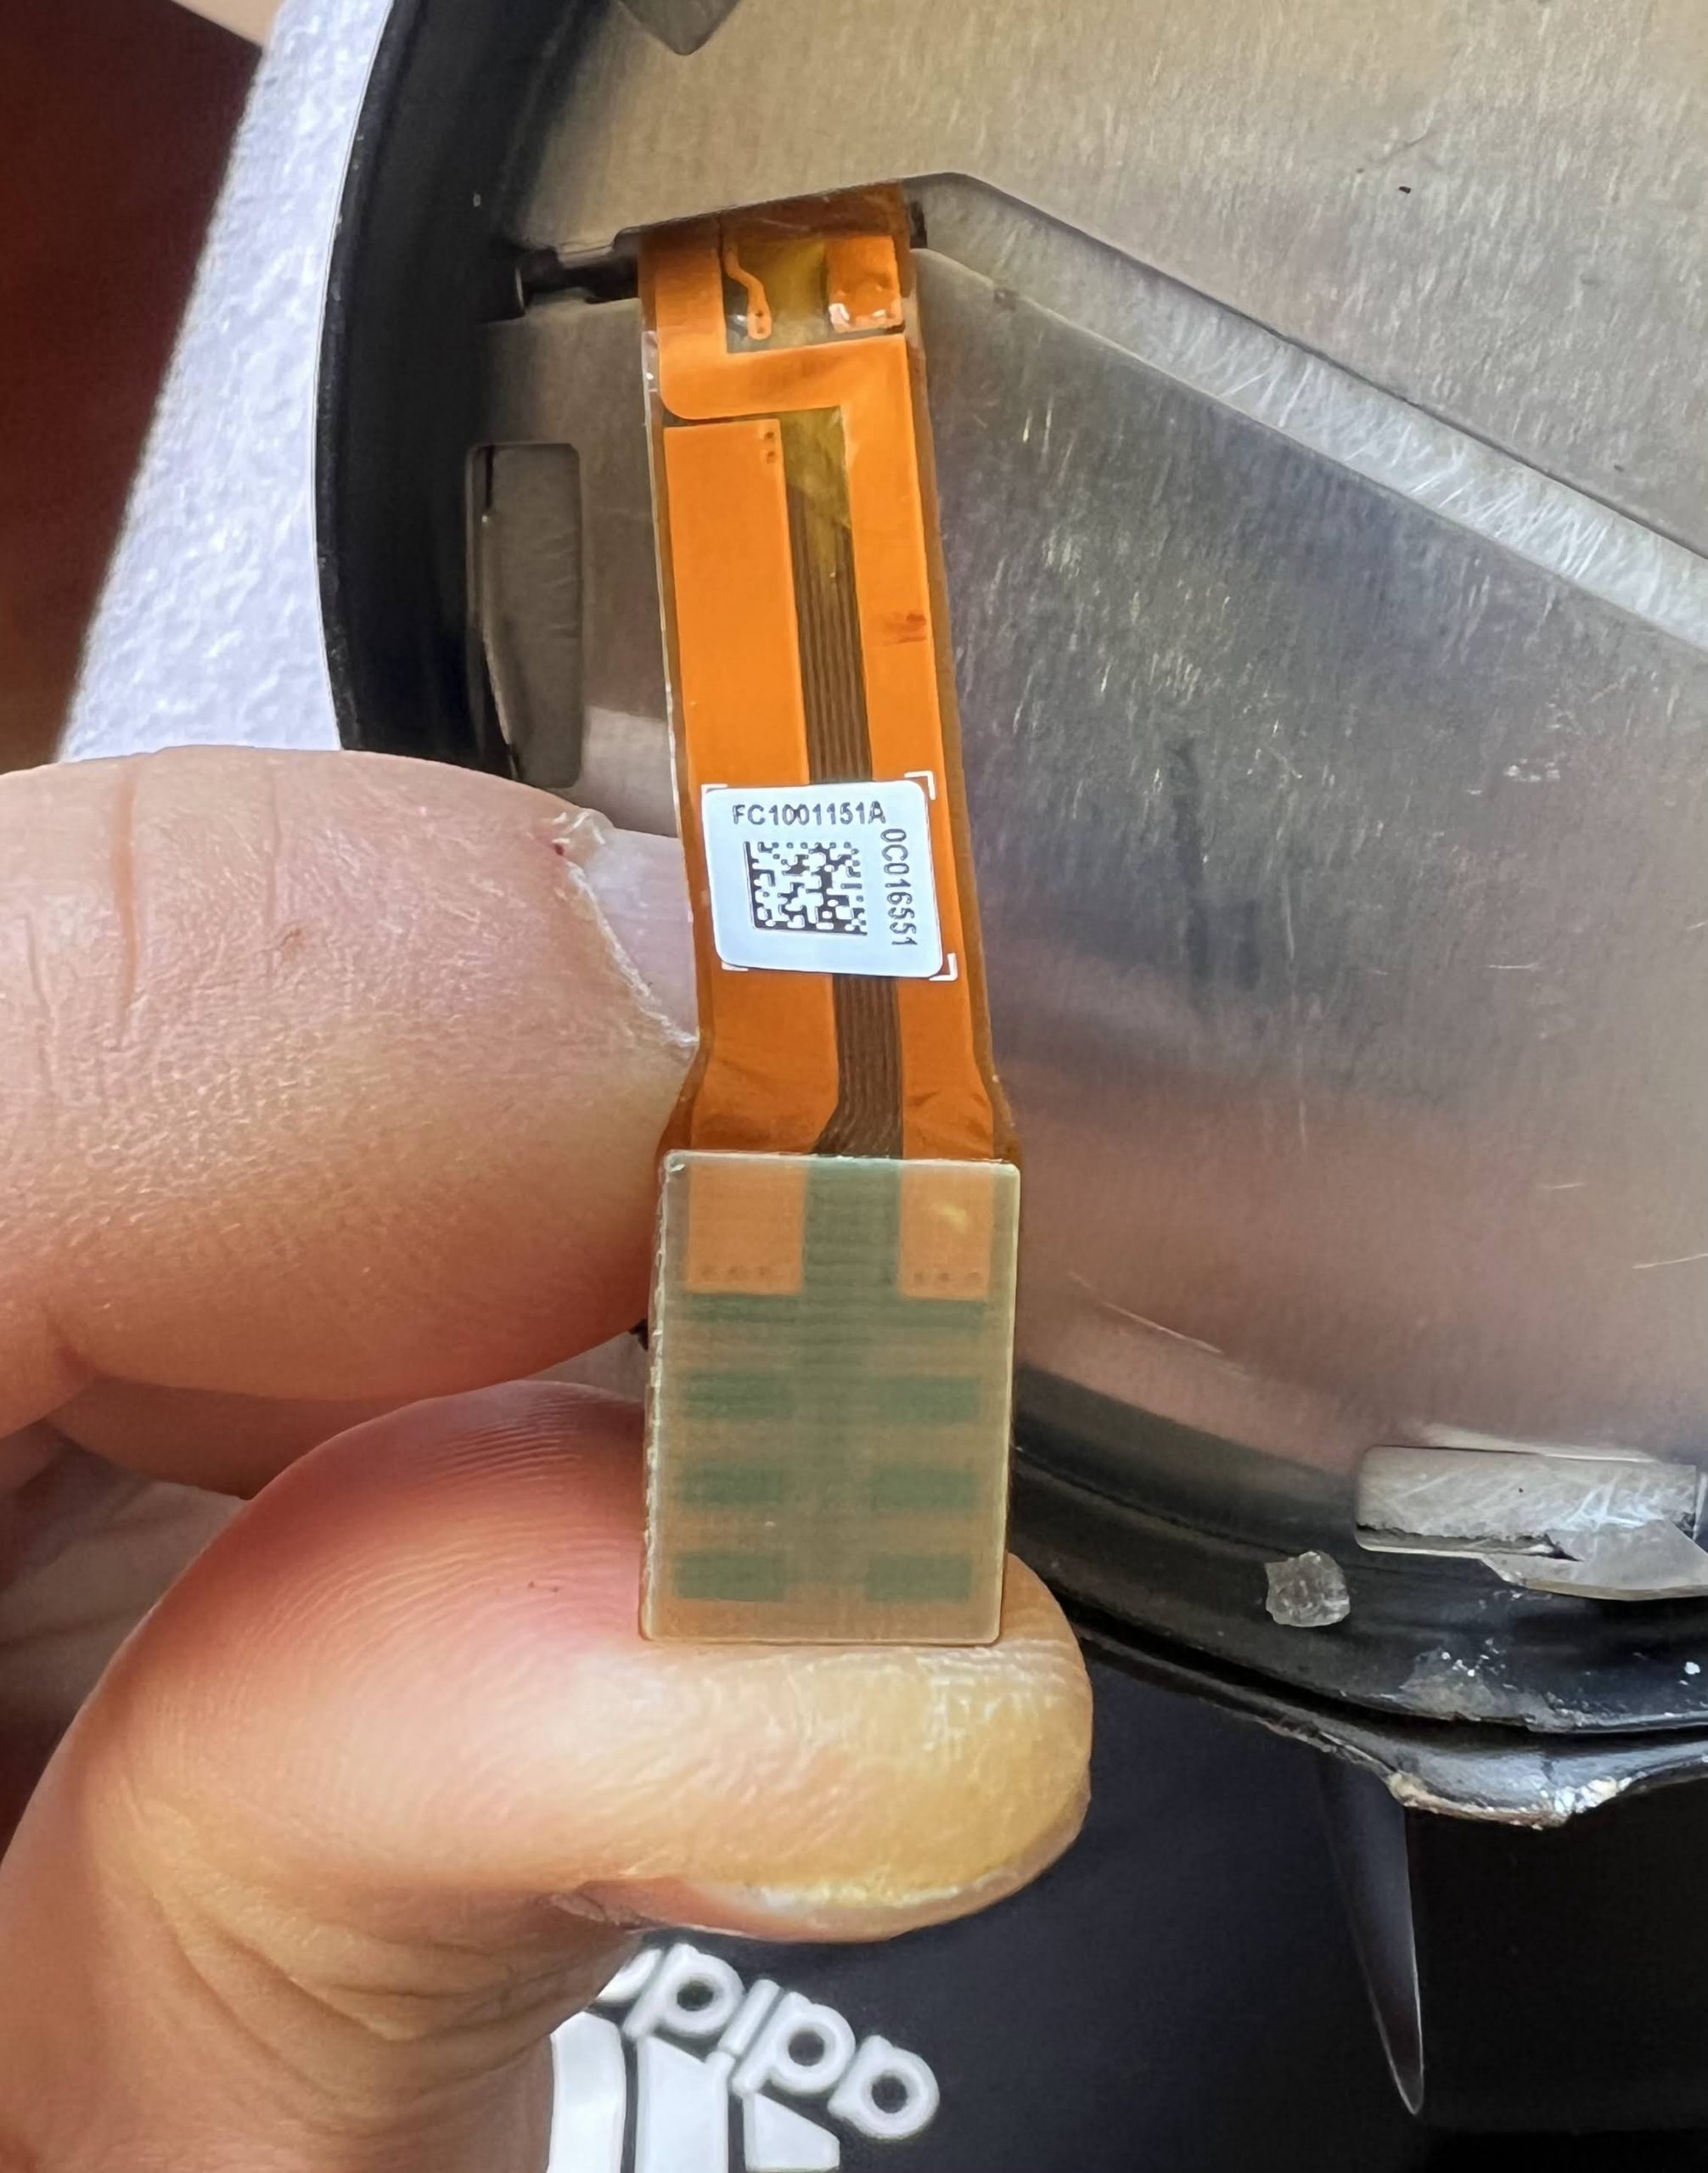
It’s obvious that the fat traces are for the heater. Next, I need to figure out what voltage/current the heater needs, as well as what kind of temperature sensor is attached at the other end.
It will be non-trivial, but not too difficult to cook up a circuit w/ an ESP32, along with firmware to resurrect my Ember Mug 2.
Update: It turns out since the last time I searched for a teardown of the Mug 2 in December, someone else has also done it. Here is a post on iFixit from 1/20/2024: https://www.ifixit.com/Teardown/Ember+Mug+Destructive+Teardown/169250
I too did a teardown and made a replacement 3D printed bottom cover. I would be happy to send you the .STL file.
Wow, I wasn’t expecting such a fast response. I’m actually already writing another article about my findings regarding the temperature sensor and heater. Did you damage your mug, as well? Did you manage to repair it? Sure, I’d like a copy of your STL, or better yet, the source file, if you don’t mind, just in case I need it.
I will be happy to send you the .STL files but do not know how to attach them to this forums mail. I you contact me at PM 1agkirk2@gmail.com I will attach them there. They are for a 81mm cup, which may be 10oz. I think the 14 oz cup is larger. I also have the remains of my teardown which you are welcome to for the postage cost. I opened the cup using a Dremel grinder by successively taking 6mm slices upward from the bottom. I nicked the flat cable but it should be repairable. Has good battery and PC board plus other hardware. I have photos of my teardown sequence is they woul be of any use.