My house has a crazy amount of sprinklers. In the front yard alone, there are 14 channels, which have been controlled by two very old Irri-Trol DewBee 7-channel units. I’m sure that they were fancy high-end stuff when they were purchased, but they look like they’re over 20 years old. Not only were they a pain in the ass to program, but for the past year, they’ve been flaky, watering on the wrong days. Another irritant is that they use a 9v battery backup which doesn’t last very long, so every time we have a long power outage, I’ve had to spend 1/2 hour reprogramming them. It was high time for a replacement, but I couldn’t find anything that met my all of requirements at the hardware store:
- easy to program
- supports 14 channels
- non-volatile program storage, so no reprogramming needed after long power outages
- automatic clock setting after power outage
- inexpensive
In addition, I thought it would be cool to be able to control it from the Internet, so I could change the settings if necessary, when away from the house. I recently started playing with my Raspberry Pi, and was looking for a project to do with it, as a way to learn the ropes. An Internet-connected sprinkler with a web browser interface immediately came to mind. The RPi seemed perfect for the task, with its built in Internet connectivity, SD card, and tons of RAM. One thing I’ve found with Arduino is that it’s easy to run low on memory when implementing web interfaces on it. No such problem with the RPi. The RPi doesn’t have enough GPIO pins to handle my 14 channels + an LCD display, but I figured that I could cook something up with I2C. The control aspect seemed relatively easy to handle, but then I started thinking about how much work the web interface would entail.
Before starting on my own DIY sprinkler, I decided to search for existing open source sprinklers and happened upon Ray’s Hobby’s OpenSprinkler. As soon as I saw it, I knew that I shouldn’t bother reinventing the wheel. OpenSprinkler is an Arduino-compatible system with:
- open source hardware and Arduino-compatible firmware
- ATMega 328 MCU, 16×2 monochrome LCD, Ethernet, and onboard USBtinyISP
- web-browser-based interface + direct HTTP interface for writing your own scripts
- 8 channels, extensible in increments of 8 channels with extension boards
- completely solid state, using 8 triacs instead of relays
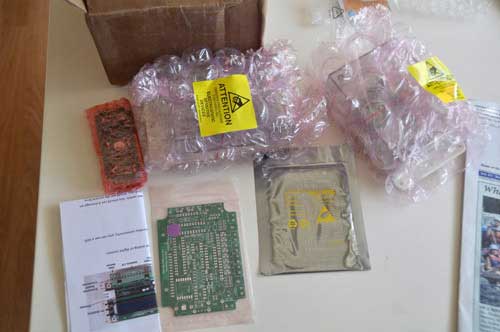
Since I needed 14 channels, I ordered a DIY OpenSprinkler 1.4u kit ($89.99) and an extension board ($25.99). Pre-assembled SMT boards are also available at higher cost. Shipping was very fast, and I received a box a few days after I placed the order. The kit came nicely packaged, with bubble wrap protecting all of the delicate parts:
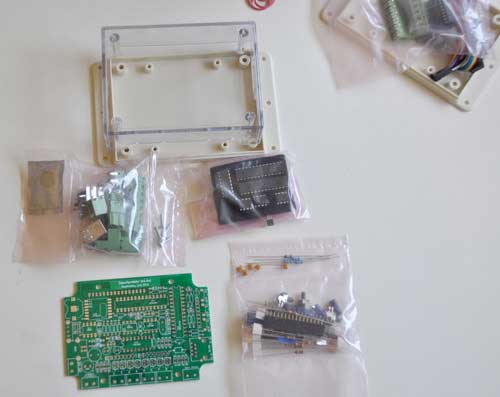
The components were also bagged in separate groups, which made finding the parts easier:
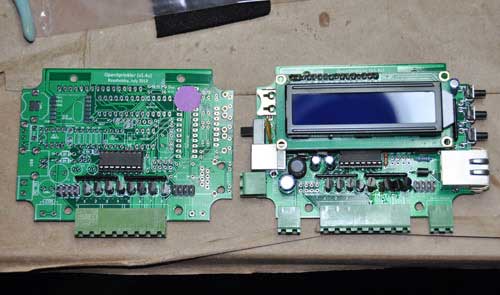
Ray’s Hobby has great documentation on their website. The step-by-step assembly instructions are very clearly written, with lots of photos, and easy enough for even a noob to follow. It took me about 3.5 hours to assemble both the main board and extension board, and one hour of that was spent undoing a careless error on my part. I inadvertently soldered 4 of the triacs on the main controller board backwards, and had to clip the leads and solder them onto the top of the PCB in order to reverse the connections. You can see in the photo below that the rightmost 4 triacs are all askew due to my messy rework:
The kit doesn’t come with a 24V transformer, so I salvaged one from one of my DewBees. The firmware is completely open source Arduino code, and is hosted on github. The controller has a built-in USBtinyISP, so you don’t need an FTDI cable or programmer to load the firmware. It comes preloaded with the latest release, so I didn’t test uploading new firmware yet.
Ray takes the cautious approach, walking the user through inserting only the switching regulator and testing the power supply voltages before inserting the remaining IC’s. After verifying the 5V and 3.3V supply voltages, I inserted the rest of the IC’s and to my delight, the unit powered up flawlessly on the first try:
The unit has a test mode that is entered by pressing and holding the top button while powering up. In test mode, it cycles through the channels, turning each one on for 5 seconds. I tested the triacs with a voltmeter, and was happy to find that I hadn’t fried any of them or messed up any PCB traces while doing my rework.
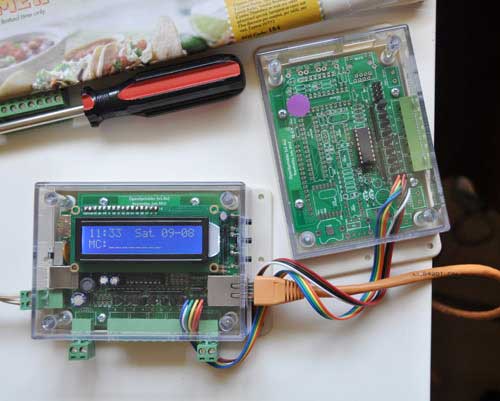
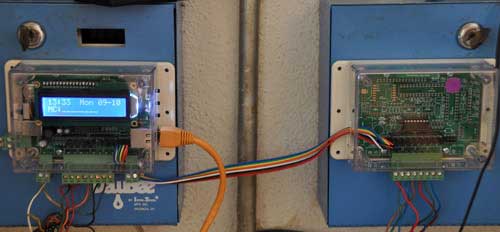
I mounted the units on top of my existing controllers by simply sticking them on with double-sided foam tape:
This way, I can revert to the old controllers when I sell my house. I’m not sure if the new owners will be savvy enough to figure how to connect it up to the Internet, figure out the IP number mapping to the unit, and then pull it up on a web browser.
For Internet connectivity, I’m using an old Linksys WRT54G in running DD-WRT in wireless repeater bridge mode. An added benefit is that I can now use my house’s WiFi from my driveway, where the signal was previously too weak. I have my router set up to assign a fixed IP to the OpenSprinkler. If you forget the IP number, pressing the 2nd button displays the current IP number and TCP port.
The web interface is a bit quirky, but it’s easy to use once you figure it out, and has a terrific graphical preview screen. The preview screen is actually one of the features that really sold me on OpenSprinkler, because it makes it very easy to check your programming for errors:

Ray cleverly gets around the limited memory of the ATMega328 MCU, and avoids having to have an onboard SD card by hosting a bunch of javascripts on his own webserver. This means that in order for the web interface to function, the unit must have Internet connectivity. You can host the scripts on your own LAN if you wish, but then you need to have a webserver running at all times.
I’ve only OpenSprinkler running for a couple of days, but so far, it’s running flawlessly. I am very impressed with the quality of Ray’s Hobby’s products and detailed documentation, and would definitely recommend them to my friends. Ray is actively working on improvements to the firmware, and since it’s open source, I’m able to hack it any way that I please.
