I recently backed Paul Stoffregen’s Teensy 3.0 on Kickstarter. Paul is a contributor to the Arduino project, and is the creator of the Teensy line of AVR-based Arduino compatible boards. Of all of the projects on Kickstarter that I have backed, the Teensy 3.0 was the by far the fastest to ship after the close of funding.
Teensy 3.0 is not currently listed on the PRJC website, as Paul is working on first fulfilling all of his Kickstarter pledges. However, if you are lucky, you might be able to score one via this hidden URL: http://www.pjrc.com/store/teensy3.html.
Unlike the its 8-bit brethren, Teensy 3.0 is based on a 32-bit ARM Cortex-M4 MCU, specifically, Freescale’s “Kinetis” K-series PK20DX128VLH5 (first batch, subsequent batches will be the functionally equivalent MK20DX128VLH5).
Here are Teensy 3.0′ technical specs:
- 32 bit ARM Cortex-M4 48 MHz CPU (M4 = DSP extensions)
- 128K Flash Memory, 16K RAM, 2K EEPROM
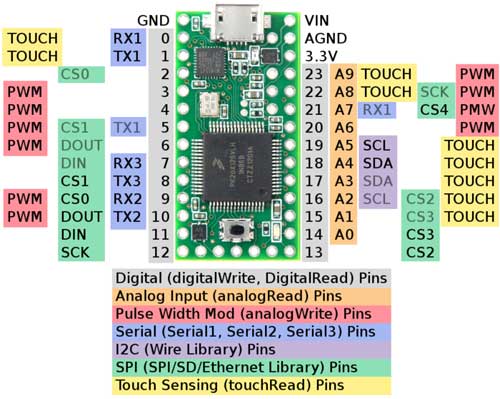
- 14* High Resolution Analog Inputs (13 bits usable, 16 bit hardware)
- 34* Digital I/O Pins (10 shared with analog)
- 10 PWM outputs
- 8 Timers for intervals/delays, separate from PWM
- USB with dedicated DMA memory transfers
- 3 UARTs (serial ports)
- SPI, I2C, I2S, IR modulator
- I2S (for high quality audio interface)
- Real Time Clock (with user-added 32.768 crystal and battery)
- 4 general purpose DMA channels (separate from USB)
- Touch Sensor Inputs
All pins have interrupt capability.
* 14 Digital-only and 10 Analog/Digital pins are accessible around the exterior of Teensy 3.0, and available when used on a breadboard. 10 more Digital-only pins, and 4 more Analog-only pins are accessible at interior and bottom-side pads.
Note that that unlike Arduino, the I/O pins operate at 3.3V. This makes level-shifting a requirement if you want to interface to your existing 5V Arduino peripherals. On the other hand, 3.3V makes it ideal as a real-time I/O expander for the Raspberry Pi.
Like its other Teensy brethren, USB device support is built in. Software support for USB host mode is slated to be available in 2013.
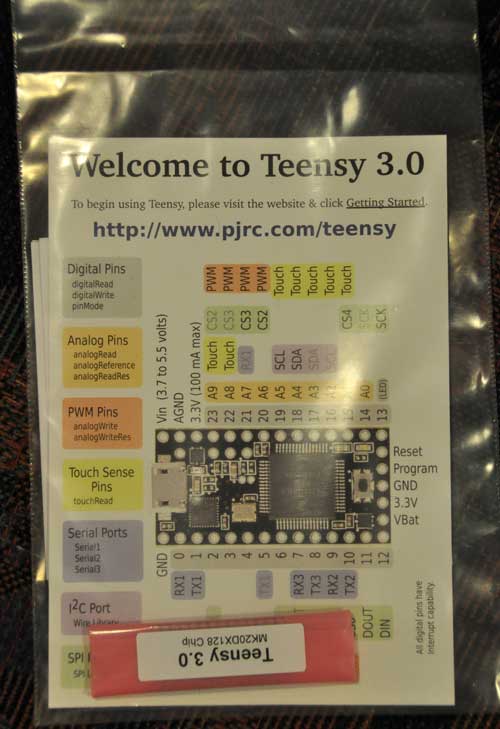
My Teensy 3.0 arrived in a padded envelope via USPS. It came packaged with a handy pinout reference card, which shows the pinouts and their usages on both the top and bottom of the board.
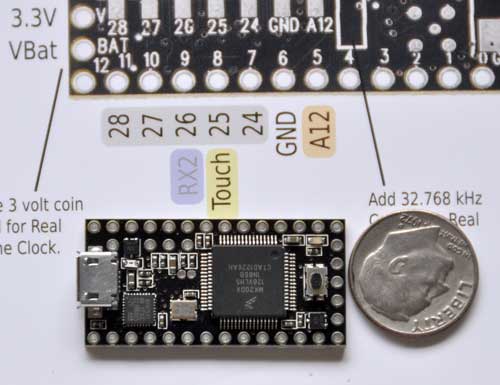
I knew the reason that it was named Teensy, but didn’t hit me exactly how teensy it was until I unpackaged it:
As of this writing, the the software is in its 5th beta, and is distributed as a pre-configured Arduino 1.0.1 distribution. The download links are listed in Kickstarter Update #18: Fifth Software Update. After launching the Arduino IDE, select Tools->Board->Teensy 3.0. Once Teensy 3.0 isselected, an interesting menu becomes available at Tools->CPU Speed. The default setting is overclocked at 96MHz, which PRJC claims will run stably. You can also select 48 or 24 MHz.
The board is pre-loaded with the standard Arduino LED blink sketch. All I have tested so far is to verify that I am able to compile and upload the Blink sketch. Note that in Files->Examples->Teensy, there are a many of standard Teensy example sketches, but I’m not sure how many of them are currently working with the Teensy 3.0. The File->Examples->Teensy->Tutorial1->Blink sketch has the LED pin set to 11. In order to blink the onboard LED on the Teensy 3.0, you must change the pin number back to the standard Arduino pin 13. Like previous Teensy boards, the IDE launches Teensy loader to do the actual transfer to the board, rather than using avrdude.
Normally, it is not necessary to press the button on the board in order to initiate firmware upload, but it is there as a backup. Firmware upload is very fast, since the Teensy 3.0 has a native USB interface, rather than going through an FTDI Serial->USB converter.
I am looking forward to building projects with the Teensy 3.0, once I figure out a use for its extra horsepower.


