gCode Visualization

I was working on a project today, which had some serious overhangs. I added support material manually, but needed to make sure that slic3r was traversing a usable path through my supports. Usually, I use Repetier Host‘s excellent built-in gCode visualizer, but it only displays a layer at a time, and I needed to see the actual paths followed in each layer. After searching a bit, I found an excellent online visualizer: gcode.ws:

Image3


It is very full featured, with sliders that let you step through your gCode layer by layer, and also line by line within a layer. Additionally, it prints out a lot of useful statistics within your gCode.

While running it in a web browser is handy, since you don’t need to install any software, sometimes, I need to have access to it when I have no Internet access. Fortunately, the visualizer is open source, and is written in javascript, so you can also run it directly from your hard drive. First, download the zip archive from github:

https://github.com/hudbrog/gCodeViewer/archive/master.zip

Unzip the archive, and simply launch index.html. I had security issues running it in Chrome, and it froze up in Internet Explorer, but Firefox runs it just fine. To run it in Chrome, you must launch it with the command line option “–allow-file-access-from-files” in order to lower the security so that it can access files locally, but it doesn’t work if you already have a running copy of Chrome.

On Windows computers, if Firefox isn’t your default browser, you can just right-click index.html, and select Open with->Firefox.

Image3


Many thanks to hudbrog for making this excellent tool.

Kossel-Linco Delta Printer: Part 1 – Magnetic Effector and Arms + Vertical Carriage

I’m currently designing my first delta 3D printer. It’s based on Johann Rochell’s Kossel Mini, but I’ve modified or redesigned just about every part, except for the bottom vertices. The first design decision I made was to get rid of the expensive linear rails and sloppy Traxx joints. I like the magnetic ball joint concept, because 1) it gets rid of backlash 2) it makes it easier to assemble/reconfigure/repair the printer and 3) it’s just plain cool.

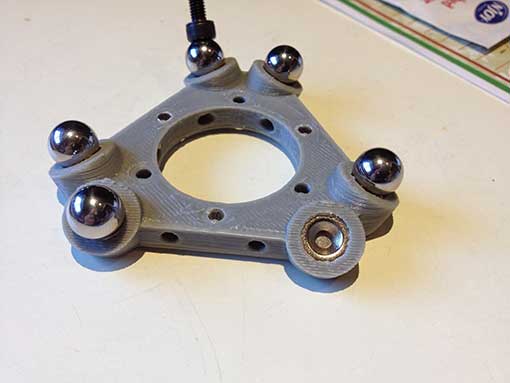
I used OpenSCAD to design the magnetic effector:

eff1

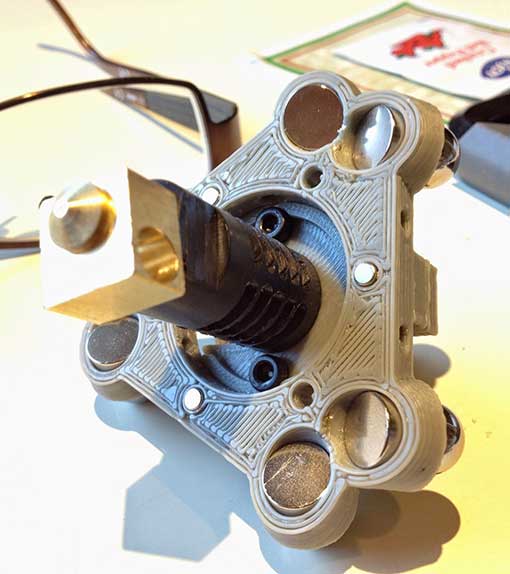
The 3/8″ chrome steel balls are each held to the effector by a 3/8×1/8″ N42 countersunk magnet stacked on top of a 3/8×1/8″ N52 disc magnet. It’s hard to see in the photo, but 3 of the six holes around the inner ring contain 1/8×1/4″ tubular magnets, allowing the toolhead to also be magnetically attached. This will allow me to quickly change toolheads on the effector without having to fiddle with bolts. I am still not sure if the toolhead magnets will be strong enough… only testing will tell. Though quick change could be done by simply swapping out effectors, I don’t like that idea for two reasons: 1) it’s more expensive and 2) different effectors will not be exactly the same, since they are printed, and can also warp, necessitating tweaking every time the effector is swapped.

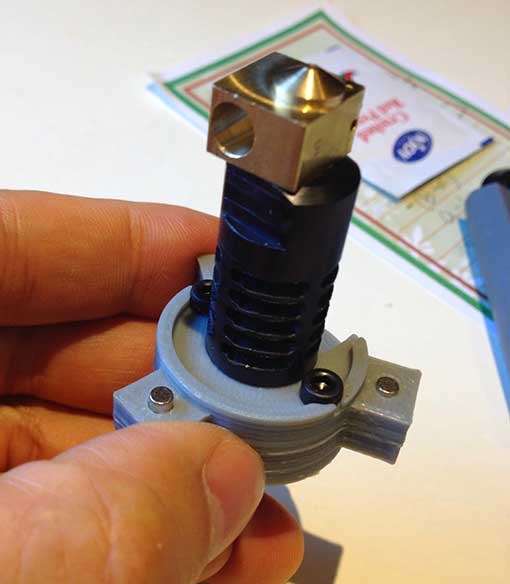
The first toolhead I designed is a J-Head groove mount for a bowden extruder:

gm1

Note the 3 magnets, which attach the toolhead to the effector. There is also a lip on the bottom of the groove mount, which engages the effector to center it, and make a more firm attachment to the effector. Top view of J-Head toolhead:

gm2

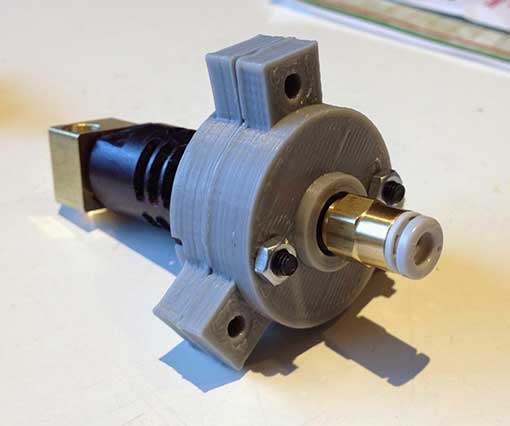
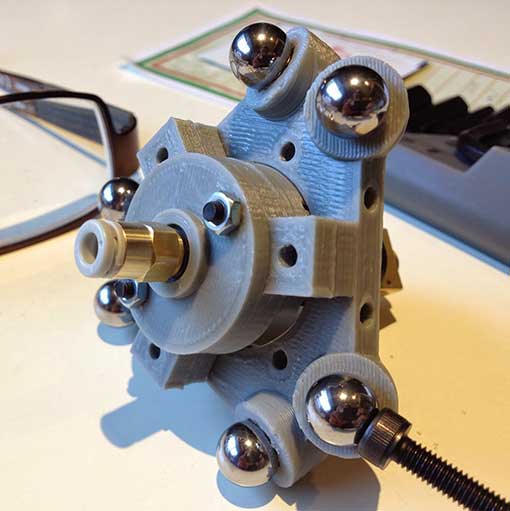
Below is the assembled effector and hot end:

efh1

efh2

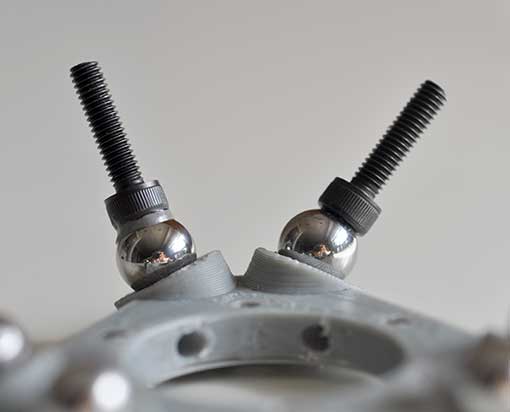
The most difficult problem was how to attach the chrome steel balls to my carbon fiber arms. Rather than glue the balls directly to the arms, I decided to attach the balls to screws, and then screw them into the arms. This technique has 3 advantages: 1) it gets rid of the need for accurate, square cuts on the rods, because the length can be fine-tuned by adjusting the screws , 2) the balls are easily replaced, and 3) the screw heads are magnetic, so they self-center and hold themselves to the balls while they’re being attached.

I used chrome steel ball bearings, they are very hard, and therefore wear resistant. However, chrome steel is very difficult to solder, and I don’t have access to a spot welder, so glue was the obvious choice for attachment of the balls to the screws. I tried both JB Weld and super glue:

glueballs

It was very convenient to glue the M4 hex head cap screws by simply first attaching the balls to the magnets. No clamping needed while the glue dried. I tested both for strength, and was not able to pull either of the screws off the balls by hand. Therefore, I decided to go with the super glue, because it’s easier to deal with since it dries in only a few minutes, rather than overnight, and there’s no messy mixing needed. In order to get a good bond, I first scuffed up the bolt head with some sandpaper. Then I cleaned both the bolt head and the steel ball with acetone before applying the super glue. After the glue dried, I tested the strength of each joint. 3 of them were weak enough that I could break the ball off, but after re-gluing them, they were just as strong as the others. Another advantage of using super glue was that it dissolves easily in acetone, so it was very to clean off the residual glue before re-gluing the failed joints.

Though it’s probably not needed, I am going to put tape between the balls and the magnets (note the tape under the leftmost ball):

tape
I bought some UHMW tape to try out, but it’s 7mil thick, and noticeably reduces the attraction between the ball and countersunk magnet. I’m thinking of trying out PTFE mouse tape next (it’s only about 2mil thick), but am afraid that it might be too soft, and wear down quickly. Surprisingly, regular old Scotch tape seems to work OK (it’s about 2mil thick),  so that’s another alternative to try.

For the arms, I’m using graphite strong wall rods from tridprinting.  The inner diameter of these tubes is conveniently, slightly smaller than my M4 cap screws. I used cutting wheel on a dremel with a flex shaft attachment to cut them down to size:

dremel

The flex shaft was necessary, because without it, I couldn’t cut perpendicularly to the tubing, since the cutting wheel is a smaller diameter than the dremel body. There are plenty of tutorials on how to cut carbon fiber tubes. The most important points are: 1) to put tape around the area of the cut to reduce splitting, and 2) to wear a mask to avoid inhaling the dust. To help prevent splitting when tapping out the holes for the M4 bolts, I printed out one of Ultibot’s excellent Delta Printer Arm Tap Jigs. The upper section was too long, so my tap couldn’t reach the rod, so I had to saw off a portion of it:

tap

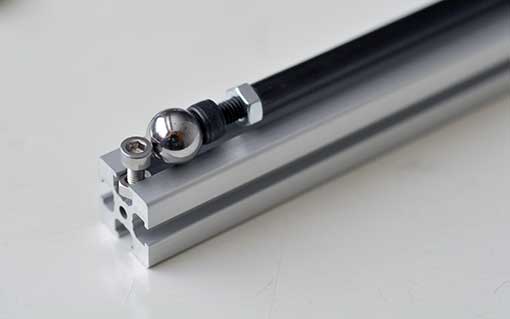
To get the rods all the same length, just put a few bolts onto a piece of 1515 extrusion to build an assembly jig:
jig1

jig2

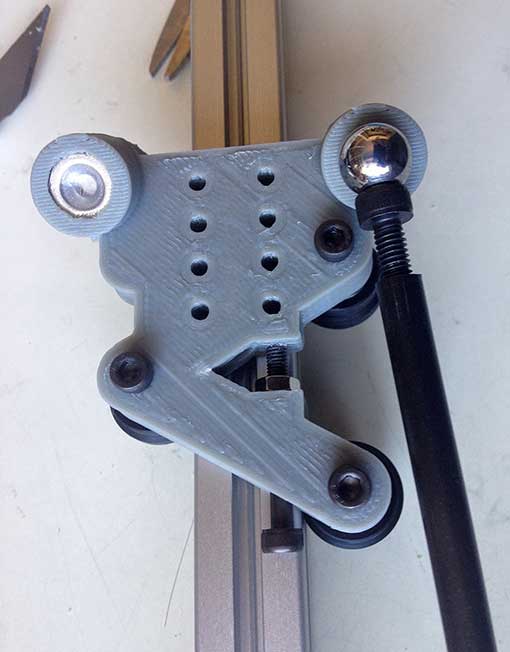
I didn’t end up using the nuts you see in the photos to lock the bolts, because in order to get them tight enough, they were putting too much pressure on the rods, causing them to split. Instead, I just dripped a drop of super glue into the junction of the rod & bolt. Loctite would probably be a better idea, but I didn’t have any handy. Below is my vertical carriage design:

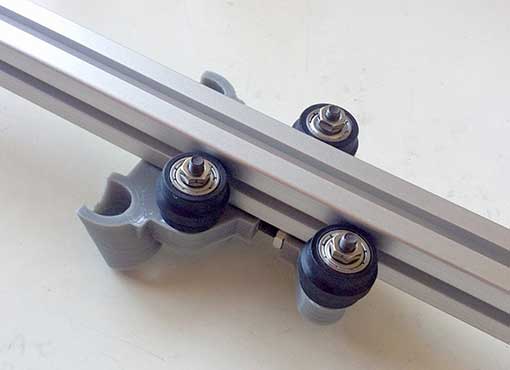
vc1

The vertical bolt running up the right side is the tensioner. I was delighted that the carriage appears to be rock solid. I was expecting to have to refine it a few times, but my first try seems to be pretty good. We’ll see once I get the printer up and running if I’m right. I bought the roller wheels from deltaprintr.

vc2

I am not entirely happy with the deltaprintr wheels for two reasons: 1) some of them have minor flat spots, so the movement isn’t perfectly smooth, and 2) there’s no internal shim between the bearings, to keep the lateral load off the ball bearings when you tighten them down (unlike makerslide wheels), so the bearings bind a bit when you try to tighten them down. Also, the bearings will wear out faster.

Note that the designs I described above are preliminary, because I am not yet finished building the printer. There are bound to be changes once I start testing it.

Update 2015-07-24: Unfortunately, I got bogged down by my fishing line drive, and was never able to get the machine calibrated. I got too busy to work on it, and it’s been gathering dust for the past year, unfortunately. The design files are all on YouMagine: https://www.youmagine.com/designs/kossel-linco

RepRap: Fish Pump Hot End Tip Cooling

I have always had trouble printing small parts and overhangs, because I was too lazy to add cooling to my hot end tip. I sometimes used to just blow a USB fan at the printer, but this has two bad effects: 1) the cooling isn’t localized enough, so it doesn’t work very well, and 2) the unfocused air flow cools down the heat bed, which can cause the print to detach. I looked at a bunch of fan shrouds that other people have been using, and didn’t like the way that most of them still leak a lot of air onto the hot bed. The thought occurred to me that the air coming out of the hose of an aquarium air pump is quite focused, so I decided to hack something together to test it out.

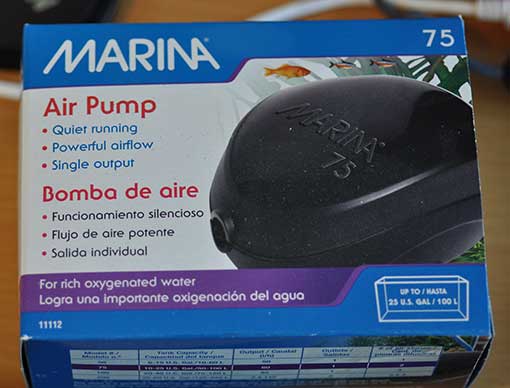
This is a fish pump that I happened to have laying around:

fishpump

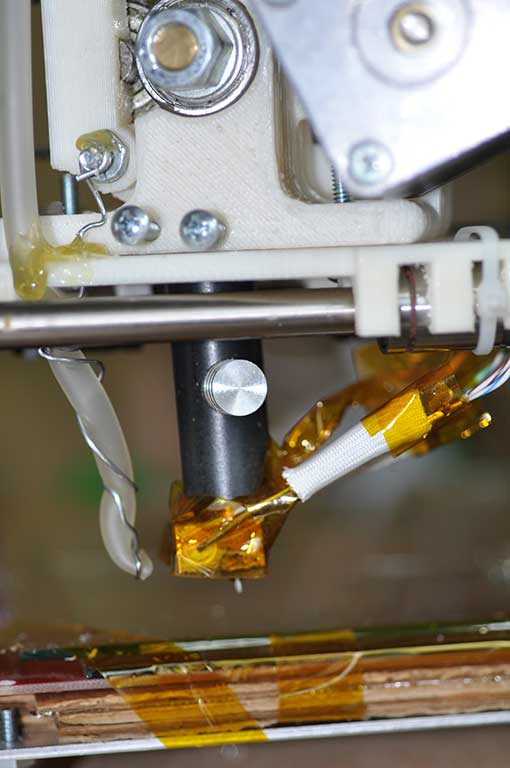
I used silicone airline tubing, because it’s more flexible than the regular clear tubing, and doesn’t harden with age, and is heat resistant. Here is my messy hack to test out the concept:

nozzlecool

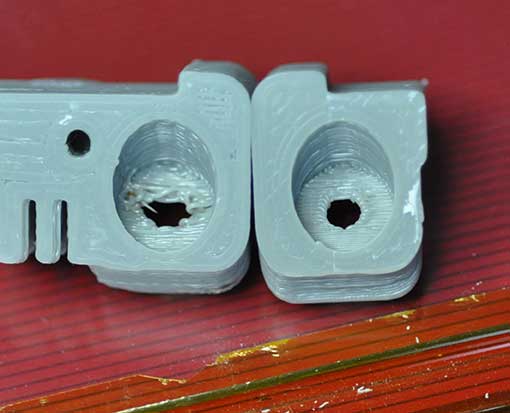
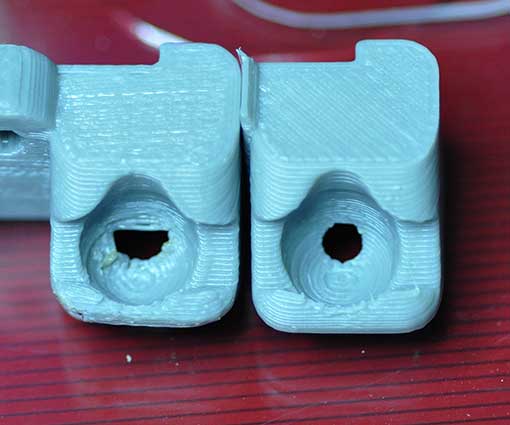
The silicone tubing is held in place with a couple of bent up paper clips. I love my J-Head Mk III-B – it works flawlessly, even without fan cooling the aluminum heat sink, but one annoying thing is that the nozzle is very short, so there’s very little clearance between the nozzle tip and the heat block. This made placement of the cooling hose sub-optimal. It’s very hard to position the hose to cool the flow of plastic without hitting the print. Nevertheless, much to my delight, it works pretty well! Below is a comparison of printing with and without nozzle cooling. The part is a holder for a steel ball from Steve Graber’s Cerberus Pup. The print on the left was done without nozzle cooling, and the print on the right with cooling:

cooling1

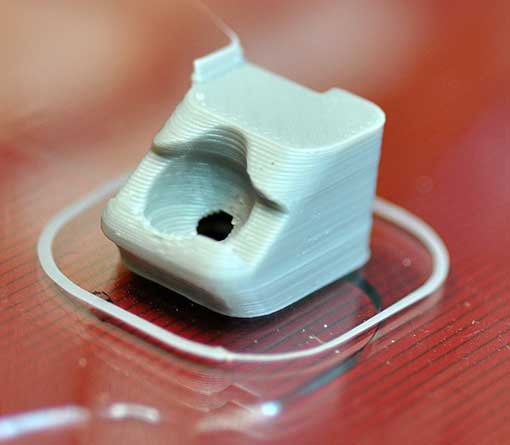
The view above is from the bottom of the part, so the flat part inside the hole was an overhang. Note what a mess it made of the uncooled part. Below is a top view of the part:
cooling2

The cooled part was a perfect, tight fit for a 3/8″ steel ball bearing. I was amazed how accurately the part came out.

cooling3
Being the lazy person I am, I’m going to keep the jerry-rigged setup until it falls apart. So far, it’s been holding up quite well, allowing me to print out all of the parts for the Kossel-Linco delta printer that I’m designing. There are 3 main downsides to using the fish pump rather than a fan: 1) the pump is rather noisy 2) It uses AC power, so a relay is needed in order to control it via software, and 3) it’s difficult to control the air flow by software. What I’ve been doing is to start the print with the pump off, and then turn it on after the first few layers are done printing.

Slic3r Support Material Frustration

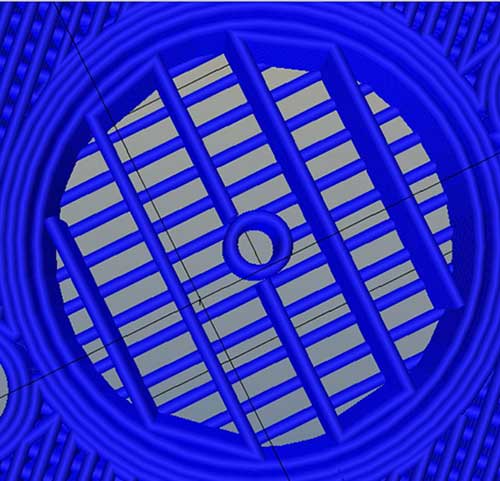
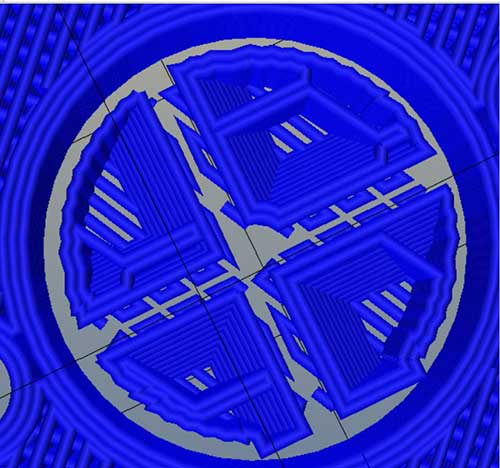
It’s been a few years since I’ve played with Slic3r, so I was eager to play with the current stable version, v1.0.1. One problem I had when playing with earlier versions of Slic3r was that the support material generation was not yet usable. A part I was designing had a big circular overhang in the middle, so it was the perfect opportunity to try out support meterial in v1.0.1 stable. Unfortunately, while the support material worked great for printing, it was almost impossible to remove! The gcode depicted below was generated using the rectlinear pattern:

slic3r101stable

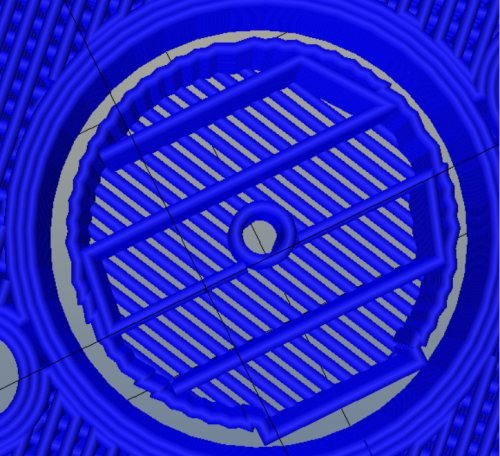
The support material in the above picture is the large circular plug. Notice how it doesn’t leave a gap between the plug and the hole, so it’s completely stuck to the part! It took me almost an hour to carefully dig the support material out with and x-acto knife. Unfortunately, there’s no parameter in v1.0.1 to let you tune the spacing between the support material and vertical walls. Next, after reading that the Slic3r team had rewritten the support material code, I downloaded the latest experimental version, 1.1.4, and tried it. Much better:

slic3r114

Note the sizeable gap between the support plug and the perimeter of the hole. This time, the supports only took a few minutes to remove. The moral of the story? Use a newer version of Slic3r instead of v1.0.1 stable if you want to generate easy to remove support material. An added bonus of v1.1.4 is a new support pattern, called pillars. It looks like this:

pillars

RepRap: Printrboard Surgery

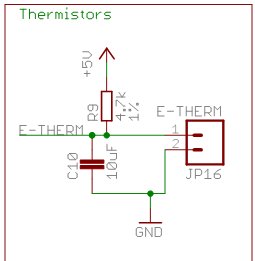
After a hiatus of a couple of years, I’m finally starting to get back into 3D printing. One of my Printrboards got messed up when some wires on my hot end shorted. The hot end temperature was no longer reading correctly. Since my other Printrboards all work correctly, I knew that the problem was not a bad thermistor or wiring. Instead of throwing out the Printrboard, I decided to try to fix it. The first step was to have a look @ the Printrboard schematic. Here’s what the temperature sensing circuit looks like:

tempckt


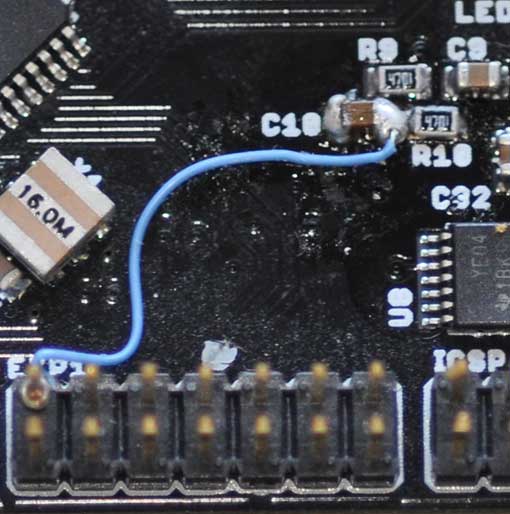
I got out my ohmmeter, and R9 was OK, but E-THERM to GND was reading as a dead short, so I assumed that C10 was bad. This was a good opportunity to play with my AOYUE INT 2702 hot air rework station, which I’d never used. I removed C10, and much to my chagrin, the reading from the hot end ADC pin was stuck at 1024. Furthermore, shorting E-THERM to ground was causing my Printrboard to reboot! This led me to conclude that something was fried inside the AT90USB1286 on the ADC pin connected to E-THERM (PF1_ADC1). Conveniently, 2 other ADC pins, ADC2 and ADC3, are broken out into an expansion header on the Printrboard. I first soldered C10 back into place. The trace connecting ADC1 to E-THERM was inaccessible, so I couldn’t cut it. Instead, I disconnected it by lifting the pin on the MCU off the PCB. Next, I connected a piece of 40AWG wire wrap wire between the A2 header pin and the E-THERM trace.

pbfix

Success, the ADC2 pin is working perfectly! The only caveat is that I have to remember to run modified firmware when using this board, reassigning the hot end thermistor pin from ADC1 to ADC2. In Marlin firmware, it’s as simple as finding the Printrboard section of pins.h, and reassigning TEMP_0_PIN from 1 to 2.

Arduino 1.0.5-r2 for AT90USB1286 and Printrboard

It’s been a few years since I hacked together the copy of Arduino-0022 that’s been floating around the web, which lets you compile and automatically upload Arduino code to an AT90USB1286. This made it a lot easier to develop Arduino code for the AT90USB1286, and in particular to easily modify the Marlin firmware for the Printrboard.

Yesterday, I figured it was high time to add AT90USB1286 support to Arduino 1.0.5-r2. The basic procedure for the modification was to first install Teensyduino, which adds the AT90USB1286 compilation support to Arduino, but only uploads to a Teensy++ 2.0, running PJRC’s proprietary halfkay bootloader. I modified the Teensyduino configuration to also support uploads to targets running the LUFA CDC Bootloader, or via USBtinyISP or USBasp ICSP programmers.

Note that I copy that I modified only runs on Microsoft Windows.
You can download it from github: https://github.com/lincomatic/arduino-1.0.5-r2-at90usb1286
It’s easiest to download it as a zip file: https://github.com/lincomatic/arduino-1.0.5-r2-at90usb1286/archive/master.zip

Once you unzip the archive and launch arduino.exe, you will notice some new entries in the Tools->Board menu:

[USBasp]AT90USB1286
[usbtinyisp]AT90USB1286
[BootloaderCDC]AT90USB1286
[USBasp]Printrboard
[usbtinyisp]Printrboard
[BootloaderCDC]Printrboard

The only difference between the Printrboard and AT90USB1286 entries is that the extraneous USB Type, CPU Speed, and Keyboard Layout submenus are grayed out from the Tools menu.

To load Marlin firmware onto a Printrboard, you will most likely want to use [BootloaderCDC]Printrboard.

Note that unlike my Arduino-0022 hack, the pinMode()/digitalRead()/digitalWrite() functions in version currently only support the pins that are exposed on the Teensy++ 2.0. This is because I haven’t yet had the time to figure out how to add in the remaining AT90USB1286. However, this limitation doesn’t affect Marlin firmware on the Printrboard, because Marlin uses its own fastio functions, rather than using Arduino digital pin numbers and pinMode()/digitalRead()/digitalWrite(). See pinmap.txt for the currently supported Arduino digital pin numbers.

Thanks again to PJRC for Teensyduino. Teensys are a great alternative to Arduino boards.

SLA (Stereolithography) First Printing Attempt with 405nm Laser Curing UV Resin

olio & I are working on SLA (stereolithography) printing using lasers, rather than a DLP projector.  The goal is to print with either a polygon mirror assembly as is currently found in laser printers, or a galvanometer, such as is used in laser light shows.  For initial tests, we are using a 100mW blu-ray laser diode.  While waiting for some B9 resin, which cures with visible light, on a lark, we decided try curing some Bucktown 385nm UV resin.  Surprisingly, it cures easily with a 405nm laser.

Today, we decided to try printing a test object on olio’s aluminum x-y bot with gcode generated by slic3r, sending it to Marlin firmware running on the bot, via Repetier-Host.  We arbitrarily chose a 15 mm/s feedrate.  We don’t yet have a way to turn the laser on and off, so instead, we just did fast moves at 150 mm/s.  I wasn’t expecting any sort of success, but amazingly, the first print was somewhat successful!

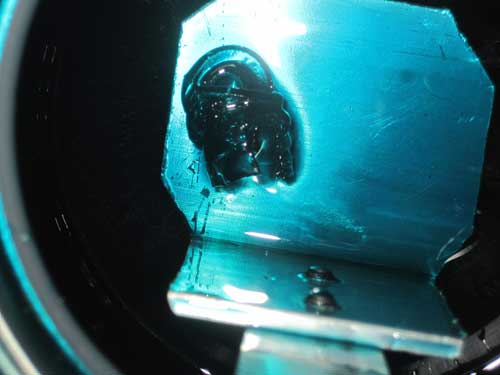
After draining the resin vat, it looked like all we had was a gunky blob:

Upon closer inspection, we were pleasantly surprised to find that it actually was a reasonable facsimile of our object, but it was so soft that it broke in half even with careful handling:

Though the print wasn’t entirely successful, I’m amazed that it worked at all! Obviously, there’s a lot of tweaking to be done, but it’s a good start.

Here’s a Reprapped print of the same object:

It’s 15mm in diameter.

Reprap: Sexy z-drive

I’ve been using this #10-24 (~5mm) leadscrew for almost a month now, and it’s been working flawlessly. The coupling is just zip ties on vinyl tubing. No slippage at all due to the reduced friction of the tiny nut vs an 8mm nut. Thin leadscrew + flexible coupling = no leadscrew wobble (aka z-wobble) + less friction = lower torque (and current) requirements on z-motors.  The threads are a finer pitch (24 threads/in) than 5/16″ screws, which are usually 18 threads/in, so the resolution is better, too.

Marlin Tuning

To get the most out of Marlin, here are a few simple tweaks.

1. EEPROM Settings

By default, Marlin forgets any configuration changes you make via the Mxxx G-codes whenever you reset or power cycle your controller. If you want to remember the settings, so you don’t have to set them every time you power up your controller, Marlin can store them in EEPROM. In Configuration.h, uncomment

#define EEPROM_SETTINGS

EEPROM_CHITCHAT is optional:

//to disable EEPROM Serial responses and decrease program space by ~1700 byte: comment this out:
// please keep turned on if you can.
#define EEPROM_CHITCHAT

You will need to compile Marlin and then upload the modified firmware to your controller in order to take advantage of the changes.

After sending your Mxxx G-codes to Marlin, send M500 to save them to EEPROM.  You can also revert to default (“factory settings”) with M502.

One nice feature of Repetier-Host is that you can use it to set your EEPROM, rather than manually typing in Mxxx G-codes.  Simply go to Config->Firmware EEPROM Settings from the menu.

Personally, I prefer to just set all my Mxxx G-codes as start G-codes in Slic3r, rather than storing them in EEPROM, but most people will probably prefer to use EEPROM.

2. PID Auto Tune

When I first switched to Marlin, I was not at all happy with the temperature control of my extruder.  It was taking a long time for my hot end to heat up, and the temperature was still varying a lot. While the hot bed is controlled using bang-bang (traditional on/off temperature control), the extruder uses a more sophisticated algorithm, called PID, which should yield better temperature stability.

Initially, I tried turning off PID by commenting out

#define PIDTEMP

in Configuration.h.  My hot end heated up much faster, but the temperature was still fluctuating a lot.  I decided to try to get PID working better.  In order to get best performance out of PID, there are some parameters which need to be tuned: Kp,Ki, and Kd.  Configuration.h contains settings for Ultimaker, Makergear, and Mendel Parts hot ends, but I’m using a JHead.  I had no idea what values to use for After doing a bit of googling around, I found out that Marlin has a way for it to automatically calculate PID parameters, G-code M303 – PID relay autotune.  To automatically tune your hot end PID parameters, start with your hot end at room temperature, and using Pronterface, send it the M303 G-code as follows:

M303 S230

The parameter is the target temperature in celcius.  If your target temperature is different, substitute it for the 230.   Marlin will then heat up and cool down your hot end, while taking measurements.  This will take a while.  When it’s done, it will output a message similar to this one:

bias: 103 d: 103 min: 147.98 max: 152.02
Ku: 65.06 Tu: 30.67
Clasic PID
Kp: 39.04
Ki: 2.55
Kd: 149.66

Next, you need to tell Marlin to use the calculated Kp, Ki, Kd values.  If you don’t want to hassle with compiling/reloading Marlin, you can just use the M301 – Set PID parameters P I and D G-code.  Using the my values above, it looks like this:

M301 P39.04 I2.55 D149.66

I simply added the line to my start G-code in Slic3r.  Setting the PID parameters in G-code allows you to change them on the fly for different profiles, for instance, if you like to switch back and forth between PLA and ABS.

If you prefer to hardcode the values as defaults in the firmware, set them as follows in Configuration.h:

#define  DEFAULT_Kp  39.04
#define  DEFAULT_Ki 2.55
#define  DEFAULT_Kd 149.66

3. Acceleration and Jerk

If your printer vibrates a lot when printing at higher feedrates, causing wiggly prints, you can improve the quality without slowing down your prints too badly by lowering the acceleration and/or XY-jerk values. In Marlin, acceleration is specified in mm/s^2. The default is 3000. On my Printrbot, I slowed it down to 1000 with G-code as follows:

M201 X1000 Y1000; // max accel print
M202 X1000 Y1000; // max accel travel
M204 S1000; // default accel for normal moves

You can also change the value in Configuration.h, if you prefer:

#define DEFAULT_ACCELERATION 1000 // X, Y, Z and E max acceleration in mm/s^2 for printing moves

If you have a slow extruder, you can also slow down the retraction acceleration, but generally, there’s no reason do do this:

#define DEFAULT_RETRACT_ACCELERATION  3000   // X, Y, Z and E max acceleration in mm/s^2 for r retracts

3000 is the default value.

The jerk value is also useful, and affects the speed at which Marlin joins two segments. The default XY-jerk value is 20 mm/s.  Lowering the value will slow down the transitions between segments.  This is especially helpful for smoothing out ringing waviness on 90 degree turns.  I found that 15mm/s is a good balance between speed an quality on my Printrbot.  G-code:

M205 X15; // max xyjerk mm/s

Configuration.h:

#define DEFAULT_XYJERK                20.0    // (mm/sec)

There are also values for the z-axis and extruder, but I didn’t need to change them:

#define DEFAULT_ZJERK                 0.4     // (mm/sec)
#define DEFAULT_EJERK                 5.0    // (mm/sec)

When tuning acceleration and jerk values, a handy way to test the effects of your new settings is the Dry Run feature of Repetier Host.  When Dry Run is enabled, the extruder is disabled while printing, so you can observe its motion without wasting filament.
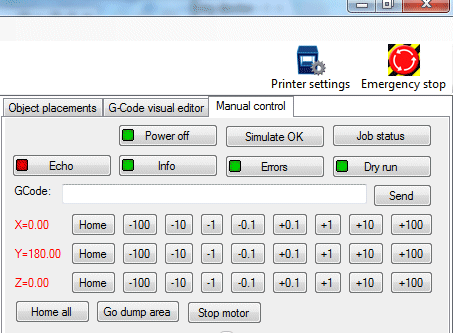
After tuning the acceleration and jerk values my prints are better quality at higher feedrates, without sacrificing too much speed.  Note that depending on your print, the lower acceleration/jerk values will have more or less effect on the total time it takes to complete it.  Prints that have more short segments will be slowed down a bit more.

Even though my discussion was about slowing down the printer, you can also tune the acceleration/jerk parameters to speed things up, if you have a particularly well-tuned bot.

Reprap: Experiments in Resolution/JHead Modding

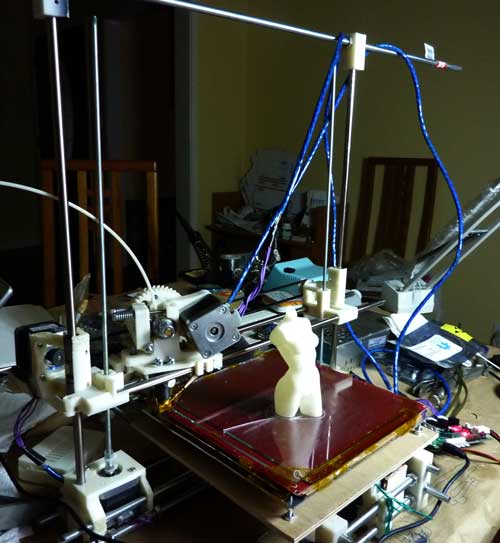
I’ve been designing a bot that attempts to get the best possible performance out of a Printrbot-style open frame design.  The design has a long way to go in terms of refinements, but I’ve started testing out the basic concept.  To address the Printrbot’s main shortcoming, the y-axis sits on a very wide base, and the leadscrews are only 5mm in diameter, and coupled to the z-motors with rubber tubing,  which pretty much cancels any effect of wobbling on the much thicker 8mm z-axis smooth rods.  So far, I’m able to print at roughly double the speeds of my Printrbot for the same quality prints.  I wanted to try low layer heights, and decided to use the  infamous Pink Panther Woman to do some tests (BTW, if anyone knows why it’s named Pink Panther Woman, please leave a comment below).  Here is my prototype printer after finishing a print:
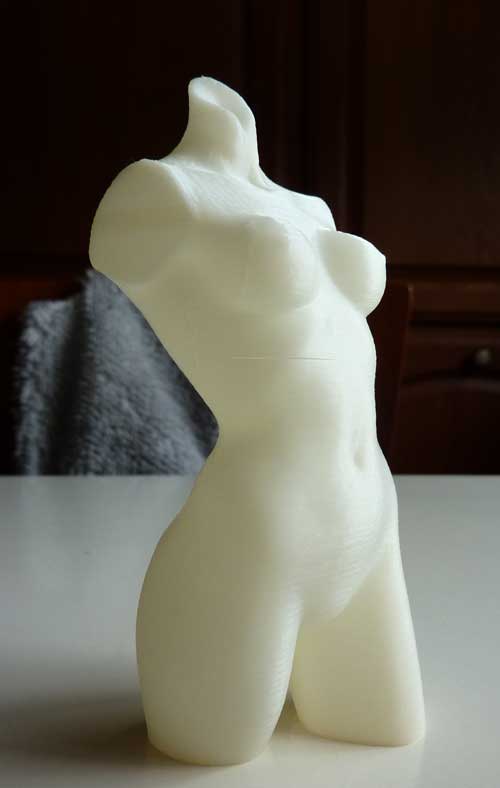
I printed Pink Panther Woman scaled down to 75% with .2mm layers, no infill, and 2 perimeters.  Printing hollow, thin-walled objects can be challenging, because the layers often start to curl up when printing expanding layers.  A cooling fan is helpful.  I ran the printer with the latest Repetier-Host software, which has a slider for dynamically adjusting the speed during a print.  This let me speed up the printing of the less challenging layers by 150%.  It took about 1.5hrs to print.  Here’s the result:

My best quality print to at the time.  Click the image above for a full resolution photo. It was not without some issues.

Some of the flatter sections of the print had some gaps:

In retrospect, I should have paid attention to Repetier Host’s excellent G-code inspection feature, and noticed the problem before I started the print:

Clearly, the G-code output by slic3r had gaps in it.  Repetier Host’s G-code preview is a great way to inspect your G-code for problems before wasting plastic and time.  It lets you pan and zoom through your G-code, and even inspect single or ranges of layers.

Also, a couple of layers didn’t stick well to each other.  Notice the horizontal line in the middle of the torso, caused by the layers separating from each other:

To address this issue, I increased the extruder steps/mm from 560 to 585, so that it would extrude a bit more plastic.  The extra plastic would also help to close the gaps a bit in the flat section.  Also, I increased the number of perimeters from 2 to 3, so that there would be more support from previous layers.  At the same time, I also cut the layer height down to .1mm.  This was the first time that I ever tried to print with .1mm layers.  Printing such small layer heights brings its own set of challenges.  The print bed leveling and z height must be very precise to get the initial layer down nicely.  The threads coming out of the extruder are so tiny that curling of the hot ABS becomes even more of an issue.  After a few false starts, I decided to let the print go at slower speed, and fine tuned my cooling fan’s position.

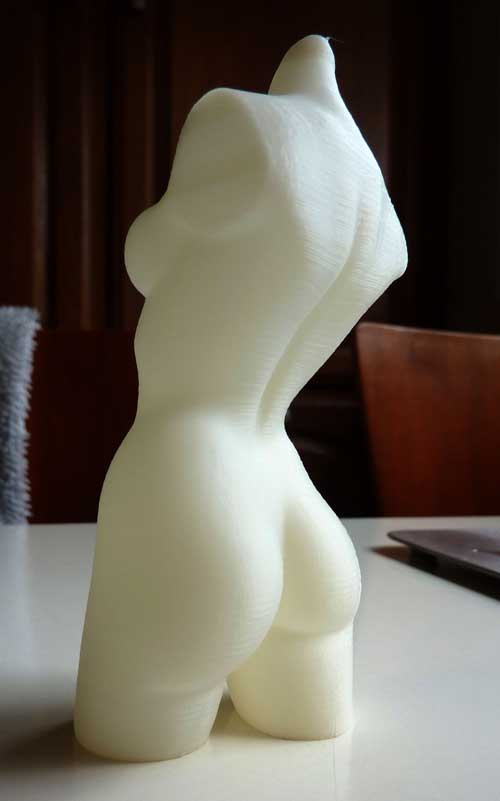
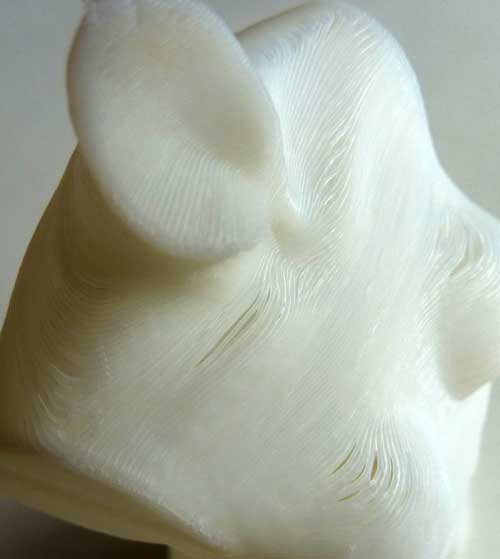
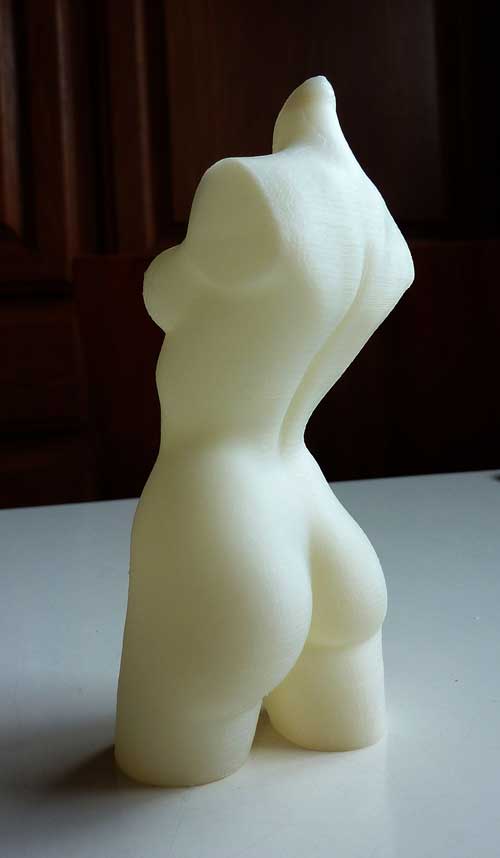
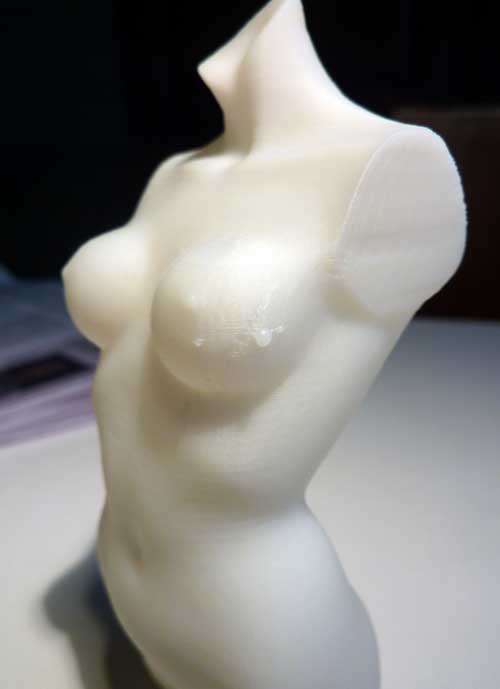
The .1mm layer height print took about 4 hours.  I was totally blown away.  It’s my best print to date.  The layers are practically invisible, and it’s so detailed that I can actually see some of the polygons that comprise its shape.

Again, click the image above to see the full resolution photo. I need to get a better macro lens – sorry that it’s a bit fuzzy. The tweaks I made solved the gaps in the flat parts of the print, and all of the layers are firmly stuck together. However, the print was not without some issues.

I knew the print was going to take a long time, so I didn’t want to use my main PC to run it, because sometimes, when I’m running lots of apps during a print, the hard drive will thrash, and cause short pauses in the printing; this causes blobbing in the print.  So I decided to run Repetier Host on my Mac instead.  I figured that starting the print from a cold boot, and no other apps running would give me a trouble-free print.  What a big mistake.  Note to self:  Don’t use my Mac for printing!  The printing froze several times during the print.  One of the pauses occured about 3 hours into the print, and lasted almost a minute!  I was freaking out, and then luckily, the printer started moving again.  As a testament of the JHead’s great design, even this long pause only caused a small blob.  The large blob that looks like an extra nipple was caused by the ~1min pause:

The other smaller blobs were caused by shorter pauses. I’m amazed how smoothly and consistently the JHead extrudes plastic.  The only complaint I have about the JHead is that it shouldn’t have the protruding nipple on its nozzle tip.  The sharp edges of the nipple causes blobbing when doing layers with 100% infill.  These blobs are not only ugly, but sometimes, they cause the hot end to knock the print loose from the bed.  The problem is that the sharp edges of the nipple can dig in and gouge the plastic thats already been deposited, remelting it, and moving it around.  Then, the sharp edges hit against the raised blobs, knocking the print loose.  Here is a particularly severe example of this issue:

Fortunately, a simple mod to the JHead cures the problem.  Simply file off the sharp edges from the nozzle tip:

I’ve had no more issues since I did this quick mod.

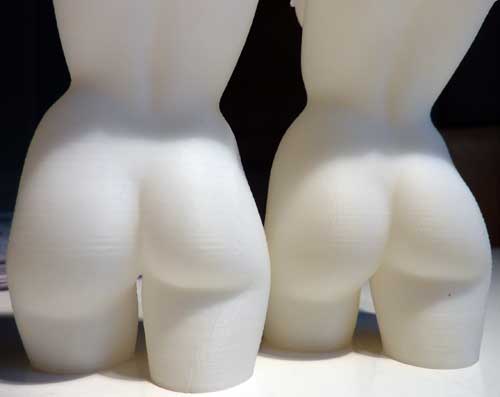
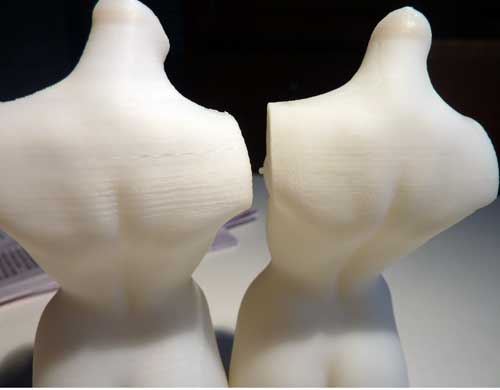
Below are some comparisons of the .2mm (left) and .1mm (right) layer height prints:

After all of the trials and tribulations I had learning about Repraps, it’s quite rewarding to finally be getting some beautiful prints.