My previous article left off with the task of figuring out what kind of temperature sensor is in the Ember Mug 2. I removed the black rubber retaining ring in the bottom of the mug, and then the 2 aluminum plates which cover the white insulation disc easily came out. Behind it was this:
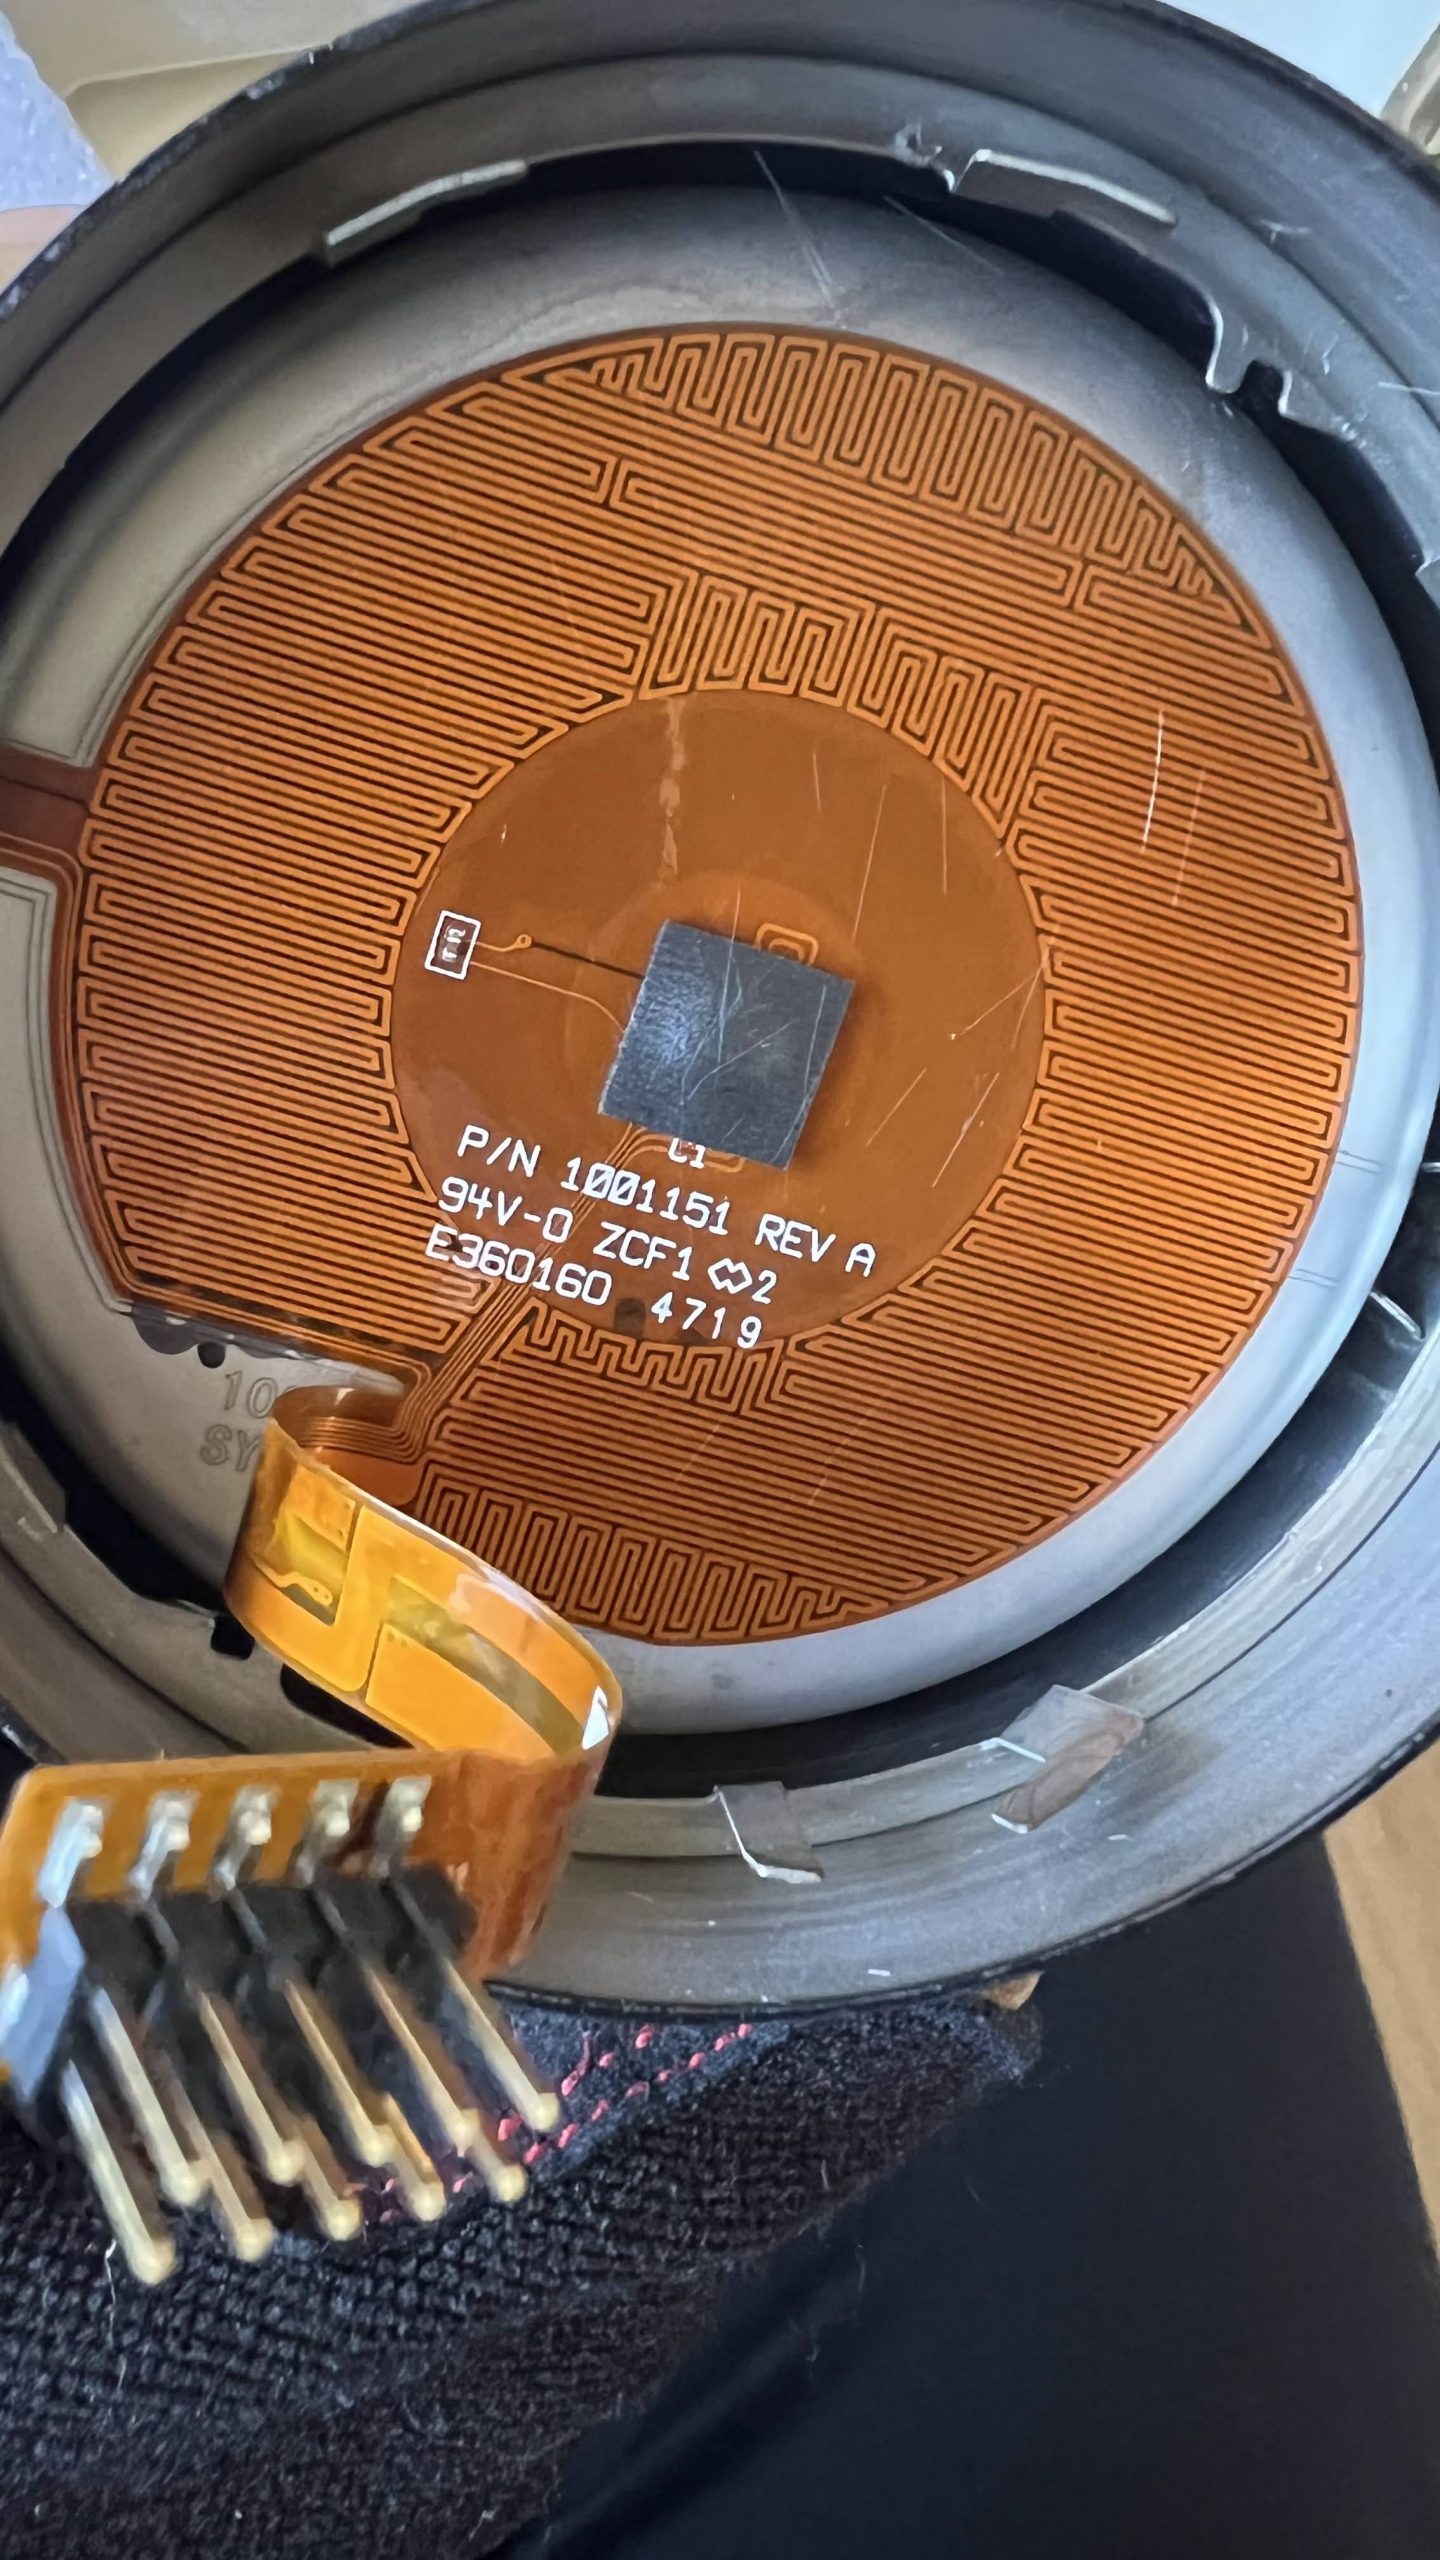
The very long grid of PCB traces is the heater. There are 3 wires going off into a narrow strip on the left of the photo above to a mystery component that’s sandwiched between the inside/outside of the mug. I think it’s glued in, and can’t be accessed w/o destroying it.
And below the black rubber square is this:
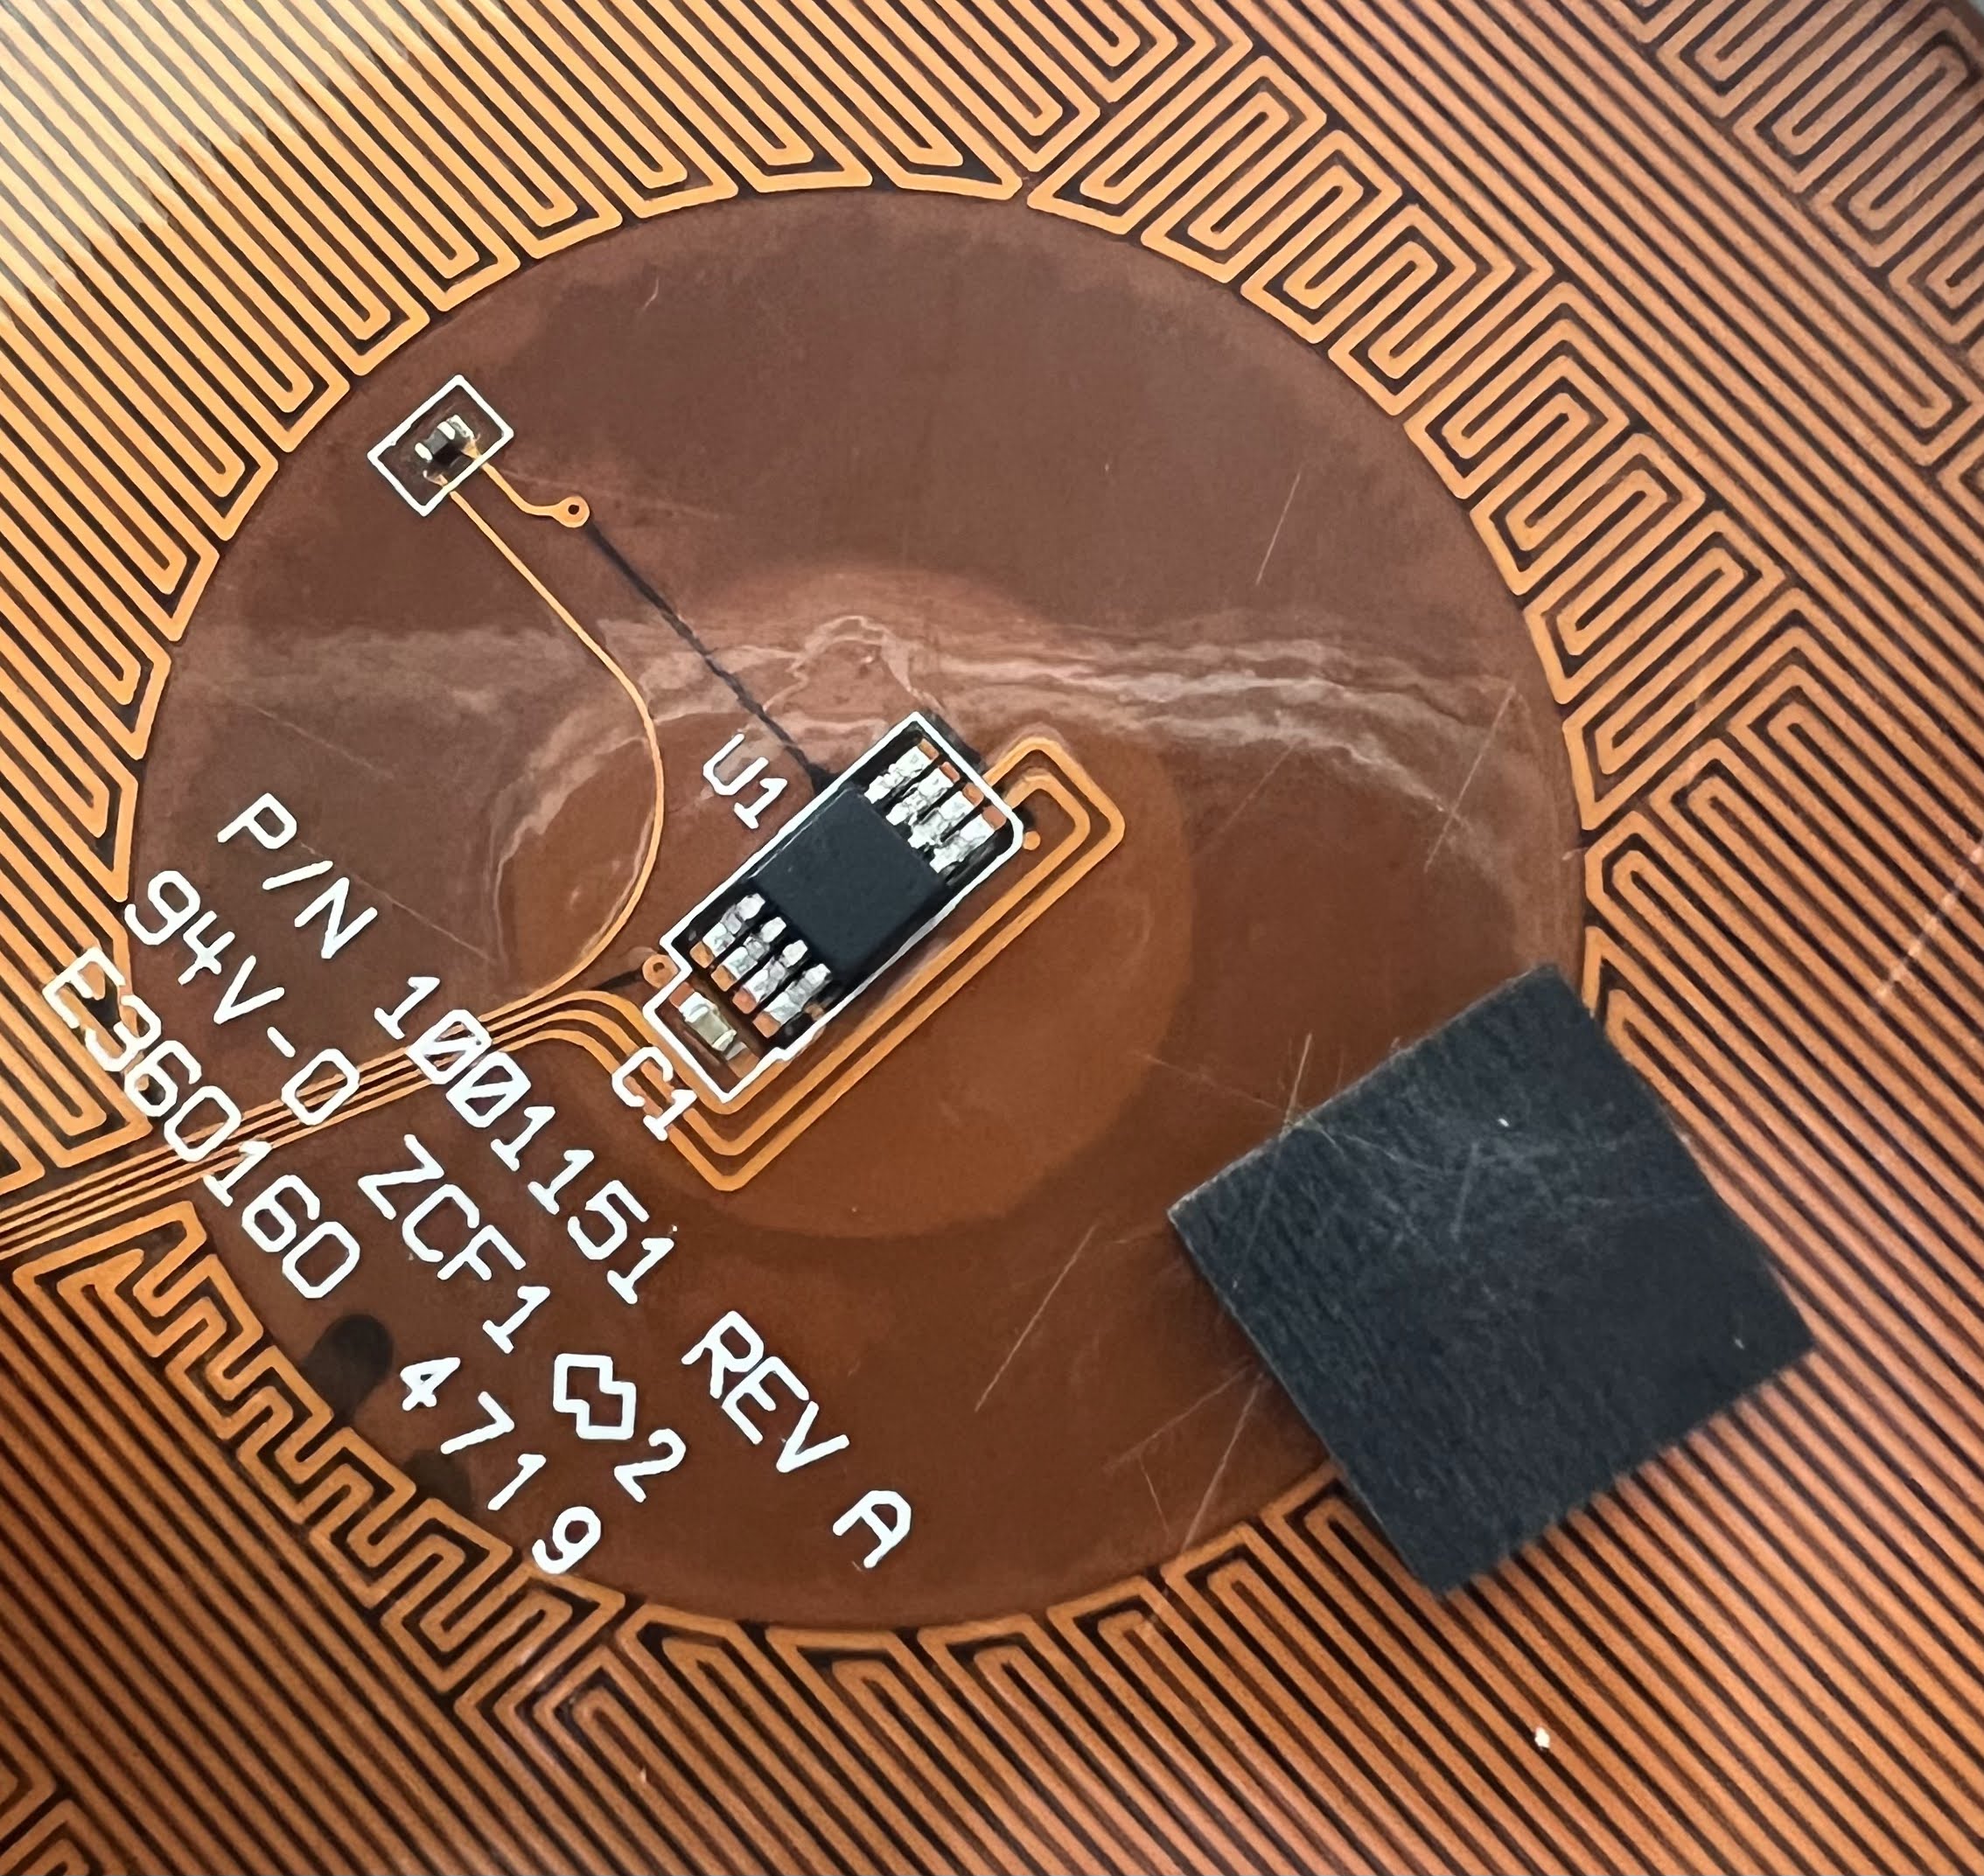
Is U1 the temperature sensor? Here is a close up:
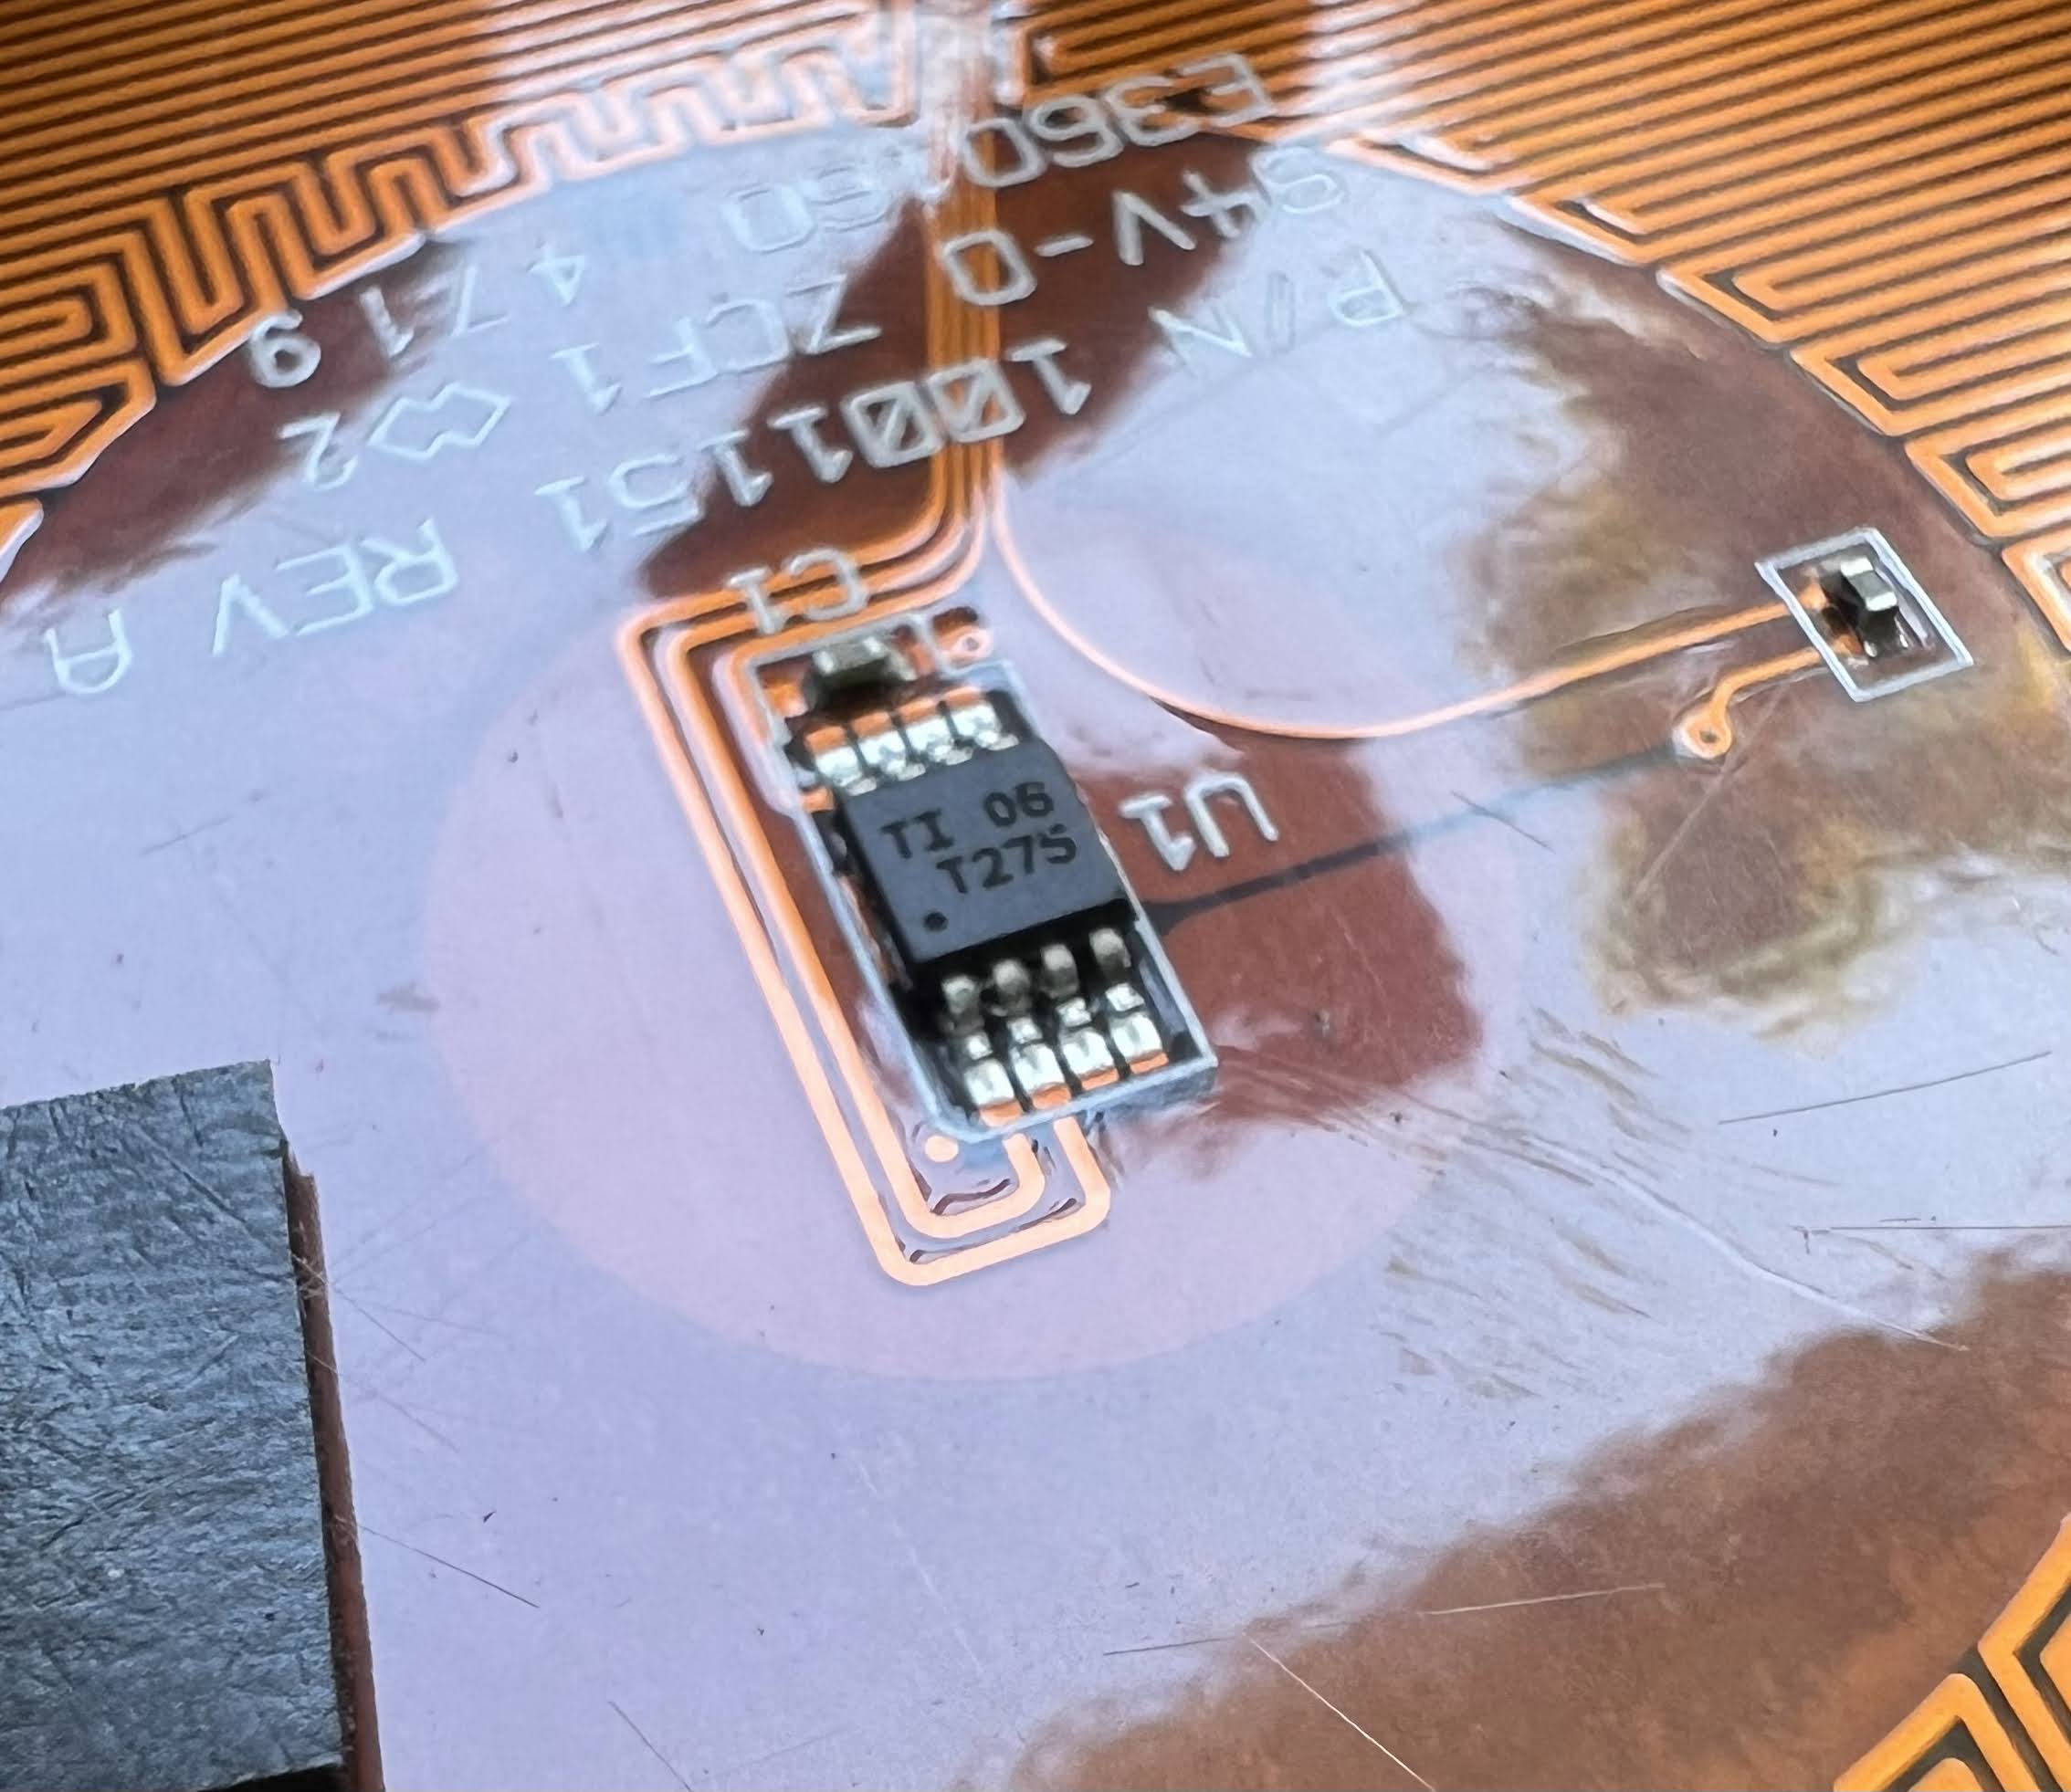
The temperature sensor is just a common part, a TMP275. I have already interfaced a TMP275 to an ESP32 for a previous project of mine. There is plentiful library code already written for reading a TMP275/LM75.
Here is the pinout of the TMP275:
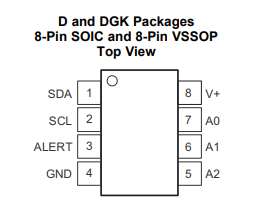
The 2×5 pin connector on the end of the flex cable is labeled J1. Looking at it from the pins side, and w/ J1 on the top, here are the connections I’ve figured out so far:
| (1) Heater2 | (6) Heater1 |
| (2) Heater3 | (7) TMP275 GND |
| (3) | (8) TMP275 SCL |
| (4) | (9) TMP275 SDA |
| (5) unlabeled cap- other end of cap to TMP275 A0/A1/A2 | (10) TMP275 V+ |
SCL & SDA need to be pulled up with 5K resistors (these are probably on the main PCB)
I’m not sure what (3) & (4) connect to, but most likely, it’s the mystery component that’s connected by 3 traces up the side of the cup.
The heater connections are a bit puzzling:
Resistance Heater1-Heater2 11.8 ohms
Resistance Heater2-Heater3 13.8 ohms
Resistance Heater1-Heater3 2.4 ohms
It appears that there are 2 heaters in series with a center tap. I’m guessing that both are used in parallel during heating, and only one is used to maintain temperature.
I’ve already spent too much time on this today, so I’ll have to continue in Part 3.
Thank you for your thorough work documenting this! In your documentation of the heating element do you know if the surface that the heating element is attached to is actual metal? In my bronze Ember 2.0 mug, tapping the bottom of the cup strangely sounds like plastic, whereas tapping the sides sounds like metal.
My cup has an inner aluminum liner. The heater is attached to it. The bottom is plastic, and houses the electronics. The heater sits above the circuit board.
Thank you! And sorry I should have been more clear – I’m referring to the inside of the cup where tapping the inner walls resonates differently than tapping the inside bottom of the cup. But you’ve answered my question anyway with your detail that there is an inner aluminum liner–my primary concern was whether there were plastic surfaces in contact with the coffee and heat.
I’m still perplexed why a contiguous aluminum liner resonates differently from the sides versus bottom, but I guess I’ll need to teardown my own if I want to satisfy my curiosity. Thanks again!