I’m working on a project which needs a touchscreen LCD. After searching eBay for a while, I noticed that many vendors were selling basically the same 3.2″ 320×240 TFT with resistive touchscreen and SD card reader. Though there were slight variations in the silkscreens, they all had the same model number – TFT_320QVT. I bought mine from digitalzone88 for $12.29. 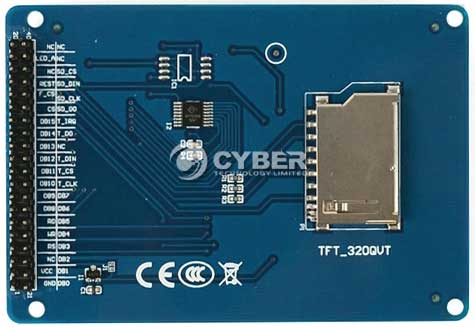
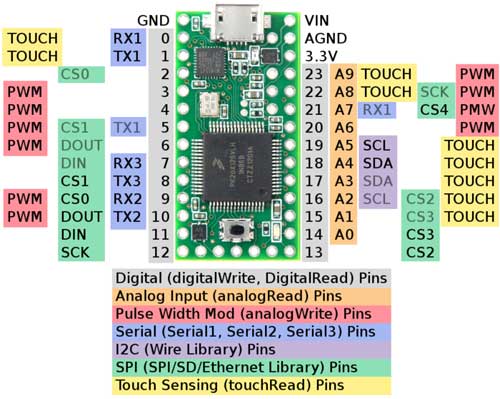
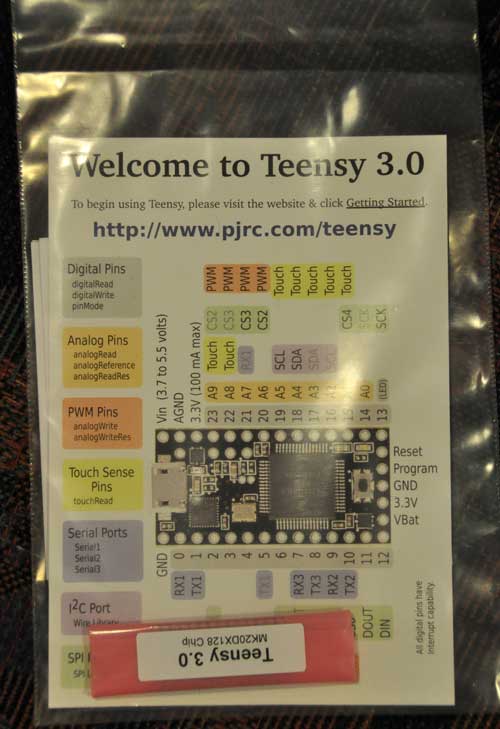
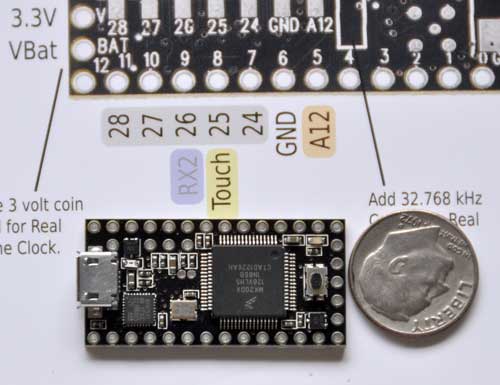
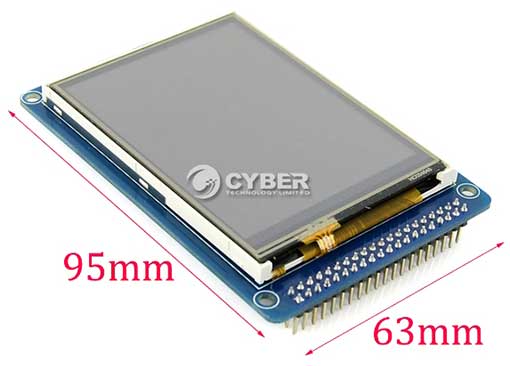 The board uses a SSD1289 LCD driver IC, and runs on 3.3V. The 3.3V voltage is incompatible with the typical Arduino, which runs at 5V (some vendors have created shields to interface it to an Arduino Mega). However, I purchased the TFT_320QVT with the intention of interfacing it to a Teensy 3.0, which runs at 3.3V. I noticed that there were not enough through-hole I/O pins on Teensy 3.0 to simultaneously interface to the LCD, touchscreen, and SD card. This necessitated the usage of the Teensy 3.0’s additional I/O pins, accessible only via solder pads on its underside:
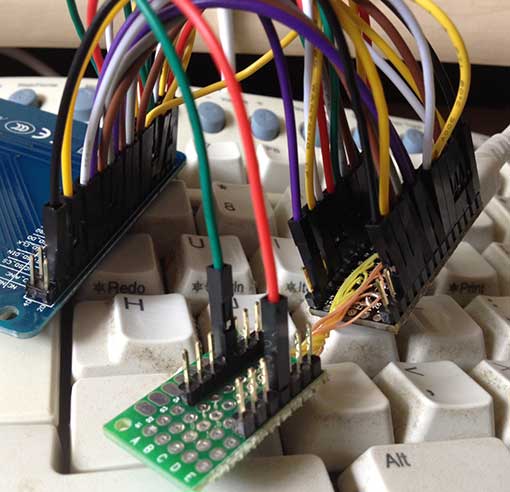
 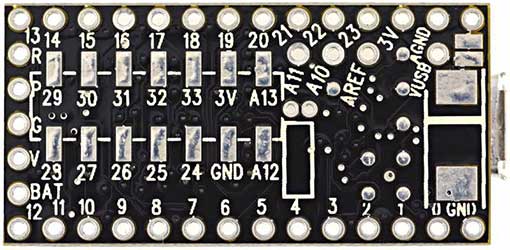 To facilitate access to the 14 solder pads, I attached some header pins to piece of stripboard, and soldered 40AWG wire-wrap wire to between the pads and headers:
  The Teensy 3.0 runs on PJRC’s specially modified version of Arduino – Teensyduino. The task was to find compatible Arduino libraries. First order of business was the LCD. I searched the web, and found that dawnmist had spent a considerable effort in modifying Henning Karlson’s UTFT to work with the Teensy 3.0. Unbeknownst to me at the time, dawnmist’s modified UTFT is actually bundled with Teensyduino!
Next, was to get the touch screen working. It turns out that the current version of Henning Karlson’s UTouch is compatible with the Teensy 3.0.
For the SD slot, I tried the version of the Arduino SD library that’s bundled with Teensyduino. Unfortunately, though the SD library works with the TFT_320QVT’s SD reader, it stops working if you instantiate a UTFT object in the sketch. I tried sdfatlib, and found that not only does it work w/ the Teensy 3.0, but it coexists fine with UTFT. The only catch I found is that it works only with SPI_HALF_SPEED. When I set it to SPI_FULL_SPEED, it stops working.
Here is the Teensy 3.0 running UTFT‘s demo sketch on the TFT_320QVT: 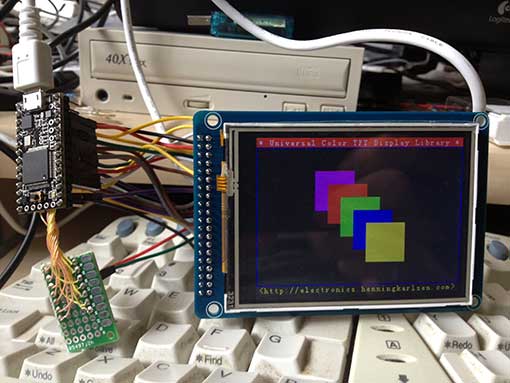
Below is the step-by-step procedure to getting the TFT_320QVT up and running with Teensy 3.0:
Step 1: Install the libraries
1. UTFT: Run the Teensyduino installer, and when the Libraries to Install dialog is displayed, check the box next to UTFT in the Choose Additional Libraries to Install combobox. (Note: Henning Karlson’s latest UTFT also works with Teensy 3.0, but my discussion below will show how to interface to the UTFT that’s bundled with Teensyduino 1.18).
2. UTouch: Download UTouch.rar. Use WinRar or 7-zip to extract the enclosed UTouch folder. From the Arduino IDE pull-down menu, use Sketch->Import Library->Add Library… to install the extracted UTouch folder. Alternatively, you can just copy Utouch/ to your arduinosketchbook/libraries directory.
3. sdfatlib: Download the latest version of sdfatlib. From the Arduino IDE pull-down menu, use Sketch->Import Library->Add Library… to install the downloaded sdfatlibyyyymmdd.zip file. You can alternatively just extract the SdFat/ folder into your arduinosketchbook/libraries directory.
Step 2: Wire it up
1. LCD: dawnmist‘s modified UTFT library that’s bundled with Teensyduino has a configuration file: arduinofolder\libraries\UTFT\hardware\arm\HW_Teensy3.h. Inside HW_Teensy3.h, there are 3 options for the LCD pin assignments: USE_B_D_PORTS, USE_C_D_PORTS, and USE_USER_PORTS. By default, the file has
#define PORTS USE_B_D_PORTS
enabled. USE_B_D_PORTS gives the best performance when your sketch needs to use SPI (which is needed for the SD card slot). USE_C_D_PORTS gives the fastest performance, but is incompatible with SPI. USE_USER_PORTS allows you to configure arbitrary pins (by changing the DB_0-DB_16 #defines), but results in the slowest performance. I elected to use the default USE_B_D_PORTS setting.
2. SD card reader: The SD card reader works via SPI, so it needs to use SD_DIN->DIN (MOSI – 11), SD_DO->DOUT (MISO – 12), SD_CLK->SCK (13), and one of the chip select pins, CS0-CS4 (10,9,20,21, or 15). I chose to use SD_CS->CS4 (15).
3. Touchscreen: The touchscreen uses 5 pins, T_DIN/T_DO,T_CS/T_CLK/T_IRQ, which can be assigned to any arbitrary free GPIO pins.
Below is a chart of my pin assignments:
Teensy_pin = TFT_320QVT_pin
0 = LCD_DB4
1 = LCD_DB5
2 = LCD_DB8
3 = LCD_LED_A (backlight)
5 = LCD_DB15
6 = LCD_DB12
7 = LCD_DB10
8 = LCD_DB11
9 = LCD_REST (RESET)
11 = SD_DIN (MOSI)
12 = SD_DO (MISO)
13 = SD_CLK (SCK)
14 = LCD_DB9
15 = SD_CS
16 = LCD_DB0
17 = LCD_DB1
18 = LCD_DB3
19 = LCD_DB2
20 = LCD_DB13
21 = LCD_DB14
22 = LCD_WR
23 = LCD_RS
24 = T_CLK
25 = LCD_DB7
26 = T_CS
27 = T_DIN
28 = T_DO
29 = T_IRQ
32 = LCD_DB6LCD_RD needs to be pulled up to 3.3v
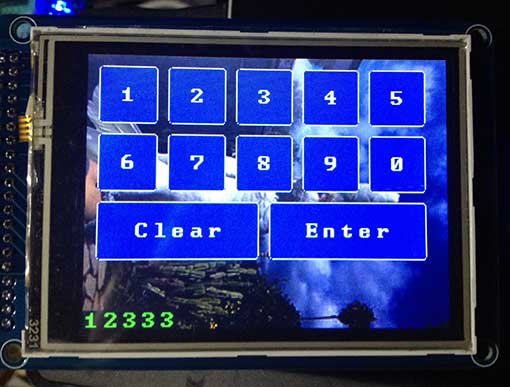
I have created a sketch, UTFT_UTouch_SdFat_teensy3, that simultaneously demonstrates the LCD, touchscreen, and SD card by modifying the UTouch demo sketch. Below are the lines which are critical to configuring it to work with the above pin connections:
[code language=”c”]
#include <UTFT.h>
#include <UTouch.h>
#include <SdFat.h>
// bitmap file to load as background.
// must be 320×240 and in format output by ImageConverter565
char bkgRaw[] = "ade.raw";
uint8_t sdCS = 15; // SD_CS – chip select
SdFat sd;
SdFile inFile;
uint8_t lcdRS = 23;
uint8_t lcdWR = 22;
uint8_t lcdCS = 4;
uint8_t lcdReset = 9;
uint8_t lcdBacklight = 3; // must be a PWM pin for variable brightness
uint8_t lcdBacklightBrightness = 255; // 0-255
UTFT myGLCD(SSD1289, lcdRS, lcdWR, lcdCS, lcdReset);
// Initialize touchscreen
uint8_t t_Clk = 24;
uint8_t t_CS = 26;
uint8_t t_DIn = 27;
uint8_t t_DOut = 28;
uint8_t t_IRQ = 29;
UTouch myTouch(t_Clk, t_CS, t_DIn, t_DOut, t_IRQ);
[/code]
The file displays a bitmap, ade.raw, as the background. Before running the sketch, copy ade.raw to a FAT-formatted SD card, and insert it into the TFT_320QVT’s SD card slot.
You can also substitute your own bitmap file. To create a .raw file, first create a 240×320 pixel jpg, png, or GIF file. Run it through either imageconverter565.exe (bundled with UTFT) or the online ImageConverter 565 make sure to select Convert to .raw file and Target Platform Arduino (AVR).
Here’s what UTFT_UTouch_SdFat_teensy3 looks like when it’s running:
Many thanks to dawnmist, and the others who figured out how to get UTFT working with the Teensy 3.0.
Downloads:
UTFT_UTouch_SdFat_teensy3
UTFT_demo_tft_320qvt_teensy3
Links:
I obtained much of the information I needed from these pages:
dawnmist – screen working … finally
Teensy 3.0 – driving an SSD1289 with utft
