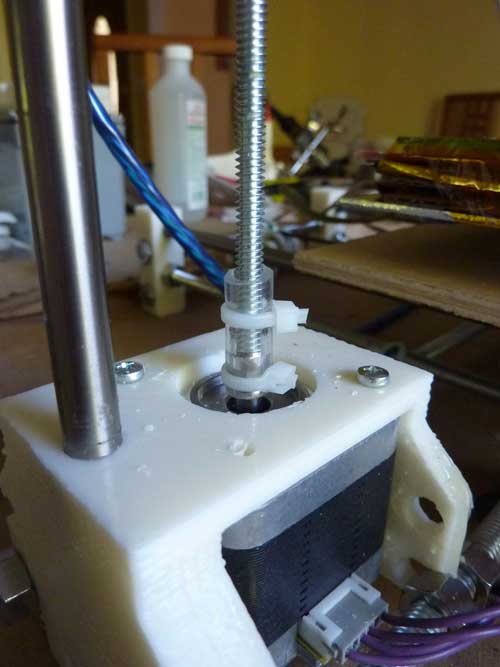
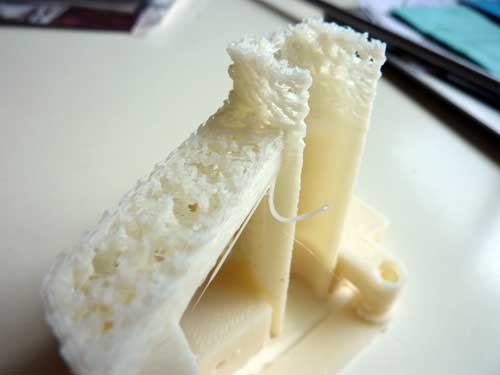
I’ve been using this #10-24 (~5mm) leadscrew for almost a month now, and it’s been working flawlessly. The coupling is just zip ties on vinyl tubing. No slippage at all due to the reduced friction of the tiny nut vs an 8mm nut. Thin leadscrew + flexible coupling = no leadscrew wobble (aka z-wobble) + less friction = lower torque (and current) requirements on z-motors. The threads are a finer pitch (24 threads/in) than 5/16″ screws, which are usually 18 threads/in, so the resolution is better, too.
Tag: reprap
Marlin Tuning
To get the most out of Marlin, here are a few simple tweaks.
1. EEPROM Settings
By default, Marlin forgets any configuration changes you make via the Mxxx G-codes whenever you reset or power cycle your controller. If you want to remember the settings, so you don’t have to set them every time you power up your controller, Marlin can store them in EEPROM. In Configuration.h, uncomment
#define EEPROM_SETTINGS
EEPROM_CHITCHAT is optional:
//to disable EEPROM Serial responses and decrease program space by ~1700 byte: comment this out:
// please keep turned on if you can.
#define EEPROM_CHITCHAT
You will need to compile Marlin and then upload the modified firmware to your controller in order to take advantage of the changes.
After sending your Mxxx G-codes to Marlin, send M500 to save them to EEPROM. You can also revert to default (“factory settings”) with M502.
One nice feature of Repetier-Host is that you can use it to set your EEPROM, rather than manually typing in Mxxx G-codes. Simply go to Config->Firmware EEPROM Settings from the menu.
Personally, I prefer to just set all my Mxxx G-codes as start G-codes in Slic3r, rather than storing them in EEPROM, but most people will probably prefer to use EEPROM.
2. PID Auto Tune
When I first switched to Marlin, I was not at all happy with the temperature control of my extruder. It was taking a long time for my hot end to heat up, and the temperature was still varying a lot. While the hot bed is controlled using bang-bang (traditional on/off temperature control), the extruder uses a more sophisticated algorithm, called PID, which should yield better temperature stability.
Initially, I tried turning off PID by commenting out
#define PIDTEMP
in Configuration.h. My hot end heated up much faster, but the temperature was still fluctuating a lot. I decided to try to get PID working better. In order to get best performance out of PID, there are some parameters which need to be tuned: Kp,Ki, and Kd. Configuration.h contains settings for Ultimaker, Makergear, and Mendel Parts hot ends, but I’m using a JHead. I had no idea what values to use for After doing a bit of googling around, I found out that Marlin has a way for it to automatically calculate PID parameters, G-code M303 – PID relay autotune. To automatically tune your hot end PID parameters, start with your hot end at room temperature, and using Pronterface, send it the M303 G-code as follows:
M303 S230
The parameter is the target temperature in celcius. If your target temperature is different, substitute it for the 230. Marlin will then heat up and cool down your hot end, while taking measurements. This will take a while. When it’s done, it will output a message similar to this one:
bias: 103 d: 103 min: 147.98 max: 152.02
Ku: 65.06 Tu: 30.67
Clasic PID
Kp: 39.04
Ki: 2.55
Kd: 149.66
Next, you need to tell Marlin to use the calculated Kp, Ki, Kd values. If you don’t want to hassle with compiling/reloading Marlin, you can just use the M301 – Set PID parameters P I and D G-code. Using the my values above, it looks like this:
M301 P39.04 I2.55 D149.66
I simply added the line to my start G-code in Slic3r. Setting the PID parameters in G-code allows you to change them on the fly for different profiles, for instance, if you like to switch back and forth between PLA and ABS.
If you prefer to hardcode the values as defaults in the firmware, set them as follows in Configuration.h:
#define DEFAULT_Kp 39.04
#define DEFAULT_Ki 2.55
#define DEFAULT_Kd 149.66
3. Acceleration and Jerk
If your printer vibrates a lot when printing at higher feedrates, causing wiggly prints, you can improve the quality without slowing down your prints too badly by lowering the acceleration and/or XY-jerk values. In Marlin, acceleration is specified in mm/s^2. The default is 3000. On my Printrbot, I slowed it down to 1000 with G-code as follows:
M201 X1000 Y1000; // max accel print
M202 X1000 Y1000; // max accel travel
M204 S1000; // default accel for normal moves
You can also change the value in Configuration.h, if you prefer:
#define DEFAULT_ACCELERATION 1000 // X, Y, Z and E max acceleration in mm/s^2 for printing moves
If you have a slow extruder, you can also slow down the retraction acceleration, but generally, there’s no reason do do this:
#define DEFAULT_RETRACT_ACCELERATION 3000 // X, Y, Z and E max acceleration in mm/s^2 for r retracts
3000 is the default value.
The jerk value is also useful, and affects the speed at which Marlin joins two segments. The default XY-jerk value is 20 mm/s. Lowering the value will slow down the transitions between segments. This is especially helpful for smoothing out ringing waviness on 90 degree turns. I found that 15mm/s is a good balance between speed an quality on my Printrbot. G-code:
M205 X15; // max xyjerk mm/s
Configuration.h:
#define DEFAULT_XYJERK 20.0 // (mm/sec)
There are also values for the z-axis and extruder, but I didn’t need to change them:
#define DEFAULT_ZJERK 0.4 // (mm/sec)
#define DEFAULT_EJERK 5.0 // (mm/sec)
When tuning acceleration and jerk values, a handy way to test the effects of your new settings is the Dry Run feature of Repetier Host. When Dry Run is enabled, the extruder is disabled while printing, so you can observe its motion without wasting filament.
After tuning the acceleration and jerk values my prints are better quality at higher feedrates, without sacrificing too much speed. Note that depending on your print, the lower acceleration/jerk values will have more or less effect on the total time it takes to complete it. Prints that have more short segments will be slowed down a bit more.
Even though my discussion was about slowing down the printer, you can also tune the acceleration/jerk parameters to speed things up, if you have a particularly well-tuned bot.
Reprap: Experiments in Resolution/JHead Modding
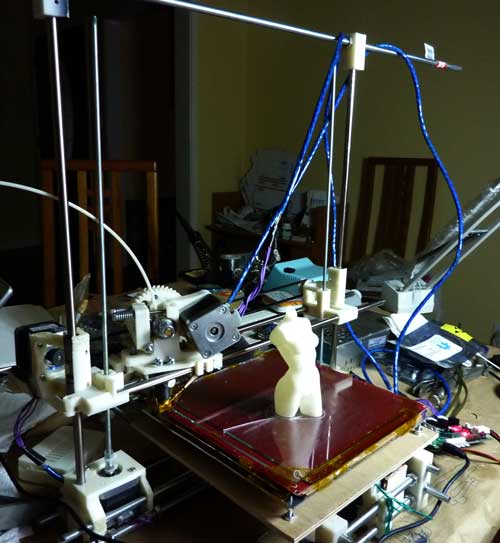
I’ve been designing a bot that attempts to get the best possible performance out of a Printrbot-style open frame design. The design has a long way to go in terms of refinements, but I’ve started testing out the basic concept. To address the Printrbot’s main shortcoming, the y-axis sits on a very wide base, and the leadscrews are only 5mm in diameter, and coupled to the z-motors with rubber tubing, which pretty much cancels any effect of wobbling on the much thicker 8mm z-axis smooth rods. So far, I’m able to print at roughly double the speeds of my Printrbot for the same quality prints. I wanted to try low layer heights, and decided to use the infamous Pink Panther Woman to do some tests (BTW, if anyone knows why it’s named Pink Panther Woman, please leave a comment below). Here is my prototype printer after finishing a print:
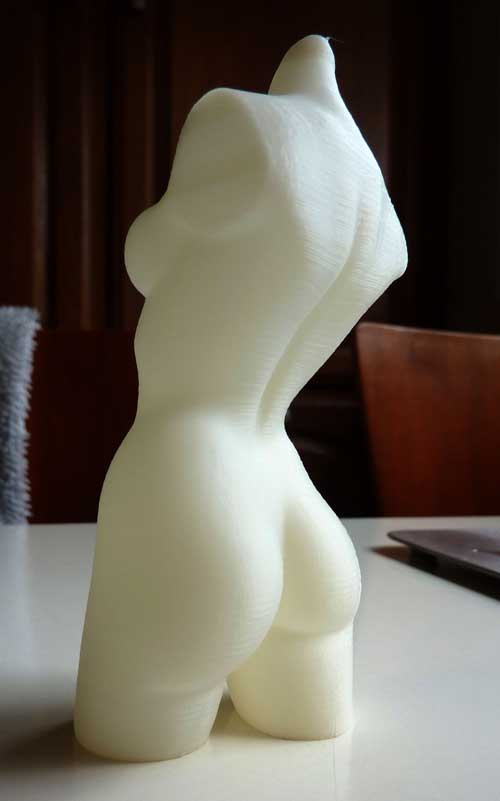
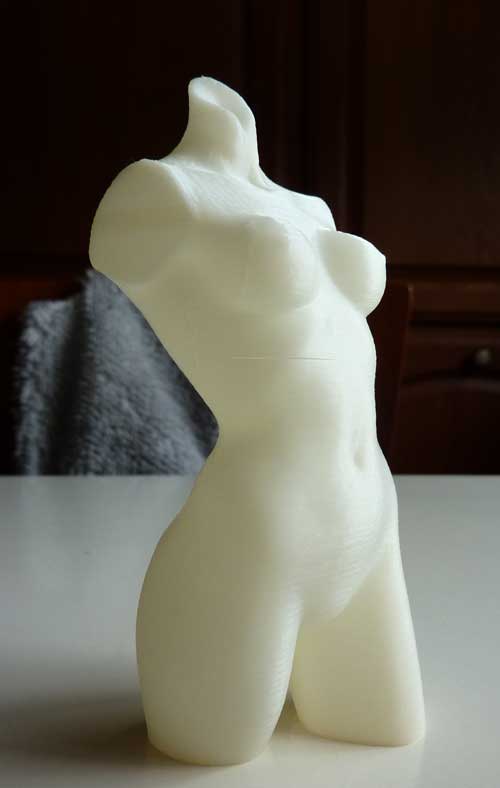
I printed Pink Panther Woman scaled down to 75% with .2mm layers, no infill, and 2 perimeters. Printing hollow, thin-walled objects can be challenging, because the layers often start to curl up when printing expanding layers. A cooling fan is helpful. I ran the printer with the latest Repetier-Host software, which has a slider for dynamically adjusting the speed during a print. This let me speed up the printing of the less challenging layers by 150%. It took about 1.5hrs to print. Here’s the result:
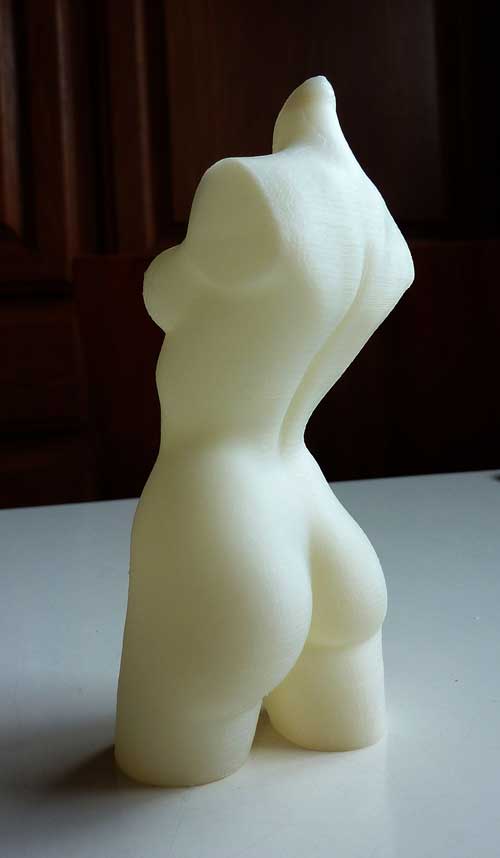
My best quality print to at the time. Click the image above for a full resolution photo. It was not without some issues.
Some of the flatter sections of the print had some gaps:
In retrospect, I should have paid attention to Repetier Host’s excellent G-code inspection feature, and noticed the problem before I started the print:
Clearly, the G-code output by slic3r had gaps in it. Repetier Host’s G-code preview is a great way to inspect your G-code for problems before wasting plastic and time. It lets you pan and zoom through your G-code, and even inspect single or ranges of layers.
Also, a couple of layers didn’t stick well to each other. Notice the horizontal line in the middle of the torso, caused by the layers separating from each other:
To address this issue, I increased the extruder steps/mm from 560 to 585, so that it would extrude a bit more plastic. The extra plastic would also help to close the gaps a bit in the flat section. Also, I increased the number of perimeters from 2 to 3, so that there would be more support from previous layers. At the same time, I also cut the layer height down to .1mm. This was the first time that I ever tried to print with .1mm layers. Printing such small layer heights brings its own set of challenges. The print bed leveling and z height must be very precise to get the initial layer down nicely. The threads coming out of the extruder are so tiny that curling of the hot ABS becomes even more of an issue. After a few false starts, I decided to let the print go at slower speed, and fine tuned my cooling fan’s position.
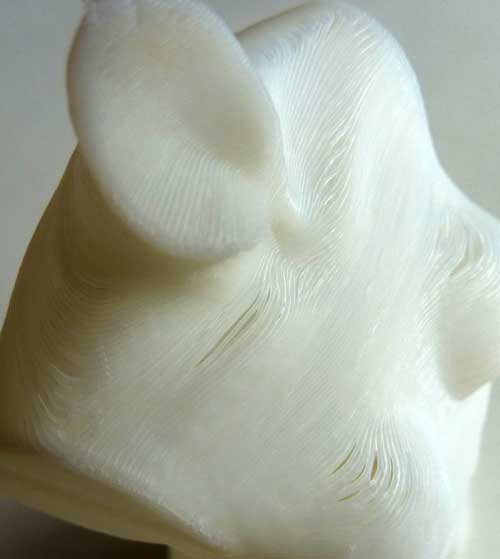
The .1mm layer height print took about 4 hours. I was totally blown away. It’s my best print to date. The layers are practically invisible, and it’s so detailed that I can actually see some of the polygons that comprise its shape.
Again, click the image above to see the full resolution photo. I need to get a better macro lens – sorry that it’s a bit fuzzy. The tweaks I made solved the gaps in the flat parts of the print, and all of the layers are firmly stuck together. However, the print was not without some issues.
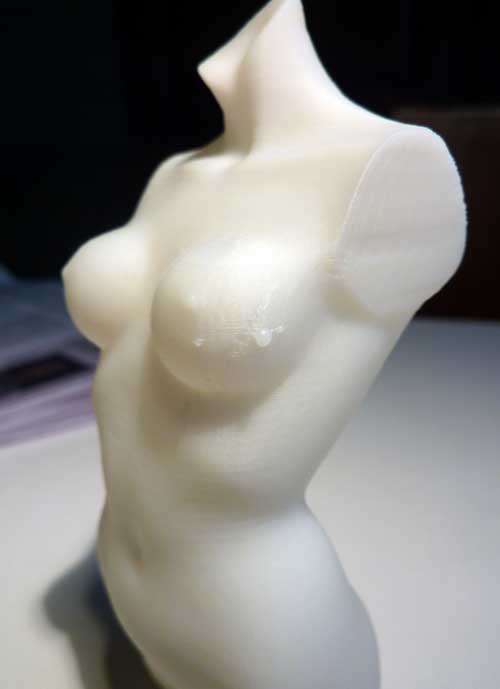
I knew the print was going to take a long time, so I didn’t want to use my main PC to run it, because sometimes, when I’m running lots of apps during a print, the hard drive will thrash, and cause short pauses in the printing; this causes blobbing in the print. So I decided to run Repetier Host on my Mac instead. I figured that starting the print from a cold boot, and no other apps running would give me a trouble-free print. What a big mistake. Note to self: Don’t use my Mac for printing! The printing froze several times during the print. One of the pauses occured about 3 hours into the print, and lasted almost a minute! I was freaking out, and then luckily, the printer started moving again. As a testament of the JHead’s great design, even this long pause only caused a small blob. The large blob that looks like an extra nipple was caused by the ~1min pause:
The other smaller blobs were caused by shorter pauses. I’m amazed how smoothly and consistently the JHead extrudes plastic. The only complaint I have about the JHead is that it shouldn’t have the protruding nipple on its nozzle tip. The sharp edges of the nipple causes blobbing when doing layers with 100% infill. These blobs are not only ugly, but sometimes, they cause the hot end to knock the print loose from the bed. The problem is that the sharp edges of the nipple can dig in and gouge the plastic thats already been deposited, remelting it, and moving it around. Then, the sharp edges hit against the raised blobs, knocking the print loose. Here is a particularly severe example of this issue:
Fortunately, a simple mod to the JHead cures the problem. Simply file off the sharp edges from the nozzle tip:
I’ve had no more issues since I did this quick mod.
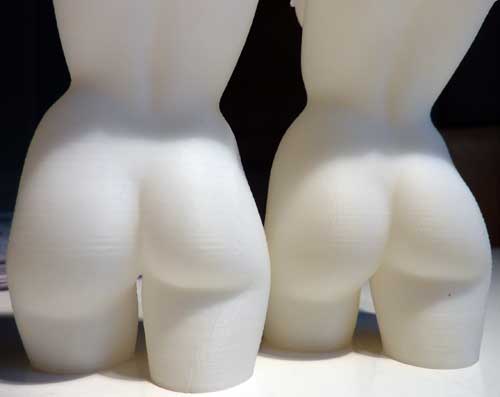
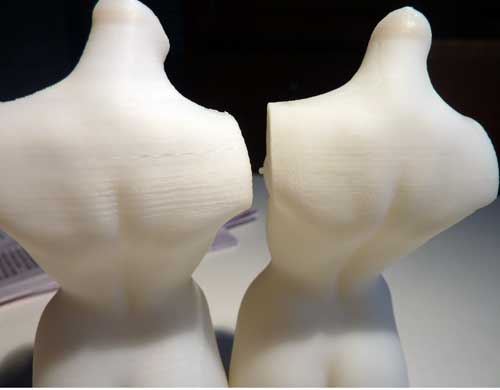
Below are some comparisons of the .2mm (left) and .1mm (right) layer height prints:
After all of the trials and tribulations I had learning about Repraps, it’s quite rewarding to finally be getting some beautiful prints.
Printrbot Tweaking
I’ve had to do a lot of experimenting and tweaking in order to get decent prints out of my Printrbot (NOTE: Just to be clear, the Printrbot I built was not from a kit from Brook Drumm. I self sourced the parts, including the printed bits, which were given to me by a friend. You may or may not run into the all of the issues I had, but my tips below are generally applicable to Repraps of any kind, as well). Initially, my prints were wiggly unless I printed very slowly, at 15mm/sec. After tweaking, my prints at 30 mm/sec look better than they used to at 15 mm/sec, and now my 15 mm/sec prints look even better.
Below is one of my best prints before tweaking; note the squiggly lines, which are caused by vibration, and binding bearings on my y-axis:
Reprap: Print Replacement Parts for Household Items
Looking for something useful to do with your Reprap? I used mine to fix a couple of nagging issues around the house.
First, one of the rubber feet on my Vitamix blender had gone AWOL a few years ago. It actually balanced fine on 3 feet, but after I got my Printrbot working, it was one of my first prints (which is why the print quality is so bad, btw … the one on the left is earlier than the one on the right).
The Vitamix foot was also the first CAD object I ever designed. I used Autodesk 123d. The program is bloated, and crashes a lot, but it’s free. Lately, I’ve mostly been using OpenSCAD instead, and I love it for making parametric objects with exacting measurements, but it’s not so easy to use for more fancy shapes. Being a programmer, I’m very comfortable using OpenSCAD to program my objects, rather than using WYSIWYG. Alibre Design is a relatively inexpensive alternative to 123D. It’s a lot less resource-intensive, crashes less, and more powerful (e.g. it makes screw threads), although it’s slightly less user friendly.
Vitmamix Foot on Thingiverse: http://www.thingiverse.com/thing:26562
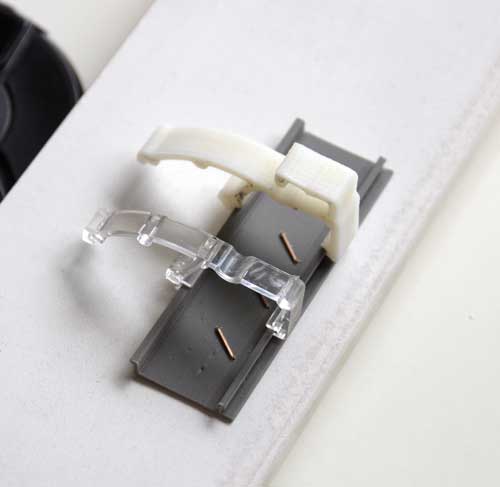
Another nagging problem in my kitchen has been the plantation-style blinds. They have this heavy wood valances attached to them, which are supposed to be held on by these cheap, brittle plastic clips, which are far too weak. I searched far & wide for replacements, but no one carried them, so I printed my own:
Valence Clip on Thingiverse: http://www.thingiverse.com/thing:26565
Getting a printable STL facsimile of the original valence clip wasn’t easy. At the time, I barely knew how to use MCAD programs. I’m going to try to remember how I created the object, and post a tutorial in the near future.
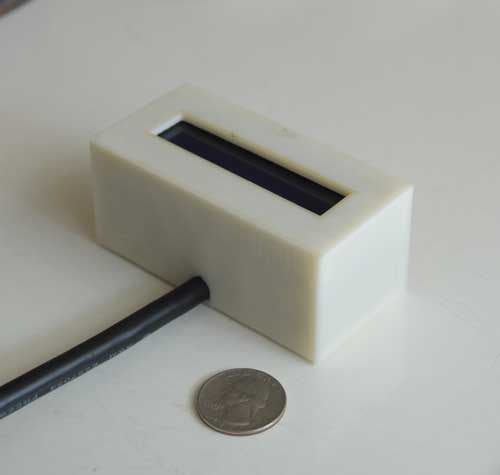
Case Protoype for LeafCAN
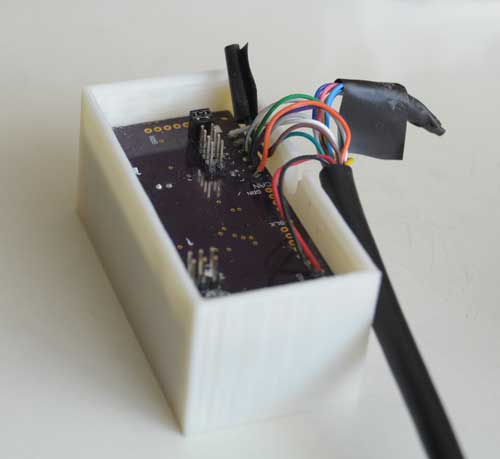
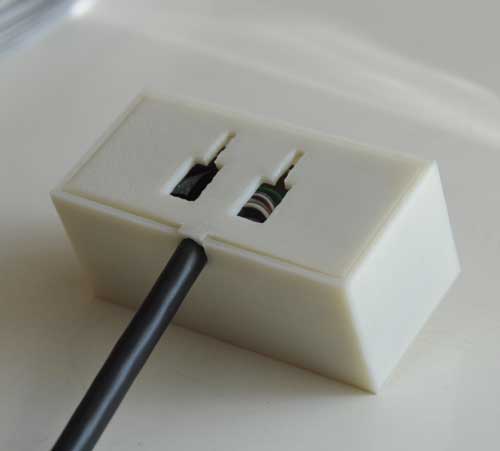
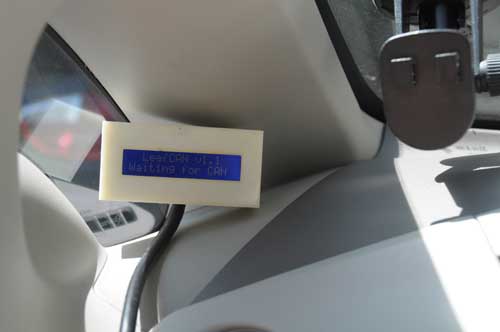
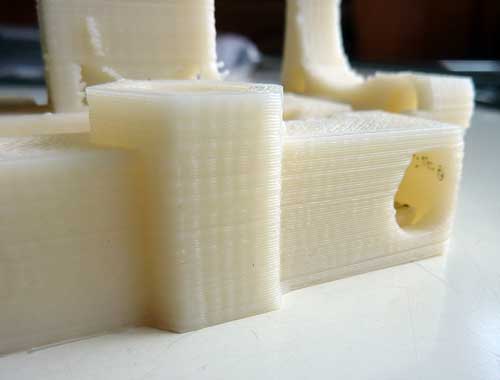
Also, in this build, I used female header pins to make the LCD detachable from the PCB, which added another centimeter to the depth of the case. The back has slots to engage various mounts:
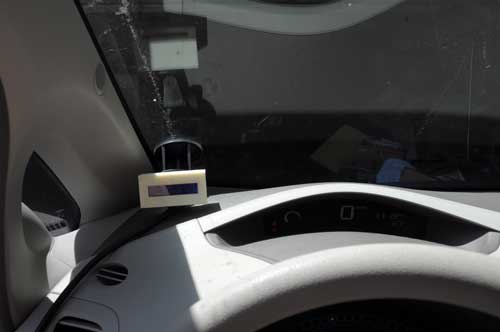
In the location above, it’s up high enough to see easily, without obstructing the view out the windowshield, and the A-pillar helps to shield it from the sun. The only problem is figuring out the mount. I’m going to try a print a holder to allow me to suction cup it to the corner window next.
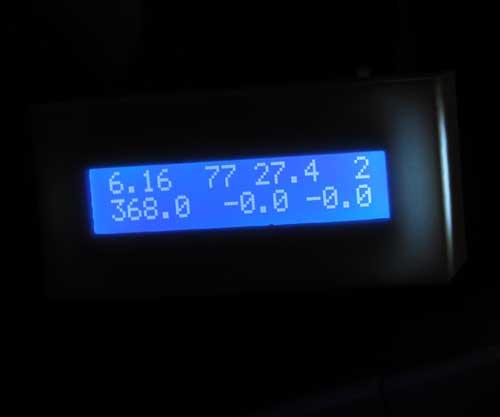
The natural ABS gives it a cool glow at night. The photo below only shows the glow on the right, but it actually glows all around.
Although my vision is good enough that I can read the LCD comfortably, even in bright sunlight, I can understand how some people would find it hard to read. I’m going to look into other displays, but at about $8, these 16×2 LCDs are hard to beat.
Reprap: Don’t Throw Away Your Cracked/Weak Parts – Fix Them!
Sometimes, my layers don’t stick nicely, or I print a part that’s too thin, and the part cracks between layers when I try to use it:
There’s no need to throw them away and reprint them. Just use a q-Tip soaked in acetone and paint it liberally. Junk ABS bits dissolved in acetone works even better, but then you need to have a different bottle for each color. I keep it in a glass tea trea oil bottle from Trader Joe’s. The milky white appearance of the liquid in the jar is due to the natural ABS that I dissolved in it. Don’t bother buying expensive ABS glue. Make it yourself!
Sometimes, I’ll just paint the sections of a part that look weak, even if they haven’t yet broken, as a pre-emptive measure. It makes your parts glossy, too, if you like that.
Did Termites Eat My Print?
I was printing out the x-end-motor for a new Reprap I’m designing yesterday. The bottom was printing beautifully:
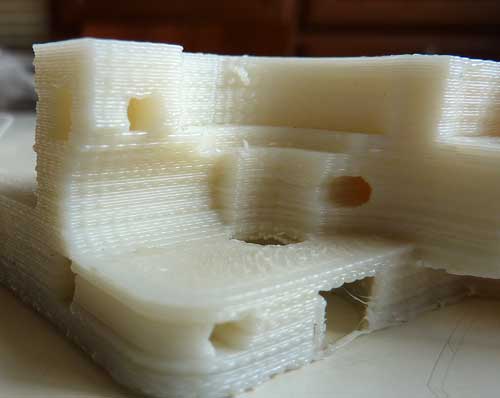
I baby sat it for the first 2:15, and went to bed during the remaining 15 minutes of the print. I woke up the next morning to find this:
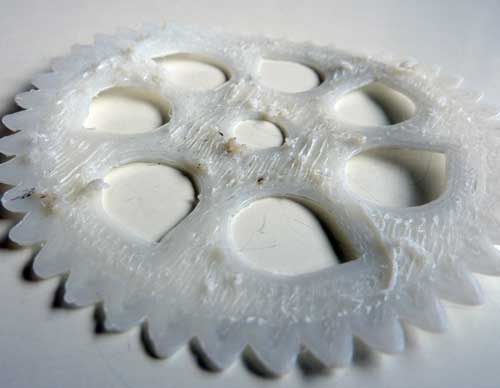
At first, I thought my hot end had jammed again, so I cleaned it out. After wasting the whole morning getting partway through a bunch of prints and wasting a ton of filament, I found the real culprit. The grub screw that holds the small gear onto my extruder motor shaft had completely unscrewed itself! The prints would start out OK, and then fail after the motor warmed up, and the heat softened the plastic of the gear, loosening its grip. Grr! Rather than reprinting the part, I’m going to just fill the gaps with JB Weld.
Raspberry Pi Case
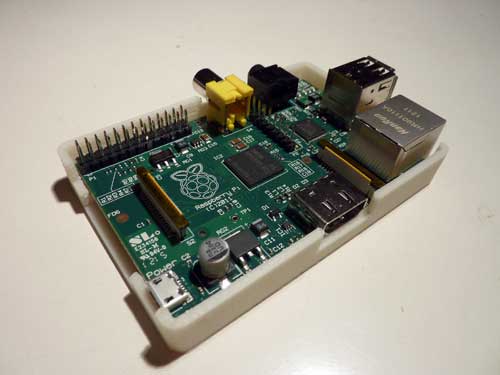
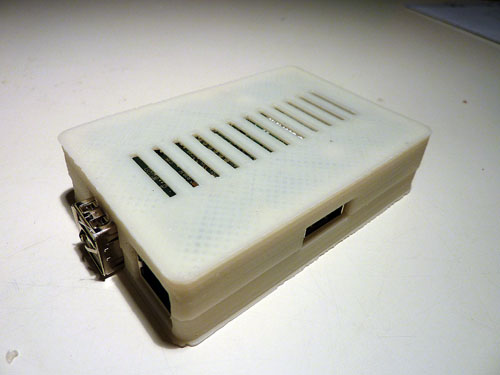
I was not fast enough to get an order in for a Raspberry Pi on launch day. Fortunately, a kind friend of mine thought of me, and bought an extra one for me. I received it yesterday, and printed this case:
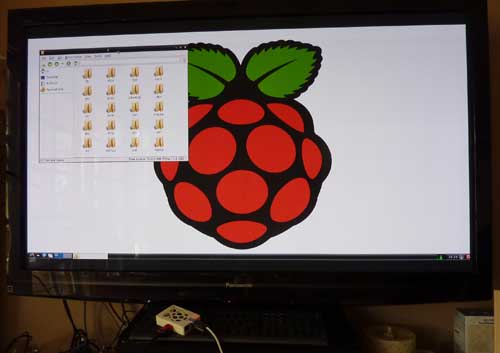
The case I made is a copy of HansH’s excellent Raspberry Pi case, modified with a slot that added on the top to accomodate access to the GPIO pins. I uploaded it to Thingiverse: Raspberry Pi Case with GPIO Access. Here’s the first sucessful boot of my Raspberry Pi:
It looks so tiny sitting in front of my 52″ plasma. I was pleasantly surprised to see it boot up at full 1080 resolution. At first, I thought the HDMI port was bad, because it didn’t work with a cable that I know is good, but it turns out the Pi is just picky about HDMI cables. I swapped in a different one, and it worked. Now, I have a lot of reading to do… yet another gadget to play with…
Marlin for Printrboard Updated
I just synced my Marlin branch for Printrboard with the latest code from ErikZalm’s branch. I noticed that there were a lot of changes in the planner, temperature control, etc. Hopefully, it will be an improvement, rather than breaking anything. Please report here or on github if you find any anolmalies with the new code.
Download Marlin for Printrboard here: https://github.com/lincomatic/Marlin
