Teensy 3.0

I just backed the Teensy 3.0 on Kickstarter.  It’s designed by Paul Stoffregen, the same wizard behind the Arduino-compatible Teensy boards.  It sports a 32-bit ARM Cortex-M4 chip, and is programmable via Arduino and C.  This looks like it’s going to be a great platform for building embedded projects that need more power than the typical Arduino.  The board is tiny compared to Raspberry Pi.

Technical Specs:

  • 32 bit ARM Cortex-M4 48 MHz CPU (M4 = DSP extensions)
  • 128K Flash Memory, 16K RAM, 2K EEPROM
  • 14* High Resolution Analog Inputs (13 bits usable, 16 bit hardware)
  • 34* Digital I/O Pins (10 shared with analog)
  • 10 PWM outputs
  • 8 Timers for intervals/delays, separate from PWM
  • USB with dedicated DMA memory transfers
  • 3 UARTs (serial ports)
  • SPI, I2C, I2S, IR modulator
  • I2S (for high quality audio interface)
  • Real Time Clock (with user-added 32.768 crystal and battery)
  • 4 general purpose DMA channels (separate from USB)
  • Touch Sensor Inputs

At $22, it’s a bargain.  The campaign ends on Sept 16, so get them while they’re hot!

How to use a WiFi Dongle with Raspberry Pi

My house isn’t wired for Ethernet, so I needed to get my Raspberry Pi networked via WiFi.  USB WiFi dongles are cheap, and can easily be found for less than $10.  I just happened to have an Airlink101 AWLL6075 laying around.  By coincidence, it uses the RTL8191SU chipset, and the official Raspbian distribution is preloaded with the appropriate driver (module r8712u).

USB WiFi dongles use quite a bit of current, and some web references said that they could only be used with the RPi via a powered USB hub.  However, some people reported success without the hub.  I couldn’t find a working powered USB hub in my house, so I tried connecting my dongle directly to my RPi.

While googling around for instructions on how to configure Raspbian for my WPA2-PSK network,  I found several different sets of instructions for configuration, and none of them worked.  After wasting a whole afternoon with no luck, I found out that early RPi boards had 140mA polyfuses to limit current draw on the USB ports. In addition to limiting the current too severely, the polyfuses lower the voltage below spec.  Therefore, later boards have 0 ohm resistors instead of the polyfuses.  Here is an official blog post which shows that the later boards don’t have the fuses:  http://www.raspberrypi.org/archives/1929

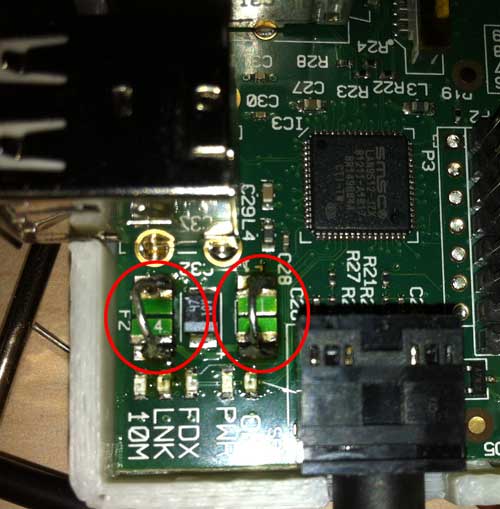
The fuses in question are F1 and F2.  The polyfuses are green, and have 14 written on them.  The 0 ohm resistors are black.  If your RPi has the resistors, then you don’t need to modify it. My board had the polyfuses, so I shunted them by soldering in jumper wires:

Bingo! The WiFi fired right up and connected to my AP on the first boot after the fix.

The easiest way to configure the SSID and password for your network is to edit the file /etc/network/interfaces:

$ sudo nano /etc/network/interfaces

Add the following lines to the file:

auto wlan0
iface wlan0 inet dhcp
wpa-ssid “YOURSSID”
wpa-psk “YOURPASSWORD”

Substitute your network’s SSID and password in the quotes above.  If present, remove the 70-persistent-net.rules file:

$,sudo rm /etc/udev/rules.d/70-persistent-net.rules

Upon rebooting, your WiFi should connect up automatically.  If you want to start it without rebooting, type

$ sudo ifup wlan0

Here are some useful commands related to your WiFi configuration:

$ iwlist wlan0 scan

scans for and displays available WiFi networks.

$ iwconfig

shows WiFi connection info, such as ESSID, bit rate, and frequency.

$ ifconfig

displays network information, such as IP number, MAC address, and packet errors.

How to Install Emacs on Raspberry Pi

I just got my Raspberry Pi up and running on Raspbian, and was finding nano, the pre-installed text editor a bit lacking.  I’ve been using Emacs since college, and decided to get it up and running on my Pi.  It turns out that it’s quite simple to install GNU Emacs:

$ sudo apt-get install emacs

If the above command fails and complains of missing packages, try

$ sudo apt-get upgrade

and then retry installing emacs (thanks to Tom Sargent for this tip).

Emacs users typically prefer their ctrl keys to reside where the Caps Lock key typically resides on most PC keyboards.  To swap the left Ctrl and Caps Lock keys, edit /etc/default/keyboard, and find the line XKBOPTIONS line.  If it’s currently empty, just replace it with

XKBOPTIONS=”ctrl:swapcaps”

if the line already has some other options in it, simply separate the options with a comma, e.g.:

XKBOPTIONS=”compose:rwin,ctrl:swapcaps”

To make the change effective, type:

$ sudo dpkg-reconfigure -phigh console-setup

They keyswap will persist across reboots, and works in both virtual text consoles, and X-windows.

SLA (Stereolithography) First Printing Attempt with 405nm Laser Curing UV Resin

olio & I are working on SLA (stereolithography) printing using lasers, rather than a DLP projector.  The goal is to print with either a polygon mirror assembly as is currently found in laser printers, or a galvanometer, such as is used in laser light shows.  For initial tests, we are using a 100mW blu-ray laser diode.  While waiting for some B9 resin, which cures with visible light, on a lark, we decided try curing some Bucktown 385nm UV resin.  Surprisingly, it cures easily with a 405nm laser.

Today, we decided to try printing a test object on olio’s aluminum x-y bot with gcode generated by slic3r, sending it to Marlin firmware running on the bot, via Repetier-Host.  We arbitrarily chose a 15 mm/s feedrate.  We don’t yet have a way to turn the laser on and off, so instead, we just did fast moves at 150 mm/s.  I wasn’t expecting any sort of success, but amazingly, the first print was somewhat successful!

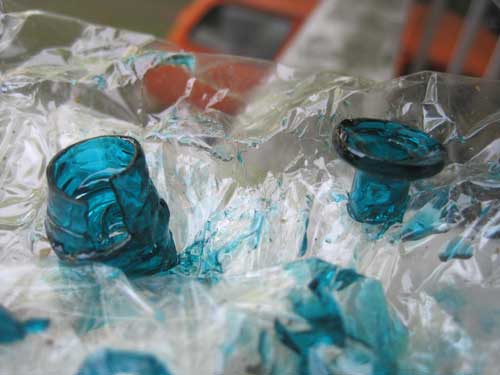
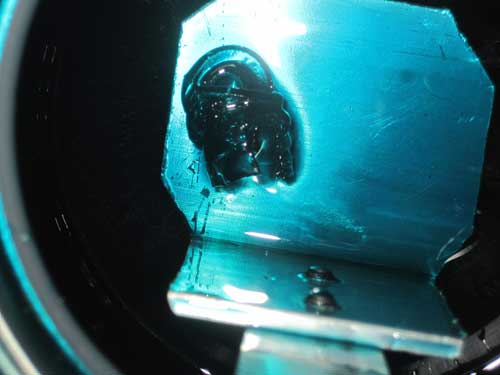
After draining the resin vat, it looked like all we had was a gunky blob:

Upon closer inspection, we were pleasantly surprised to find that it actually was a reasonable facsimile of our object, but it was so soft that it broke in half even with careful handling:

Though the print wasn’t entirely successful, I’m amazed that it worked at all! Obviously, there’s a lot of tweaking to be done, but it’s a good start.

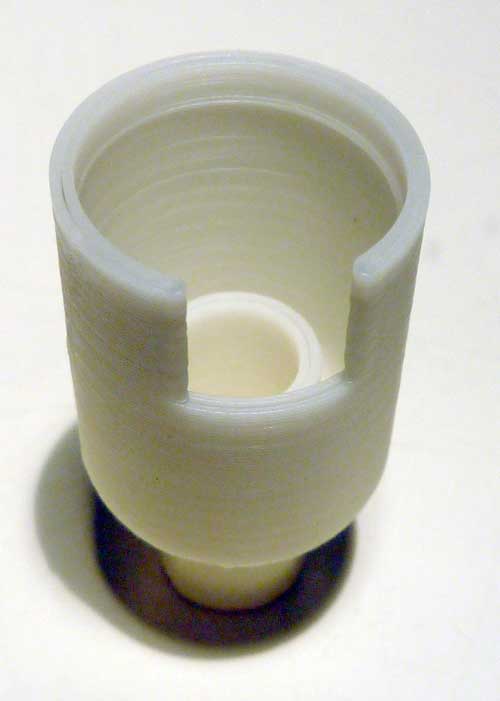
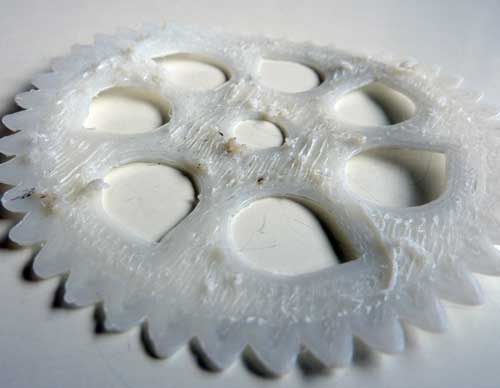
Here’s a Reprapped print of the same object:

It’s 15mm in diameter.

Cheap 16×2 LCD Comparison

HD44780-compatible 16×2 LCD’s are cheap (<$4), and easy to use with Arduino via the LiquidCrystal library. To reduce the pin count considerably, the Adafruit LCD backpack is a nice little add-on that converts them to work via a two-wire I2C or SPI interface.

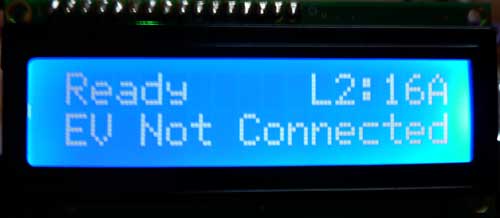
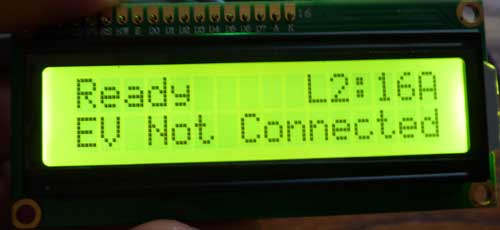
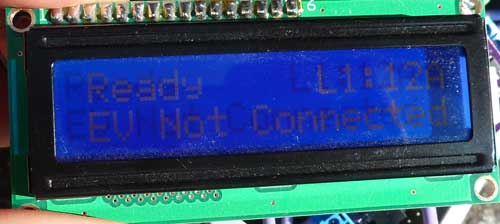
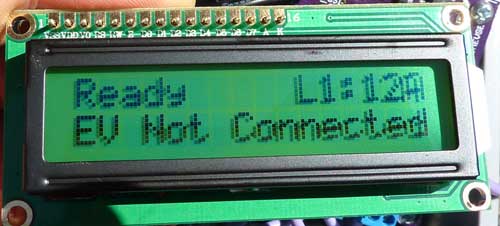
I bought two types to compare for use with OpenEVSE and LeafCAN. One has white lettering over a blue background, and the other one has black lettering over a yellow background. Here is an indoor comparison:

My camera can’t take good photos of the blue LCD indoors. The blue background is actually a good bit darker than in the photo, and the contrast is much better than it appears. Factoring that in, I guess I would still give the yellow LCD a slight edge indoors.

Now, here they are outdoors, in direct sunlight:

Again, the blue LCD didn’t photograph well. It looked slightly better than depicted in the photo. However, it’s a clear win for the yellow LCD. It works as a reflective LCD in direct sunlight, with very high contrast.

Reprap: Sexy z-drive

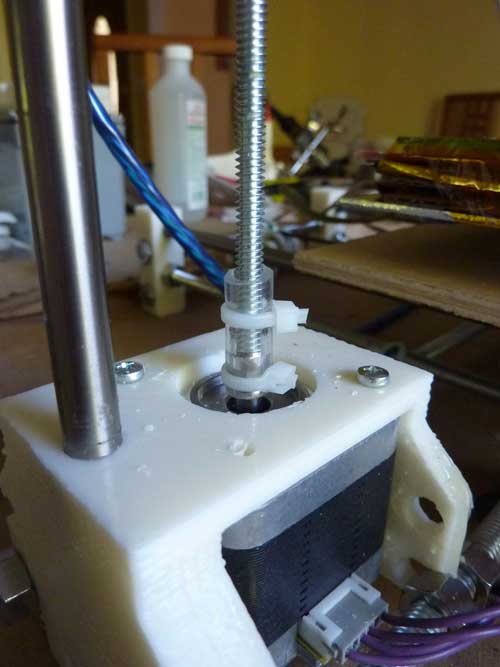
I’ve been using this #10-24 (~5mm) leadscrew for almost a month now, and it’s been working flawlessly. The coupling is just zip ties on vinyl tubing. No slippage at all due to the reduced friction of the tiny nut vs an 8mm nut. Thin leadscrew + flexible coupling = no leadscrew wobble (aka z-wobble) + less friction = lower torque (and current) requirements on z-motors.  The threads are a finer pitch (24 threads/in) than 5/16″ screws, which are usually 18 threads/in, so the resolution is better, too.

Marlin Tuning

To get the most out of Marlin, here are a few simple tweaks.

1. EEPROM Settings

By default, Marlin forgets any configuration changes you make via the Mxxx G-codes whenever you reset or power cycle your controller. If you want to remember the settings, so you don’t have to set them every time you power up your controller, Marlin can store them in EEPROM. In Configuration.h, uncomment

#define EEPROM_SETTINGS

EEPROM_CHITCHAT is optional:

//to disable EEPROM Serial responses and decrease program space by ~1700 byte: comment this out:
// please keep turned on if you can.
#define EEPROM_CHITCHAT

You will need to compile Marlin and then upload the modified firmware to your controller in order to take advantage of the changes.

After sending your Mxxx G-codes to Marlin, send M500 to save them to EEPROM.  You can also revert to default (“factory settings”) with M502.

One nice feature of Repetier-Host is that you can use it to set your EEPROM, rather than manually typing in Mxxx G-codes.  Simply go to Config->Firmware EEPROM Settings from the menu.

Personally, I prefer to just set all my Mxxx G-codes as start G-codes in Slic3r, rather than storing them in EEPROM, but most people will probably prefer to use EEPROM.

2. PID Auto Tune

When I first switched to Marlin, I was not at all happy with the temperature control of my extruder.  It was taking a long time for my hot end to heat up, and the temperature was still varying a lot. While the hot bed is controlled using bang-bang (traditional on/off temperature control), the extruder uses a more sophisticated algorithm, called PID, which should yield better temperature stability.

Initially, I tried turning off PID by commenting out

#define PIDTEMP

in Configuration.h.  My hot end heated up much faster, but the temperature was still fluctuating a lot.  I decided to try to get PID working better.  In order to get best performance out of PID, there are some parameters which need to be tuned: Kp,Ki, and Kd.  Configuration.h contains settings for Ultimaker, Makergear, and Mendel Parts hot ends, but I’m using a JHead.  I had no idea what values to use for After doing a bit of googling around, I found out that Marlin has a way for it to automatically calculate PID parameters, G-code M303 – PID relay autotune.  To automatically tune your hot end PID parameters, start with your hot end at room temperature, and using Pronterface, send it the M303 G-code as follows:

M303 S230

The parameter is the target temperature in celcius.  If your target temperature is different, substitute it for the 230.   Marlin will then heat up and cool down your hot end, while taking measurements.  This will take a while.  When it’s done, it will output a message similar to this one:

bias: 103 d: 103 min: 147.98 max: 152.02
Ku: 65.06 Tu: 30.67
Clasic PID
Kp: 39.04
Ki: 2.55
Kd: 149.66

Next, you need to tell Marlin to use the calculated Kp, Ki, Kd values.  If you don’t want to hassle with compiling/reloading Marlin, you can just use the M301 – Set PID parameters P I and D G-code.  Using the my values above, it looks like this:

M301 P39.04 I2.55 D149.66

I simply added the line to my start G-code in Slic3r.  Setting the PID parameters in G-code allows you to change them on the fly for different profiles, for instance, if you like to switch back and forth between PLA and ABS.

If you prefer to hardcode the values as defaults in the firmware, set them as follows in Configuration.h:

#define  DEFAULT_Kp  39.04
#define  DEFAULT_Ki 2.55
#define  DEFAULT_Kd 149.66

3. Acceleration and Jerk

If your printer vibrates a lot when printing at higher feedrates, causing wiggly prints, you can improve the quality without slowing down your prints too badly by lowering the acceleration and/or XY-jerk values. In Marlin, acceleration is specified in mm/s^2. The default is 3000. On my Printrbot, I slowed it down to 1000 with G-code as follows:

M201 X1000 Y1000; // max accel print
M202 X1000 Y1000; // max accel travel
M204 S1000; // default accel for normal moves

You can also change the value in Configuration.h, if you prefer:

#define DEFAULT_ACCELERATION 1000 // X, Y, Z and E max acceleration in mm/s^2 for printing moves

If you have a slow extruder, you can also slow down the retraction acceleration, but generally, there’s no reason do do this:

#define DEFAULT_RETRACT_ACCELERATION  3000   // X, Y, Z and E max acceleration in mm/s^2 for r retracts

3000 is the default value.

The jerk value is also useful, and affects the speed at which Marlin joins two segments. The default XY-jerk value is 20 mm/s.  Lowering the value will slow down the transitions between segments.  This is especially helpful for smoothing out ringing waviness on 90 degree turns.  I found that 15mm/s is a good balance between speed an quality on my Printrbot.  G-code:

M205 X15; // max xyjerk mm/s

Configuration.h:

#define DEFAULT_XYJERK                20.0    // (mm/sec)

There are also values for the z-axis and extruder, but I didn’t need to change them:

#define DEFAULT_ZJERK                 0.4     // (mm/sec)
#define DEFAULT_EJERK                 5.0    // (mm/sec)

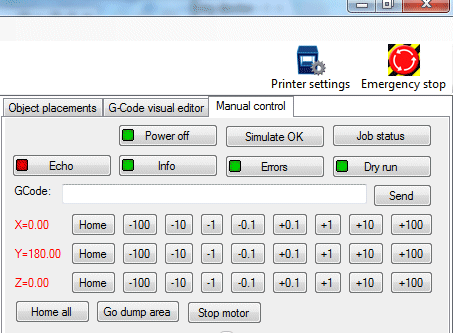
When tuning acceleration and jerk values, a handy way to test the effects of your new settings is the Dry Run feature of Repetier Host.  When Dry Run is enabled, the extruder is disabled while printing, so you can observe its motion without wasting filament.
After tuning the acceleration and jerk values my prints are better quality at higher feedrates, without sacrificing too much speed.  Note that depending on your print, the lower acceleration/jerk values will have more or less effect on the total time it takes to complete it.  Prints that have more short segments will be slowed down a bit more.

Even though my discussion was about slowing down the printer, you can also tune the acceleration/jerk parameters to speed things up, if you have a particularly well-tuned bot.
Reprap: Experiments in Resolution/JHead Modding

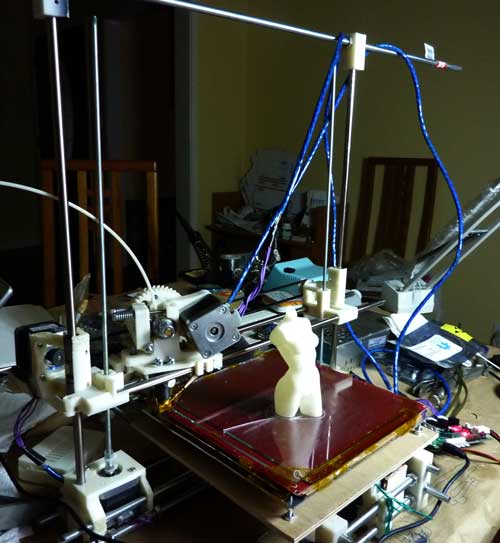
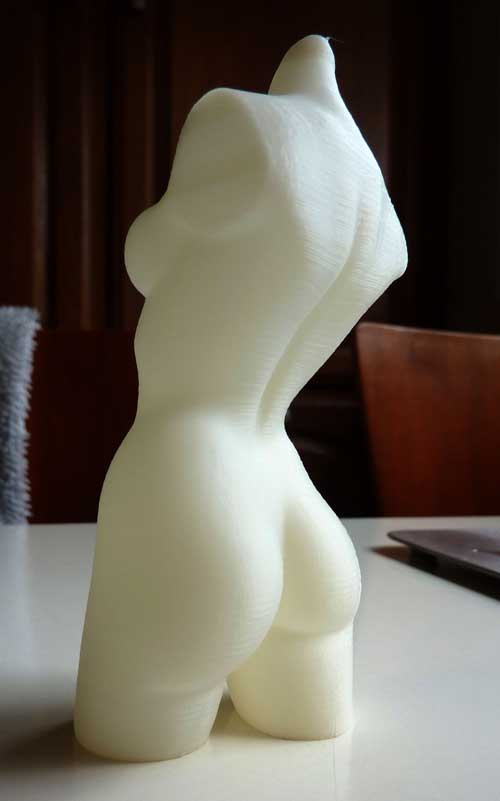
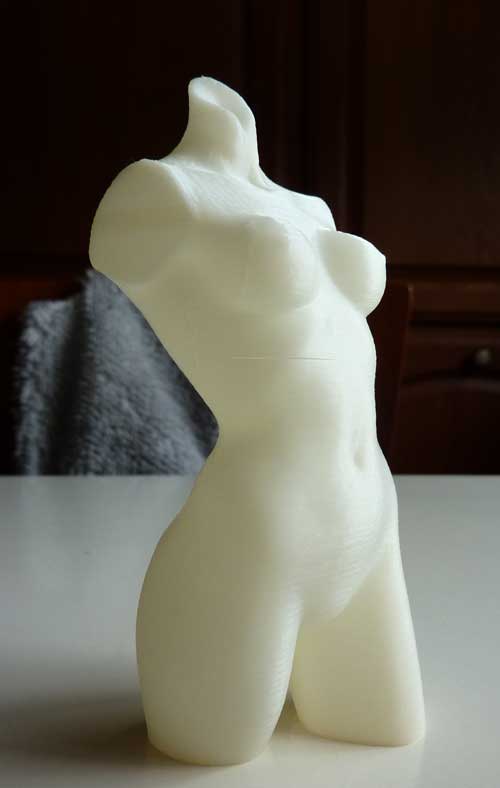
I’ve been designing a bot that attempts to get the best possible performance out of a Printrbot-style open frame design.  The design has a long way to go in terms of refinements, but I’ve started testing out the basic concept.  To address the Printrbot’s main shortcoming, the y-axis sits on a very wide base, and the leadscrews are only 5mm in diameter, and coupled to the z-motors with rubber tubing,  which pretty much cancels any effect of wobbling on the much thicker 8mm z-axis smooth rods.  So far, I’m able to print at roughly double the speeds of my Printrbot for the same quality prints.  I wanted to try low layer heights, and decided to use the  infamous Pink Panther Woman to do some tests (BTW, if anyone knows why it’s named Pink Panther Woman, please leave a comment below).  Here is my prototype printer after finishing a print:

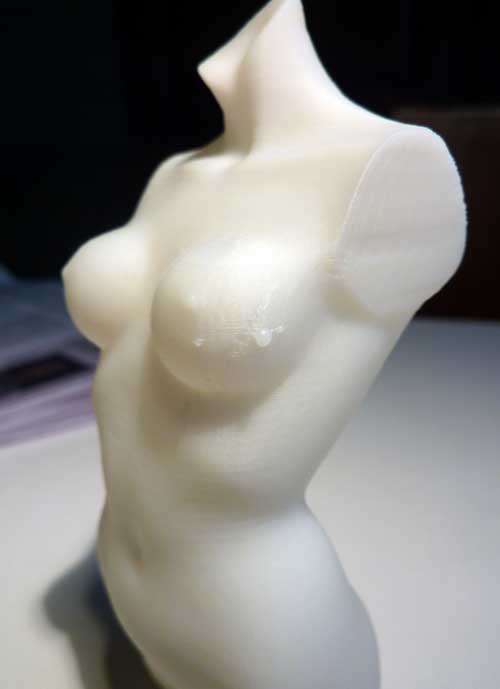
I printed Pink Panther Woman scaled down to 75% with .2mm layers, no infill, and 2 perimeters.  Printing hollow, thin-walled objects can be challenging, because the layers often start to curl up when printing expanding layers.  A cooling fan is helpful.  I ran the printer with the latest Repetier-Host software, which has a slider for dynamically adjusting the speed during a print.  This let me speed up the printing of the less challenging layers by 150%.  It took about 1.5hrs to print.  Here’s the result:

My best quality print to at the time.  Click the image above for a full resolution photo. It was not without some issues.

Some of the flatter sections of the print had some gaps:

In retrospect, I should have paid attention to Repetier Host’s excellent G-code inspection feature, and noticed the problem before I started the print:

Clearly, the G-code output by slic3r had gaps in it.  Repetier Host’s G-code preview is a great way to inspect your G-code for problems before wasting plastic and time.  It lets you pan and zoom through your G-code, and even inspect single or ranges of layers.

Also, a couple of layers didn’t stick well to each other.  Notice the horizontal line in the middle of the torso, caused by the layers separating from each other:

To address this issue, I increased the extruder steps/mm from 560 to 585, so that it would extrude a bit more plastic.  The extra plastic would also help to close the gaps a bit in the flat section.  Also, I increased the number of perimeters from 2 to 3, so that there would be more support from previous layers.  At the same time, I also cut the layer height down to .1mm.  This was the first time that I ever tried to print with .1mm layers.  Printing such small layer heights brings its own set of challenges.  The print bed leveling and z height must be very precise to get the initial layer down nicely.  The threads coming out of the extruder are so tiny that curling of the hot ABS becomes even more of an issue.  After a few false starts, I decided to let the print go at slower speed, and fine tuned my cooling fan’s position.

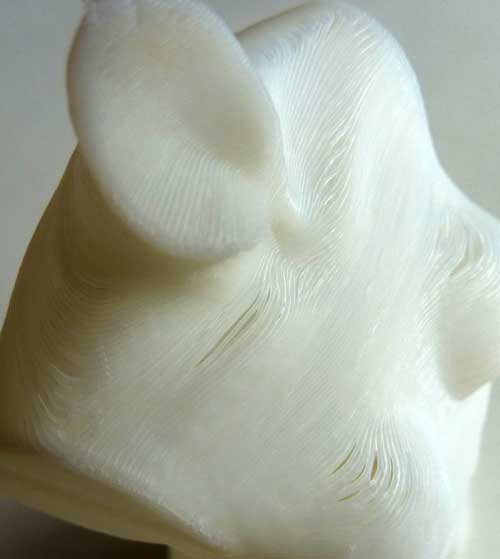
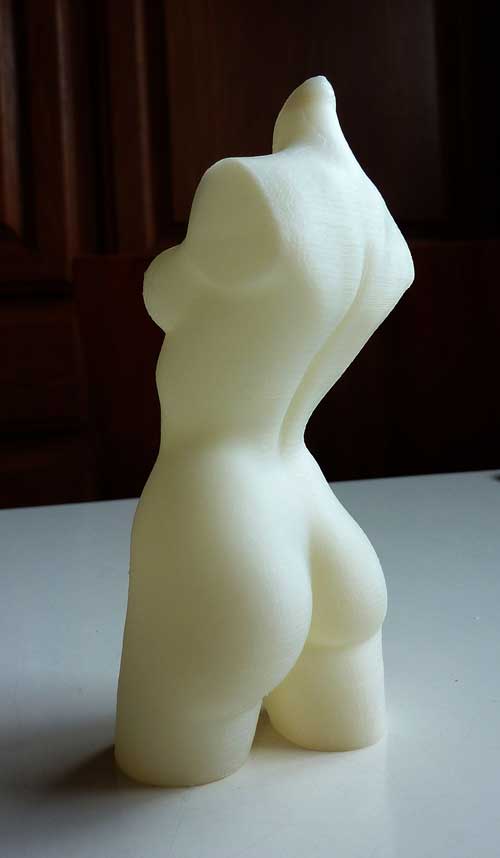
The .1mm layer height print took about 4 hours.  I was totally blown away.  It’s my best print to date.  The layers are practically invisible, and it’s so detailed that I can actually see some of the polygons that comprise its shape.

Again, click the image above to see the full resolution photo. I need to get a better macro lens – sorry that it’s a bit fuzzy. The tweaks I made solved the gaps in the flat parts of the print, and all of the layers are firmly stuck together. However, the print was not without some issues.

I knew the print was going to take a long time, so I didn’t want to use my main PC to run it, because sometimes, when I’m running lots of apps during a print, the hard drive will thrash, and cause short pauses in the printing; this causes blobbing in the print.  So I decided to run Repetier Host on my Mac instead.  I figured that starting the print from a cold boot, and no other apps running would give me a trouble-free print.  What a big mistake.  Note to self:  Don’t use my Mac for printing!  The printing froze several times during the print.  One of the pauses occured about 3 hours into the print, and lasted almost a minute!  I was freaking out, and then luckily, the printer started moving again.  As a testament of the JHead’s great design, even this long pause only caused a small blob.  The large blob that looks like an extra nipple was caused by the ~1min pause:

The other smaller blobs were caused by shorter pauses. I’m amazed how smoothly and consistently the JHead extrudes plastic.  The only complaint I have about the JHead is that it shouldn’t have the protruding nipple on its nozzle tip.  The sharp edges of the nipple causes blobbing when doing layers with 100% infill.  These blobs are not only ugly, but sometimes, they cause the hot end to knock the print loose from the bed.  The problem is that the sharp edges of the nipple can dig in and gouge the plastic thats already been deposited, remelting it, and moving it around.  Then, the sharp edges hit against the raised blobs, knocking the print loose.  Here is a particularly severe example of this issue:

Fortunately, a simple mod to the JHead cures the problem.  Simply file off the sharp edges from the nozzle tip:

I’ve had no more issues since I did this quick mod.

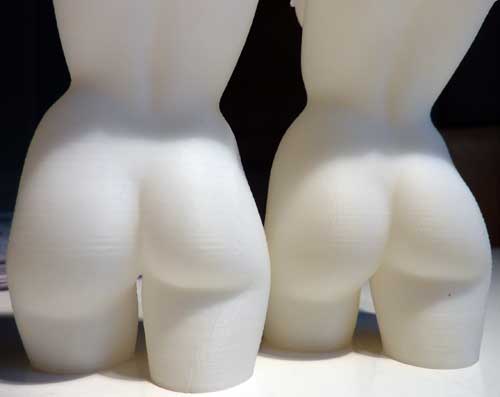
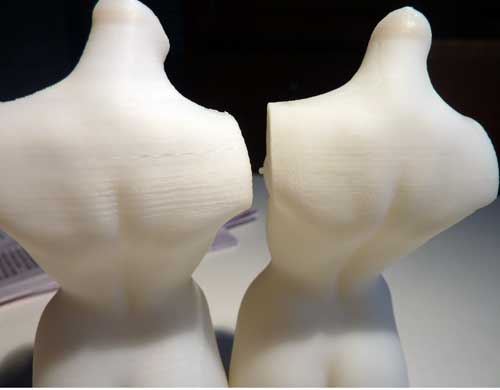
Below are some comparisons of the .2mm (left) and .1mm (right) layer height prints:

After all of the trials and tribulations I had learning about Repraps, it’s quite rewarding to finally be getting some beautiful prints.

Printrbot Tweaking

I’ve had to do a lot of experimenting and tweaking in order to get decent prints out of my Printrbot (NOTE:  Just to be clear, the Printrbot I built was not from a kit from Brook Drumm.  I self sourced the parts, including the printed bits, which were given to me by a friend.  You may or may not run into the all of the issues I had, but my tips below are generally applicable to Repraps of any kind, as well).  Initially, my prints were wiggly unless I printed very slowly, at 15mm/sec.  After tweaking, my prints at 30 mm/sec look better than they used to at 15 mm/sec, and now my 15 mm/sec prints look even better.

Below is one of my best prints before tweaking; note the squiggly lines, which are caused by vibration, and binding bearings on my y-axis:

Continue reading “Printrbot Tweaking”