Teensy 3.0

I just backed the Teensy 3.0 on Kickstarter.  It’s designed by Paul Stoffregen, the same wizard behind the Arduino-compatible Teensy boards.  It sports a 32-bit ARM Cortex-M4 chip, and is programmable via Arduino and C.  This looks like it’s going to be a great platform for building embedded projects that need more power than the typical Arduino.  The board is tiny compared to Raspberry Pi.

Technical Specs:

  • 32 bit ARM Cortex-M4 48 MHz CPU (M4 = DSP extensions)
  • 128K Flash Memory, 16K RAM, 2K EEPROM
  • 14* High Resolution Analog Inputs (13 bits usable, 16 bit hardware)
  • 34* Digital I/O Pins (10 shared with analog)
  • 10 PWM outputs
  • 8 Timers for intervals/delays, separate from PWM
  • USB with dedicated DMA memory transfers
  • 3 UARTs (serial ports)
  • SPI, I2C, I2S, IR modulator
  • I2S (for high quality audio interface)
  • Real Time Clock (with user-added 32.768 crystal and battery)
  • 4 general purpose DMA channels (separate from USB)
  • Touch Sensor Inputs

At $22, it’s a bargain.  The campaign ends on Sept 16, so get them while they’re hot!

How to use a WiFi Dongle with Raspberry Pi

My house isn’t wired for Ethernet, so I needed to get my Raspberry Pi networked via WiFi.  USB WiFi dongles are cheap, and can easily be found for less than $10.  I just happened to have an Airlink101 AWLL6075 laying around.  By coincidence, it uses the RTL8191SU chipset, and the official Raspbian distribution is preloaded with the appropriate driver (module r8712u).

USB WiFi dongles use quite a bit of current, and some web references said that they could only be used with the RPi via a powered USB hub.  However, some people reported success without the hub.  I couldn’t find a working powered USB hub in my house, so I tried connecting my dongle directly to my RPi.

While googling around for instructions on how to configure Raspbian for my WPA2-PSK network,  I found several different sets of instructions for configuration, and none of them worked.  After wasting a whole afternoon with no luck, I found out that early RPi boards had 140mA polyfuses to limit current draw on the USB ports. In addition to limiting the current too severely, the polyfuses lower the voltage below spec.  Therefore, later boards have 0 ohm resistors instead of the polyfuses.  Here is an official blog post which shows that the later boards don’t have the fuses:  http://www.raspberrypi.org/archives/1929

The fuses in question are F1 and F2.  The polyfuses are green, and have 14 written on them.  The 0 ohm resistors are black.  If your RPi has the resistors, then you don’t need to modify it. My board had the polyfuses, so I shunted them by soldering in jumper wires:
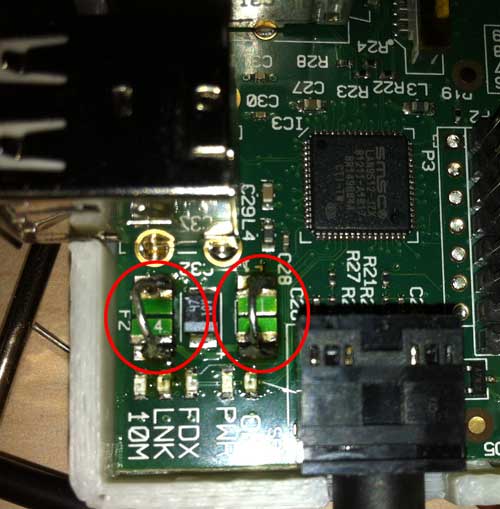
Bingo! The WiFi fired right up and connected to my AP on the first boot after the fix.

The easiest way to configure the SSID and password for your network is to edit the file /etc/network/interfaces:

$ sudo nano /etc/network/interfaces

Add the following lines to the file:

auto wlan0
iface wlan0 inet dhcp
wpa-ssid “YOURSSID”
wpa-psk “YOURPASSWORD”

Substitute your network’s SSID and password in the quotes above.  If present, remove the 70-persistent-net.rules file:

$,sudo rm /etc/udev/rules.d/70-persistent-net.rules

Upon rebooting, your WiFi should connect up automatically.  If you want to start it without rebooting, type

$ sudo ifup wlan0

Here are some useful commands related to your WiFi configuration:

$ iwlist wlan0 scan

scans for and displays available WiFi networks.

$ iwconfig

shows WiFi connection info, such as ESSID, bit rate, and frequency.

$ ifconfig

displays network information, such as IP number, MAC address, and packet errors.

How to Install Emacs on Raspberry Pi

I just got my Raspberry Pi up and running on Raspbian, and was finding nano, the pre-installed text editor a bit lacking.  I’ve been using Emacs since college, and decided to get it up and running on my Pi.  It turns out that it’s quite simple to install GNU Emacs:

$ sudo apt-get install emacs

If the above command fails and complains of missing packages, try

$ sudo apt-get upgrade

and then retry installing emacs (thanks to Tom Sargent for this tip).

Emacs users typically prefer their ctrl keys to reside where the Caps Lock key typically resides on most PC keyboards.  To swap the left Ctrl and Caps Lock keys, edit /etc/default/keyboard, and find the line XKBOPTIONS line.  If it’s currently empty, just replace it with

XKBOPTIONS=”ctrl:swapcaps”

if the line already has some other options in it, simply separate the options with a comma, e.g.:

XKBOPTIONS=”compose:rwin,ctrl:swapcaps”

To make the change effective, type:

$ sudo dpkg-reconfigure -phigh console-setup

They keyswap will persist across reboots, and works in both virtual text consoles, and X-windows.

SLA (Stereolithography) First Printing Attempt with 405nm Laser Curing UV Resin

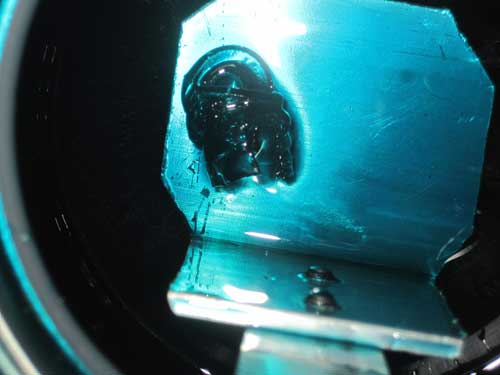
olio & I are working on SLA (stereolithography) printing using lasers, rather than a DLP projector.  The goal is to print with either a polygon mirror assembly as is currently found in laser printers, or a galvanometer, such as is used in laser light shows.  For initial tests, we are using a 100mW blu-ray laser diode.  While waiting for some B9 resin, which cures with visible light, on a lark, we decided try curing some Bucktown 385nm UV resin.  Surprisingly, it cures easily with a 405nm laser.

Today, we decided to try printing a test object on olio’s aluminum x-y bot with gcode generated by slic3r, sending it to Marlin firmware running on the bot, via Repetier-Host.  We arbitrarily chose a 15 mm/s feedrate.  We don’t yet have a way to turn the laser on and off, so instead, we just did fast moves at 150 mm/s.  I wasn’t expecting any sort of success, but amazingly, the first print was somewhat successful!

After draining the resin vat, it looked like all we had was a gunky blob:

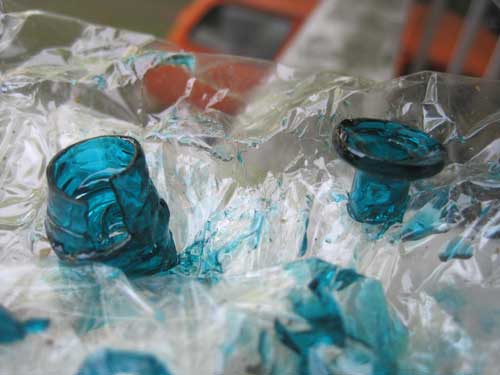
Upon closer inspection, we were pleasantly surprised to find that it actually was a reasonable facsimile of our object, but it was so soft that it broke in half even with careful handling:

Though the print wasn’t entirely successful, I’m amazed that it worked at all! Obviously, there’s a lot of tweaking to be done, but it’s a good start.

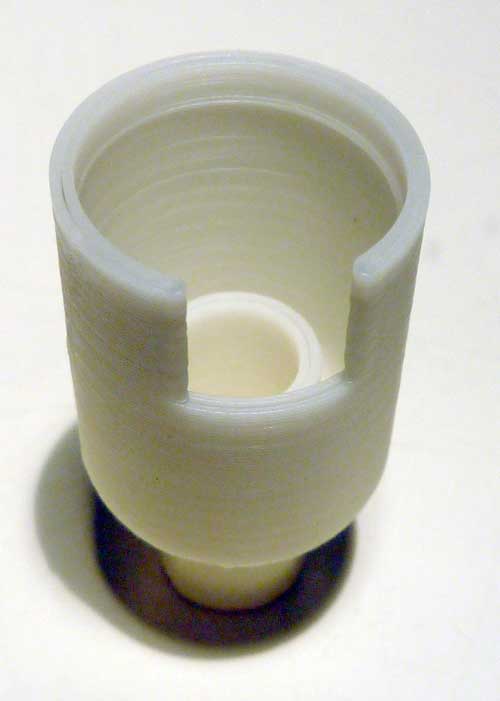
Here’s a Reprapped print of the same object:

It’s 15mm in diameter.

Printrbot Tweaking

I’ve had to do a lot of experimenting and tweaking in order to get decent prints out of my Printrbot (NOTE:  Just to be clear, the Printrbot I built was not from a kit from Brook Drumm.  I self sourced the parts, including the printed bits, which were given to me by a friend.  You may or may not run into the all of the issues I had, but my tips below are generally applicable to Repraps of any kind, as well).  Initially, my prints were wiggly unless I printed very slowly, at 15mm/sec.  After tweaking, my prints at 30 mm/sec look better than they used to at 15 mm/sec, and now my 15 mm/sec prints look even better.

Below is one of my best prints before tweaking; note the squiggly lines, which are caused by vibration, and binding bearings on my y-axis:

Continue reading “Printrbot Tweaking”

Colorduino Library v1.2.3 Released

Thanks to wiltwong and Markus Lange, I have added support for Arduino Mega and Leonardo to the Colorduino Library.  Markus also helped to clean up the code a bit for Arduino 1.x.  I have added the ColorFill() function to the ColorduinoObject class, as well, so you don’t have to copy it from ColorduinoPlasma.pde.

You can download it from github: https://github.com/lincomatic/Colorduino/downloads

Reprap: Print Replacement Parts for Household Items

Looking for something useful to do with your Reprap?  I used mine to fix a couple of nagging issues around the house.

First, one of the rubber feet on my Vitamix blender had gone AWOL a few years ago.  It actually balanced fine on 3 feet, but after I got my Printrbot working, it was one of my first prints (which is why the print quality is so bad, btw … the one on the left is earlier than the one on the right).

The Vitamix foot was also the first CAD object I ever designed.  I used Autodesk 123d.  The program is bloated, and crashes a lot, but it’s free.  Lately, I’ve mostly been using OpenSCAD instead, and I love it for making parametric objects with exacting measurements, but it’s not so easy to use for more fancy shapes.  Being a programmer, I’m very comfortable using OpenSCAD to program my objects, rather than using WYSIWYG.  Alibre Design is a relatively inexpensive alternative to 123D.  It’s a lot less resource-intensive, crashes less, and more powerful (e.g. it makes screw threads), although it’s slightly less user friendly.

Vitmamix Foot on Thingiverse: http://www.thingiverse.com/thing:26562

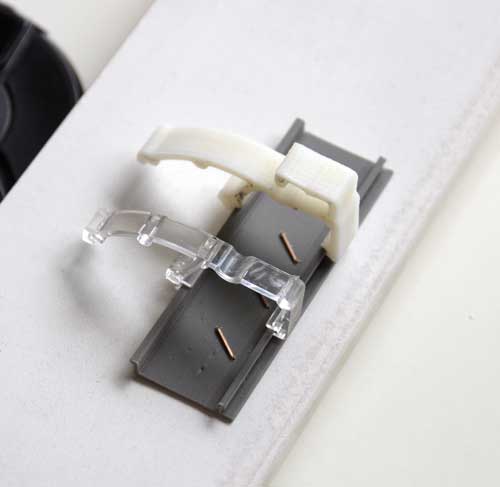
Another nagging problem in my kitchen has been the plantation-style blinds.  They have this heavy wood valances attached to them, which are supposed to be held on by these cheap, brittle plastic clips, which are far too weak.  I searched far & wide for replacements, but no one carried them, so I printed my own:

Valence Clip on Thingiverse: http://www.thingiverse.com/thing:26565

Getting a printable STL facsimile of the original valence clip wasn’t easy.  At the time, I barely knew how to use MCAD programs.  I’m going to try to remember how I created the object, and post a tutorial in the near future.


Reprap: Don’t Throw Away Your Cracked/Weak Parts – Fix Them!

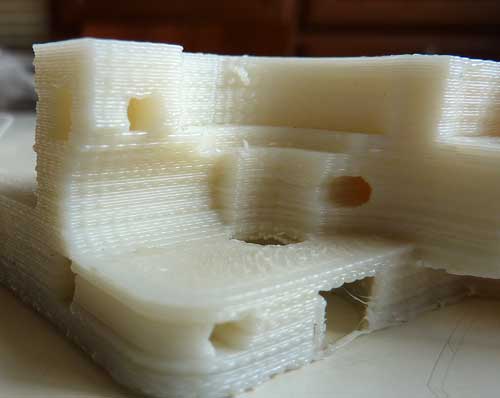
Sometimes, my layers don’t stick nicely, or I print a part that’s too thin, and the part cracks between layers when I try to use it:

There’s no need to throw them away and reprint them.  Just use a q-Tip soaked in acetone and paint it liberally.  Junk ABS bits dissolved in acetone works even better, but then you need to have a different bottle for each color. I keep it in a glass tea trea oil bottle from Trader Joe’s.  The milky white appearance of the liquid in the jar is due to the natural ABS that I dissolved in it. Don’t bother buying expensive ABS glue.  Make it yourself!

Sometimes, I’ll just paint the sections of a part that look weak, even if they haven’t yet broken, as a pre-emptive measure.  It makes your parts glossy, too, if you like that.

AVR CAN Bus Project: LeafCAN v1.2 Released

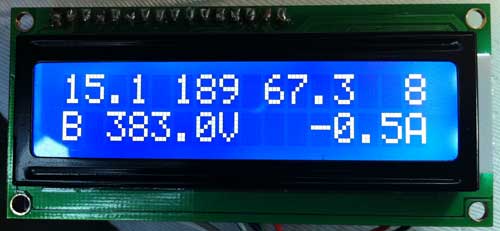
Another tweak today, I added instantaneous battery power consumption in KWh to the second line of the display. In order to make room, I had to do away with the V and A characters after the voltage and current draw. Here is the new display:

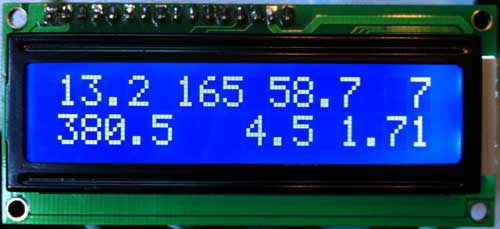
The top line, from left to right, contains Battery Pack Remaining KWh, SOC (“GIDs”), SOC % (GIDs/281*100), and Remaining Fuel Bars.
The bottom line now contains Battery Pack Voltage, Battery Pack Current Draw (Amps), and Battery Power Consumption (Pack Voltage * Pack Amps).

For users who prefer the old display, I added:

#define SHOW_KWH
#define SHOW_KW

If you comment out both lines, the display will be the same as v1.0, but with the smoothing that was added in v1.1.

As usual can download the latest release from github: https://github.com/lincomatic/LeafCAN/downloads.

Previous: AVR CAN Bus Project: LeafCAN v1.1 Released

AVR CAN Bus Project: LeafCAN v1.1 Released

I made some minor modifications to LeafCAN firmware today. First, I added display of remaining KWh in the battery pack, based on Phil Sadow’s formula of GIDs * 80 = Wh. Also, the display was a bit blurry when the values were updating rapidly, so I slowed down the refresh rate of the LCD to 250ms.

In order to make space for the KWh remaining value, I had to take out the % character in the SOC % display. Here is the new display:

The top line, from left to right, contains Battery Pack Remaining KWh, SOC (“GIDs”), SOC % (GIDs/281*100), and Remaining Fuel Bars.
The bottom line is unchanged, and contains Battery Pack Voltage, Battery Pack Current Draw (Amps).

You can download the latest release from github: https://github.com/lincomatic/LeafCAN/downloads. Note that I have added LeafCAN.hex, a precompiled file, for those who don’t have a working Arduino setup for compiling the code.

Previous: AVR CAN Bus Project: Step 4 – LeafCAN: Nissan Leaf SOC Meter
Next: AVR CAN Bus Project: LeafCAN v1.2 Released